
There is really no substitute for experience when it comes to winter hiking, backpacking, and camping. You can read about it in books and watch videos, but the best way to learn is to go out with an experienced friend who can teach you the ropes. Here are a few things I’ve picked up over the years that you can try your next time out. These are shortcuts and hacks I’ve picked up from others or invented myself that can make winter hiking and backpacking less expensive, safer and more fun. Experiment, by all means, but bring a safety net. It’s the only way to become an expert.
1. Pre-hydrate before winter hikes by drinking a liter of water or juice before you start out.
Drink a liter of water on the way to the trailhead before a winter hike. This is above and beyond whatever coffee and liquids you consume at breakfast. You’ll pee more, but you’ll stay better hydrated and warmer. You lose a lot more moisture than you realize in winter, by sweating and exhaling the moisture in your lungs. It’s also hard to force yourself to drink enough on a winter hike, so drinking extra upfront will keep you better hydrated during the day.

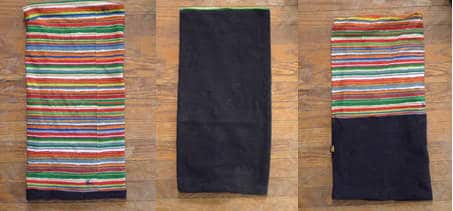
2. Warm up with a neck gaiter.
Neck gaiters are one of the most underrated winter hiking insulation layers. If you’re feeling chilled, put one on around your neck. Major veins and arteries pass through this area and covering them up will make you quickly feel warmer. You can use a thin neck gaiter or a Reversible Polar Buff for even more effect. Neck gaiters are also an excellent way to increase your comfort inside a sleeping bag or a backpacking quilt because they prevent drafts from leaking around your neck and upper chest.
3. Wear exam gloves inside fleece gloves.
Winter hikers can use up several pairs of fleece gloves on cold-weather hikes because they get saturated with body sweat. You can prevent this by wearing nitrile or latex exam gloves inside a fleece glove or mitten. Your hands will still sweat, but the sweat will stay in the exam gloves and keep your gloves drier. Just don’t take the exam gloves off until you get inside someplace warm or they’ll get very cold because the moisture will quickly evaporate in the drier winter air. Evaporation sucks heat out of your hands and they’ll get really cold.

4. Insulate your water bottles with wool socks.
There’s no need to buy expensive neoprene bottle parkas to insulate the bottles of hot water you store inside your backpack. Wrap them up on a heavy wool sock and they’ll stay warm for most of the day, nestled inside your backpack with your extra insulation and gear.

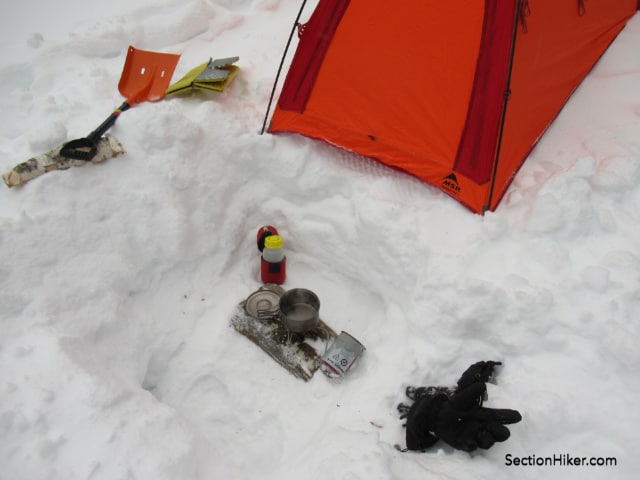
5. Dig a front porch for your tent.
With your avalanche shovel, dig a hole outside the front door to your tent, about the depth of your legs, below the knee. This lets you sit with your back inside the tent, but dangle your legs in the pit, making it easier to take off and put on your boots. Not only is this more comfortable, but it helps to prevent the snow and ice that clings to your boots from entering your tent, where it’ll cause internal condensation. A front porch also provides a good windbreak for cooking and melting snow.
6. Wrap duct tape around liquid fuel bottles to help prevent frostbite.
The fuel inside liquid fuel stove bottles is gasoline which freezes at a lower temperature than water. If you touch the metal of one of these bottles on a subzero night with bare hands, there’s a good chance that you’ll get frostbite since the cold will be conducted through the bottle’s metal walls. This happens very quickly. Wrapping the bottles in duct tape helps insulate them but is also a tactile reminder that you should always wear an insulated glove when you touch a metal fuel bottle.

7. Bury your insulated water bottles at night.
Snow is an excellent insulator. One way to keep your insulated water bottles from freezing at night, instead of sleeping with them in your sleeping bag, is to bury them in a small cave that you dig into the snow. Turning them upside down is also recommended. Make sure to “close the door” to the cave to keep them well insulated and mark the spot so you can find it easily the next morning.

8. Use supermarket bags as deadmen for pitching tents.
When you pitch a tent on snow, you should stake it out. But snow doesn’t provide a very good grip, so you need bury a snow stake (usually sideways) and stomp it into the snow to create a solid anchor point. Called “deadmen“, these snow stakes can take 30 minutes or more to harden in place. A faster and lighter-weight alternative is to bring plastic supermarket carryall bags with you, fill them up part-way with snow, tie them to your tent’s guy-out points, and then bury them. They set up almost immediately, so you can get in your tent and out of your wet clothes faster. Be sure to chop the bags out the next morning with your avalanche shovel and pack them out to leave no trace.

9. Bring two pairs of ski goggles for above-treeline hikes.
You often need to protect your eyes from freezing mist, sun, and wind when you hike above treeline in winter. But they often fog up, especially if you’re hiking hard and perspiring, making it difficult to see. One solution is to bring two pairs of goggles instead of one, so you have a spare if yours or your partner’s become impossible to see through. I’ve used this trick to summit some challenging winter peaks that I would have had to bail on due to goggle fogging. I also recommend putting googles away when not in use and not putting them on your forehead, which is wet with perspiration, because they’ll ice up.

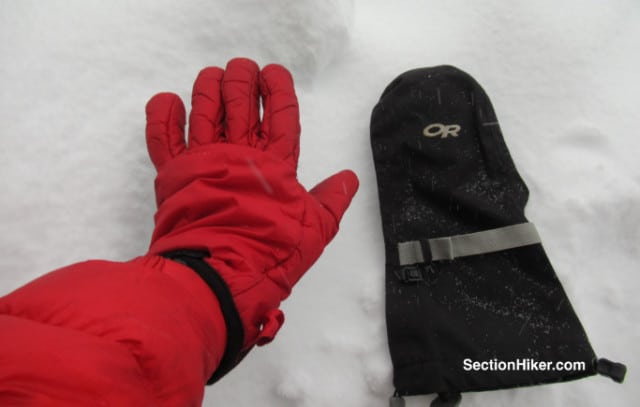
10. Wear high dexterity glove liners inside shell mitts.
Most shell mitts and heavily insulated winter mittens come with mitten-shaped liners. Replace these with gloves that have fingers, so you can take your hands out of the mittens to perform tasks that require more dexterity.
That’s just a taste of the little tricks you can use to make winter hiking safer, more comfortable, and more efficient. Stay tuned. Want more great winter hiking and backpacking hacks? See 10 More Winter Hiking and Backpacking Hacks.
Updated February 2024.
SectionHiker is reader-supported. We only make money if you purchase a product through our affiliate links. Help us continue to test and write unsponsored and independent gear reviews, beginner FAQs, and free hiking guides.