
When gearing up for winter day hiking in New Hampshire’s White Mountains you want footwear, clothing, and traction aids that can be used across a wide range of temperatures, wind speeds, sun, precipitation types, and surface conditions. For example, typical winter weather includes:
- Temperatures: from 40 degrees down to 10 below zero (Fahrenheit)
- Wind speeds: up to 40 mph (over that, you get knocked down)
- Sunlight: from intense sunshine and snow glare to heavy clouds or dense forest cover
- Precipitation types: including blowing snow, freezing fog, sleet, freezing rain, and rain
- Surface conditions: ranging from deep snow to bare rock, bare ground, packed trails, powder, frozen bodies of water, and soft or hard ice
Layering Clothes
In addition, you need to dress for a wide range of activity levels, such as when you are exerting yourself and generating lots of body heat or when you are at rest and need to bundle up.
The recommended approach for winter dressing is to add clothing layers when you get cold and take off layers when you start to sweat. Sweating should be avoided in winter because wet or damp clothing, particularly baselayers, will chill you when you stop moving. Take off layers if you start to sweat or slow down your pace to generate less body heat.
When starting a hike in winter, you’ll probably be wearing gloves, a hat, long sleeve jersey, long underwear, boxer jocks, hardshell or softshell pants, a fleece pullover, a hardshell jacket, warm socks, insulated boots, and high gaiters. After about 15 minutes, you’ll probably take off your hardshell and unzip your pants to vent body warmth. That’s called layering and it occurs when someone in your group shouts out “layer break!”
Important: Do not wear cotton on winter hikes because it takes so long to dry. The same holds for clothing made of wood fibers including modal, rayon, viscose, Tencel, and lyocell.

Winter Day Hiking Gear List
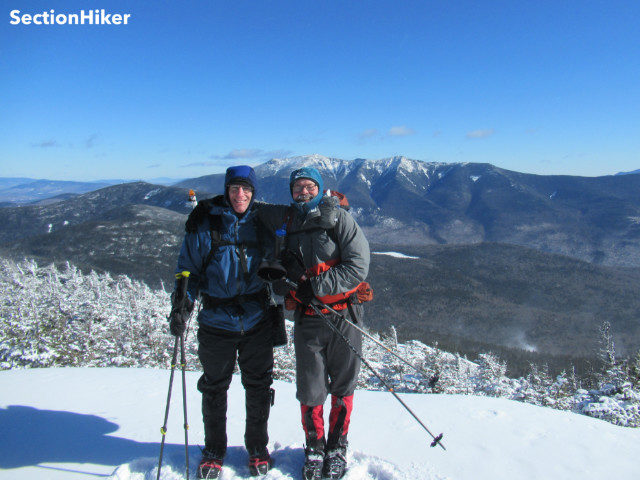
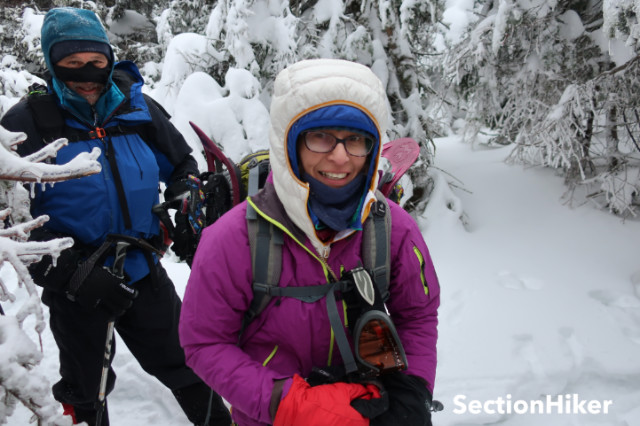
The following day winter day hiking clothing and gear will keep you safe and comfortable in below-treeline conditions. Below-treeline hikes are usually protected by forests and are warmer and less windy than above-treeline hikes, which are on top of exposed mountains or ridgelines.
- Footwear
- Insulated hiking boots
- Warm socks (sock liners optional)
- High gaiters
- Hats
- Lightweight fleece or wool hat
- Heavyweight fleece or wool hat
- Gloves
- Lightweight fleece or wool gloves
- Waterproof shell mitts or gloves, with insulated liners
- Jackets
- Puffy insulated jacket with attached hood
- Waterproof and windproof jacket with attached hood
- Pants
- Rain pants that are waterproof and windproof with full-length zippers along the sides
- Softshell pants that are moderately windproof
- Mid-Layer Insulation
- Fleece jacket, fleece pullover, fleece vest, insulated vest, or softshell jacket (at least one, possibly several)
- Base-Layer Insulation
- Long sleeve jersey
- Long underwear (good for people who run cold)
- Boxer jock underwear to prevent chafing, wool or synthetic only
- Spare Clothing (optional, but sometimes useful)
- Long sleeve jersey
- Long underwear
- Extra pair of socks
- Winter traction aids
- Microspikes
- Snowshoes (depending on conditions)
- Crampons (depending on conditions)
- Water Bottles
- Two or three 1-liter wide-mouth water bottles (hydration system hoses freeze up and should be avoided)
- Water bottle insulation, if bottles are stored outside your backpack
- Backpack
- 35-45 liter backpack with side compression straps or a shovel pocket for attaching snowshoes and microspikes to the pack
- Extra webbing straps as needed for attaching more gear
- 10 Essentials
- Map
- Compass
- Whistle
- Headlamp (1 or 2)
- Personal first aid kit
- Fire starting materials (wax in paper egg containers make the best firestarter)
- Small knife or multi-tool
- Gear repair supplies
- High-energy snacks that won’t freeze
- Sunglasses and sunscreen
- Toilet paper
- Survival Gear – this can be distributed among hiking group members, or carried if hiking alone
- Sleeping bag
- Sleeping pad
- Lightweight bivy sack or tent body without tent poles
- White gas stove, fuel, pot, stove base
- Group first aid kit
Extra Gear for Above-Treeline Day Hikes
If you’re headed above treeline on a day hike, you’ll often want to carry extra wind protection for your face and beefier traction aids, like full crampons. Avalanche tools are rarely needed in the Northeast unless you are hiking in high-risk mountain areas.
- A face mask or combination face mask/balaclava
- Snow goggles
- Crampons
- Ice ax (depending on the route)
- Avalanche shovel, beacon, and probe in hazardous terrain
Winter Hiking Clothing and Gear Buying Guide
While gear lists are useful, I’ve also provided some advice below about what to look for when purchasing gear for winter use to steer you in the right direction about the capabilities you want in winter hiking gear. I’ve used every single item listed below so I know what’s good and what’s not good.
Insulated winter boots
Most people day hike in “soft” insulated winter hiking boots that do not have a removable liner and are compatible with microspikes, snowshoes, and crampons that are compatible with non-rigid boots. These are available with 400-gram insulation and 200-gram insulation. This refers to the thickness of the insulation used, not its weight. Boots with 400-gram insulation will keep you warm to 20 below zero degrees (F), while boots with 200-gram insulation are good to about 10-20 degrees above zero degrees (F). These temperatures assume you are walking, not standing around. If you plan on hiking where temperatures get below 10F-20F degrees, I recommend 400g insulated winter boots. Otherwise, a 200g insulated boot should be sufficient.
We recommend:
You can also wear mountaineering boots which have a rigid sole capable of being used with crampons for ice climbing and mountaineering. These are harder to walk in for any distance, but some are available with removable liners which are useful for winter backpacking because you can dry them in a sleeping bag at night. Avoid so-called Pack Boots, which are less comfortable for vigorous hiking and are too large for use with microspikes and most snowshoes.
Warm socks
Most hikers wear heavier wool socks in winter than during other times of the year, but this is an area of personal preference, and the sock “systems” people use vary widely. Sock liners are optional but can be beneficial if you are blister-prone. Whatever combination you use, make sure that there is plenty of space in your boots to wiggle your toes around as this increases blood circulation and foot warmth.
We recommend:
High gaiters
High gaiters help prevent snow from entering your boots or making your socks wet and provide extra insulation below your knee. If you use crampons, they also protect your ankles from self-inflicted wounds when you tire. Avoid gaiters that close with zippers because they break quickly. Look for gaiters that seal around your leg using velcro instead.
We recommend:
Hats
A minimum of two hats is recommended for winter day hikes: a lightweight wool or synthetic hat for high-exertion activities and a warmer, heavier-weight hat for later in the day when temperatures drop. You’ll probably sweat at least one of them out.
We recommend:
Gloves
A minimum of two pairs of gloves is recommended, although hikers often bring three or four pairs if their hands sweat a lot while hiking. Experiment with this. You’ll be glad to have extras if you wet out your gloves with sweat.
One pair of gloves should be modular with an unlined outer waterproof/breathable shell layer and an inner insulating glove liner. Mitts provide more warmth than gloves, but gloves provide more dexterity. One approach is to use an insulating fleece liner glove inside a waterproof mitten shell to provide dexterity and warmth. When purchasing a modular mitten system (mitten plus liner) or a mitten shell, I recommend getting ones with wrist gauntlets, which will insulate your wrists and keep your hands warmer. If your hands are too warm with a mitten shell and liner and they start to perspire, you can remove the mitten shell and pack it away until it’s needed.
We recommend the following modular mitt systems and mitten shells:
I usually carry multiple pairs of inexpensive REI fleece gloves or Decathlon liner gloves, so I can swap them out if one pair gets wet or soaked by perspiration. Hint: Buy multiple pairs, all in the same color, so you can swap in a replacement if you lose one of a pair or wear it out.
If you need to grip an ice axe on your hikes, you’ll also want to shop around for an insulated high-dexterity glove so you hold the pick in the ice-axe ready-position. A mitten shell doesn’t provide enough dexterity to wrap your fingers around the pick and a glove liner doesn’t provide enough insulation from the cold metal. Black Diamond has some good gloves for this, including the Black Diamond Punisher Glove and the Enforcer Glove.
Puffy Insulated Hooded Jacket
When you’re taking a break during a winter hike and have stopped moving, it’s best to pull a big puffy insulated jacket out of your backpack and wear it over your other clothes to stay warm. You’ll want a parka-weight jacket and not a lightweight 3-season jacket. This coat should be sufficiently warm that you could stand around in it for a few hours if someone in your group has an accident and you need to stay with them until help arrives. You want something with an integrated hood that will really keep you toasty warm in frigid weather.
We recommend:
Lightweight insulated jackets like the Mountain Hardwear Hooded Down Ghost Whisperer 2 are too lightweight and are more suitable as a mid-layer.

Hard Shell or Rain Jacket
You also want to carry a windproof and waterproof rain jacket/or hardshell with an adjustable hood that can be worn while you are hiking. They don’t have built-in insulation, but they’ll shield you from high winds and trap the heat held by your mid-layer garments. Look for jackets with at least two exterior pockets to stash hats and gloves. Hardshell jackets or rain jackets with pit zips provide the most flexibility for regulating your temperature. For example, the Outdoor Research Foray II with full torso-length side zips is an excellent option that I use in winter. The women’s version is called the Outdoor Research Aspire II Jacket.
Hard Shell Pants or Rain Pants
Hardshell or rain pants are completely windproof and waterproof. Many people find it helpful to use pants that have full zips along the sides to help vent extra heat while hiking. Ankle zips are required at a minimum, so you can put them on or take them off without having to take off your boots. Test this out before you hike with them. Most hikers who wear hardshell pants as their primary pant layer, also wear long underwear underneath them for warmth. Marmot Precip Full Zip Pants are an excellent, economical full-zip waterproof pant option.
Softshell Pants
Many hikers, myself included, prefer wearing softshell pants in winter because they are more breathable and form-fitting than full-zip hardshell pants. If that’s the case, you still need to bring a pair of hard shell pants for protection against sustained precipitation and high winds since most softshell pants are water and wind-resistant but not waterproof or windproof. Softshell pants tend to be much warmer than hardshell pants, so you often don’t need to wear long underwear with them except in very cold weather. REI makes an economical softshell pant called the Men’s Activator 3.0 Pant (and Women’s Activator 3.0 Pant) that I use and recommend.
Mid-Layer Insulation
There are a lot of options available for mid-layer insulation and it’s best to experiment to figure out what you like best. Midweight fleece jackets, hoodies, pullovers, or vests are all cost-effective and well-performing options because fleece will keep you warm when it is wet and wick moisture away from your skin and base layers. The same holds for wool sweaters if you prefer it over fleece. There are many manufacturers that sell fleece garments. You can also augment a mid-layer with a softshell jacket or an insulated vest for more warmth depending on whether you run hot or cold.
Here are some of our favorite layering garments and ones that we recommend:
Base layer insulation
Most winter hikers wear a wool or synthetic base layer consisting of a long sleeve jersey, long underwear pants, and some kind of boxer or bikini underwear under that. All of your base layers must be synthetic or wool and not cotton because they’ll dry faster and won’t cause chafing if they get damp.
The most important factor in choosing a base layer is that it should be wicking so that it transports sweat away from your skin to the next highest layer of your clothing. Lightweight and thin layers do this better than heavier layers, but again this is an area of personal taste. Patagonia Capilene Lightweight, available in jerseys and long underwear, is an excellent option. A Smartwool Merino 150 LS Baselayer shirt is also a good choice. If you run really cold, try a fishnet-style jersey from Brynje. They really do work!
Spare Clothing
It’s important to bring some spare clothing on longer hikes (jersey, long underwear, socks, gloves, hats) in case yours get wet, either from sweat or because you’ve had some kind of accident, such as falling into a stream. This is fairly common when you have to do any stream crossings on a hike and a snow shelf you’re standing on collapses into the water. It’s also nice to have a dry layer to change into if you need to stop for an extended time and the clothes you are wearing are damp with sweat.
Winter Traction-Aids
The traction aids that you bring on a hike are likely to vary, depending on the weather and whether you are hiking on a trail that others have hiked previously and packed down. Most hikers carry microspikes on all hikes because they provide extra traction on packed snow and ice and they’re quite lightweight. Snowshoes may also be required, particularly on less traveled trails or after a snowfall. Heavier-duty crampons may also be required for steep routes covered with rock or thick ice, while snowshoes provide floatation for hiking through unconsolidated snow. It’s not uncommon for you to have to carry some or all of these on a hike, depending on where you go and how many other people use the trails you follow. When buying snowshoes for mountainous terrain you want ones that have a televator lift under the heel, which makes it easier to climb hills. We recommend the following traction aids, which are compatible with all types of winter boots.
Water Bottles/Water Bottle Insulators
Hydration reservoir hoses freeze very easily in cold temperatures, so it’s best to carry two or three 1-liter wide-mouth bottles on winter hikes since narrow-mouth bottles also freeze shut more easily. If you carry your water bottles outside of your backpack, it’s best to store them upside down in an insulated sleeve so the cap won’t freeze shut. White wide-mouth Nalgene bottles are the best for winter use because they don’t crack.
For insulation, try insulated Nalgene water bottle sleeves or 40 below Neoprene Bottle Boots. Insulated Hydroflask 32oz. metal bottles also work but are heavier. You can also store your bottles in a wool sock inside your pack, surrounded by your down parka. Boil your water before putting it into the bottles and it will stay warm for a good part of the day. Add tea, electrolytes, or other flavorings to make it desirable to drink so you stay hydrated.

Winter Dayhiking Backpacks
You’ll want a 30-50 liter backpack for winter day hiking because you’ll be carrying more extra clothes, food, and water than the rest of the year. Winter packs should have a lot of external attachment points, daisy chains, and side compression straps to which you can attach traction aids such as snowshoes, crampons, or microspikes. These are either too large to pack inside a backpack, they have sharp points that can slice up your extra packed clothing, or they will be encrusted with snow and best kept separate. A full complement of traction aids can add as much as 6-8 pounds to your backpack load, so you’ll want a pack with a frame that can carry the extra weight on your hips and not on your shoulders.
Daisy chains, which are webbing loops found on shoulder straps or the sides of a pack, are good for hooking gear, including water bottles or Nalgene bottles filled with bite-size snacks that you can shake into your mouth. It’s also convenient to have a top lid on a winter backpack with one or more pockets to store gear you want easily at hand like your headlamp, extra hats, more snacks, and gloves.
The following backpacks are excellent for winter day hikes:
10 Essentials
The 10 essentials are just as important in winter as during the rest of the year, perhaps more so, since winter hiking requires more self-sufficiency.
A map and compass are important because it’s easy to lose one’s way, trail blazes are often buried in snow, and there are far fewer landmarks visible in winter when everything is covered in white. A plastic whistle is better than a metal one which will freeze to your lips, and useful if you get lost because it is louder than a human voice. You should use lithium batteries in your headlamp and other electronic devices because they are resistant to cold temperatures: nickel-metal hydride and alkaline batteries drain much faster in cold weather. Rechargeable headlamps are also okay since most have lithium batteries. You might also want to carry two headlamps because you’ll be hiking after sunset because there are so few hours of daylight.
While you can buy commercial first aid, gear repair, and fire-starting kits, they’re also easy to make by yourself at home. It also helps to bring some kind of multi-tool or plastic ties with you on a winter hike to repair gear, especially traction aids which take a lot of abuse. Sun protection, including sunglasses and sunscreen, is important to carry because it’s very easy to get a sunburn, from light reflected off the snow.
Survival Gear
If you’re winter day hiking alone, it’s important to bring extra insulation including a sleeping bag and sleeping pad in order to prevent hypothermia if you are immobilized and you need to survive until help arrives. A 20-degree sleeping bag, a foam accordion sleeping pad like a Therm-a-rest Zlite, and a lightweight bivy sack will usually suffice to keep you alive if you also put on all of the clothing you’re carrying. These can be split among different hikers if traveling as a group.
If you have to spend an unexpected night out, you also need to have some way of melting snow to create drinking water. While carrying a liquid fuel stove like an MSR Whisperlite and a cookpot is the most reliable way of doing this, a Jetboil can also work if you can keep the fuel canister warm. Hypothermia is accelerated by dehydration and can have dire consequences. When hiking in a group, this gear is usually distributed between group members, otherwise, you’ll probably need a bigger backpack to carry it all.

Extra Gear for Above Treeline Hikes
For above-treeline hiking, your biggest priorities are extra wind protection for your face and extra traction to prevent uncontrolled slides on ice and snow. The easiest way to protect your face is to use a balaclava with a fully integrated facemask like the Serius Comboclava. You’ll need to combine that with ski goggles to protect your eyes from blowing snow and prevent them from freezing shut. Practice wearing these before you get above treeline as they can fog easily.
For extra traction, you’ll want to buy toothier crampons and possibly an ice ax. This is a fairly advanced stage of winter day hiking, so it’s best to learn how to use these tools from a qualified instructor, either a mountaineering guide or in one of the winter hiking schools run by outdoor clubs in the northeast such as the Appalachian Mountain Club or the Adirondack Mountain Club.
See Also:
SectionHiker is reader-supported. We only make money if you purchase a product through our affiliate links. Help us continue to test and write unsponsored and independent gear reviews, beginner FAQs, and free hiking guides.
About the author
Updated December 2023.