
How To Add Modern Convenience With This Plug & Play Module
Remote start may not be a standard feature across all Tacoma trim levels, but that doesn’t mean you have to miss out on this modern convenience. Thanks to the N2 Designs remote start kit, you can effortlessly start your truck from practically anywhere!
Remote start is a game-changer. Imagine those blistering summer days or freezing winter mornings. You gain the ability to cool or heat your truck before you even step inside. It’s not just about convenience; it’s also about enhancing your comfort during extreme weather conditions.
In this post, I’m excited to give you a rundown of this fantastic kit. I’ll walk you through its features and discuss how it can be tailored to suit your specific needs. I’ll also provide a detailed step-by-step installation guide – which is plug-and-play and takes no more than 20 minutes.
Features
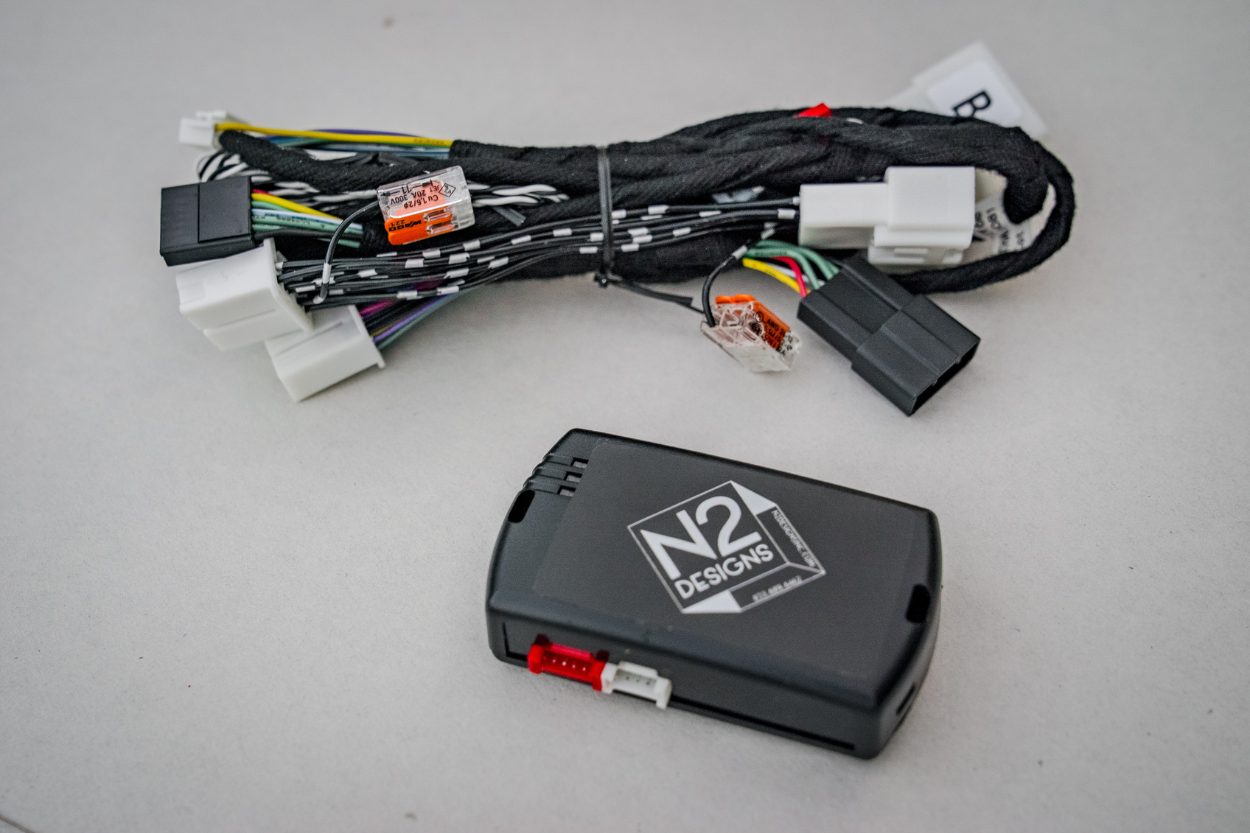
With the N2, you’re in control—all with the simple touch of your OEM key fob. This plug-and-play kit is extremely convenient and saves you the hassle of dealer activation. There’s no need for wire splicing or cutting, and it comes with printed easy-to-follow instructions.
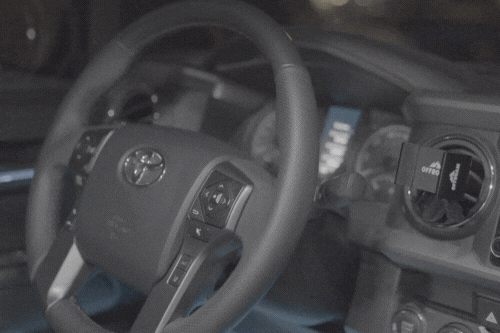
What sets this module apart is its compatibility with Long Range Remote Kits. There’s also an additional Smart Phone Module, offering extended functionality beyond the standard remote start. Additionally, it will run for 15 minutes, ensuring your Tacoma reaches a comfortable temperature before you hop in. Just remember, for the system to activate, all doors and the hood must be securely closed—a small but important detail.
Should You Add Smartphone Module?
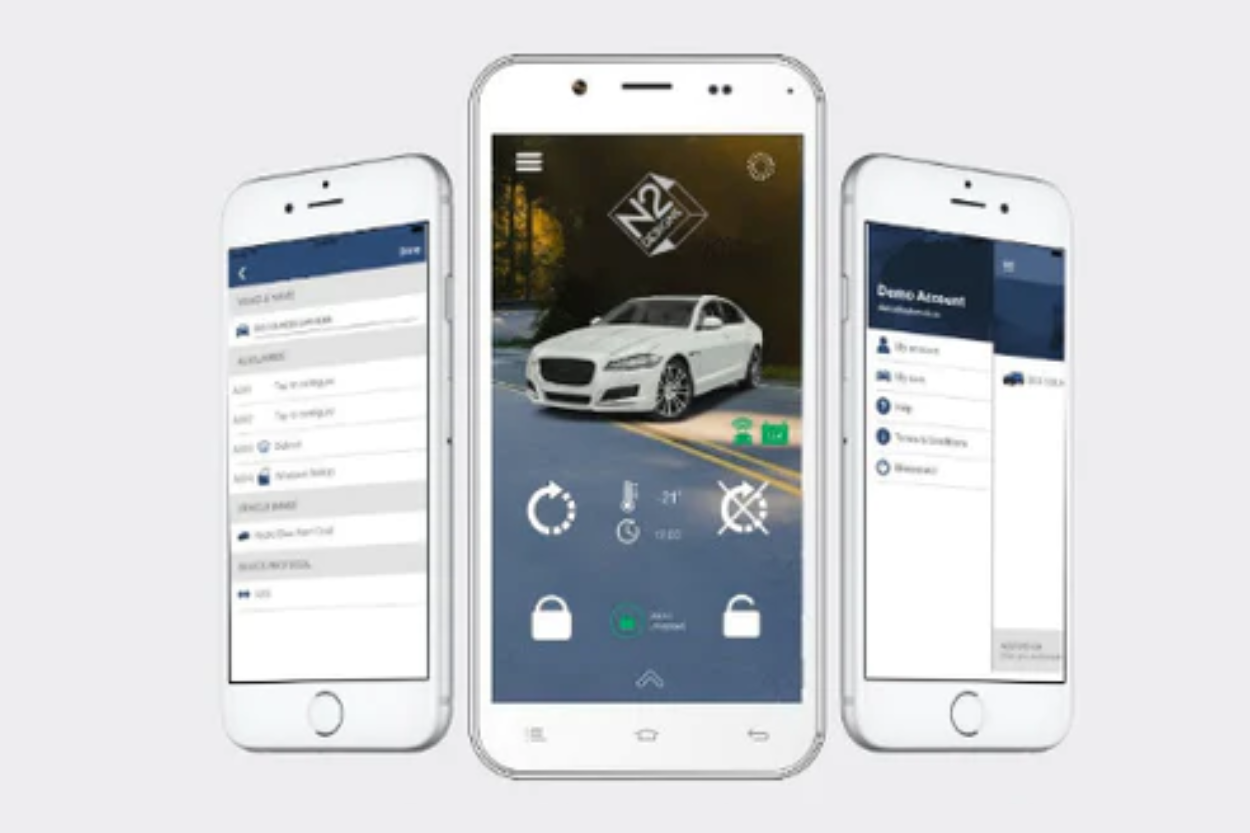
If you’re someone who’d love to start your truck using your phone, the Smartphone Module is for you. This allows you to control various functions remotely. You can start or stop the engine, lock and unlock doors, and if your truck has additional features like window controls, you can control those too—all from your smartphone.
It also includes GPS tracking at no extra cost. While I opted not to add this feature, it’s a great addition for those seeking extra control and convenience.
Installation
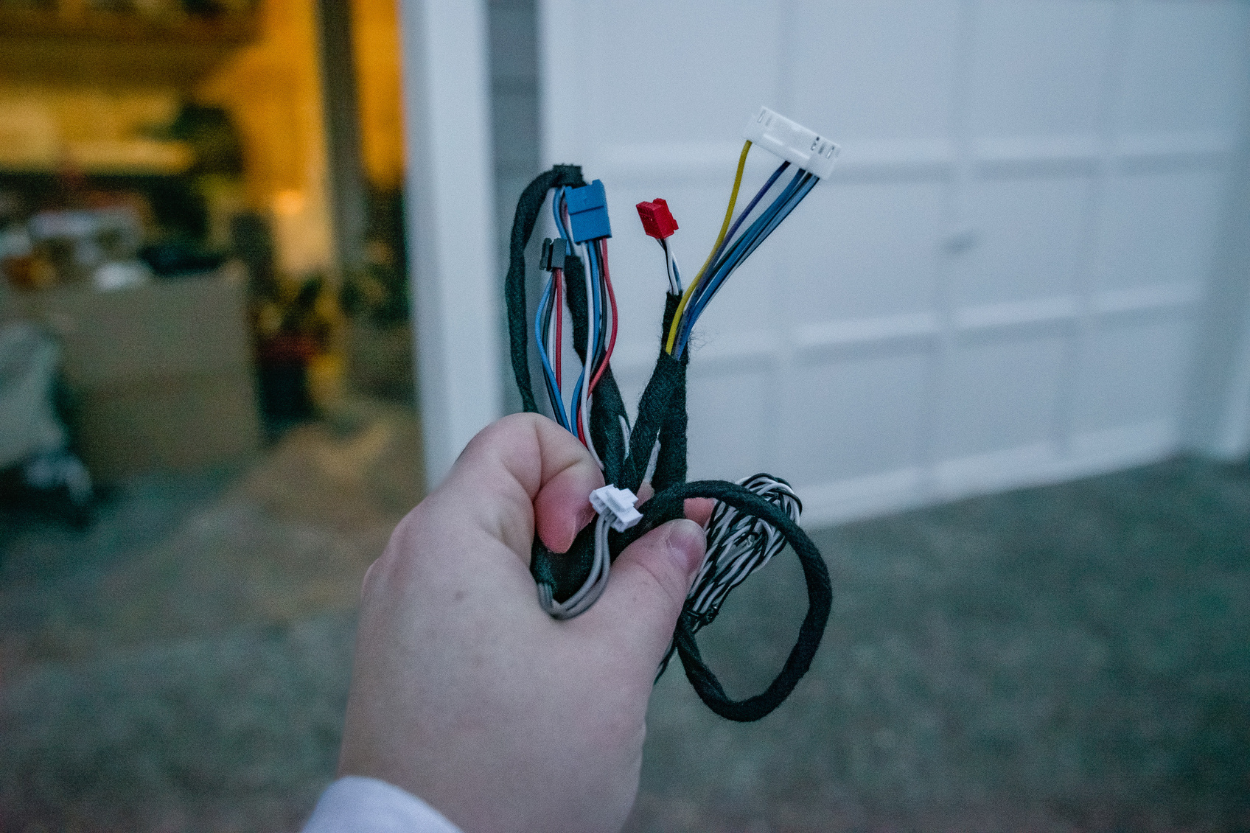
Before starting the installation there are a few things to note. You’ll want to ensure your key fob stays inside the vehicle during the entire installation. Also, take a moment to familiarize yourself with all the components in the kit and confirm nothing is missing.
Tools Required
- Trim Pry Tool (Optional)
- 3/8 Ratcheting Wrench or 3/8 Impact Gun
- 10mm
- Philips Screwdriver
- Zip Ties
1. Remove Panels
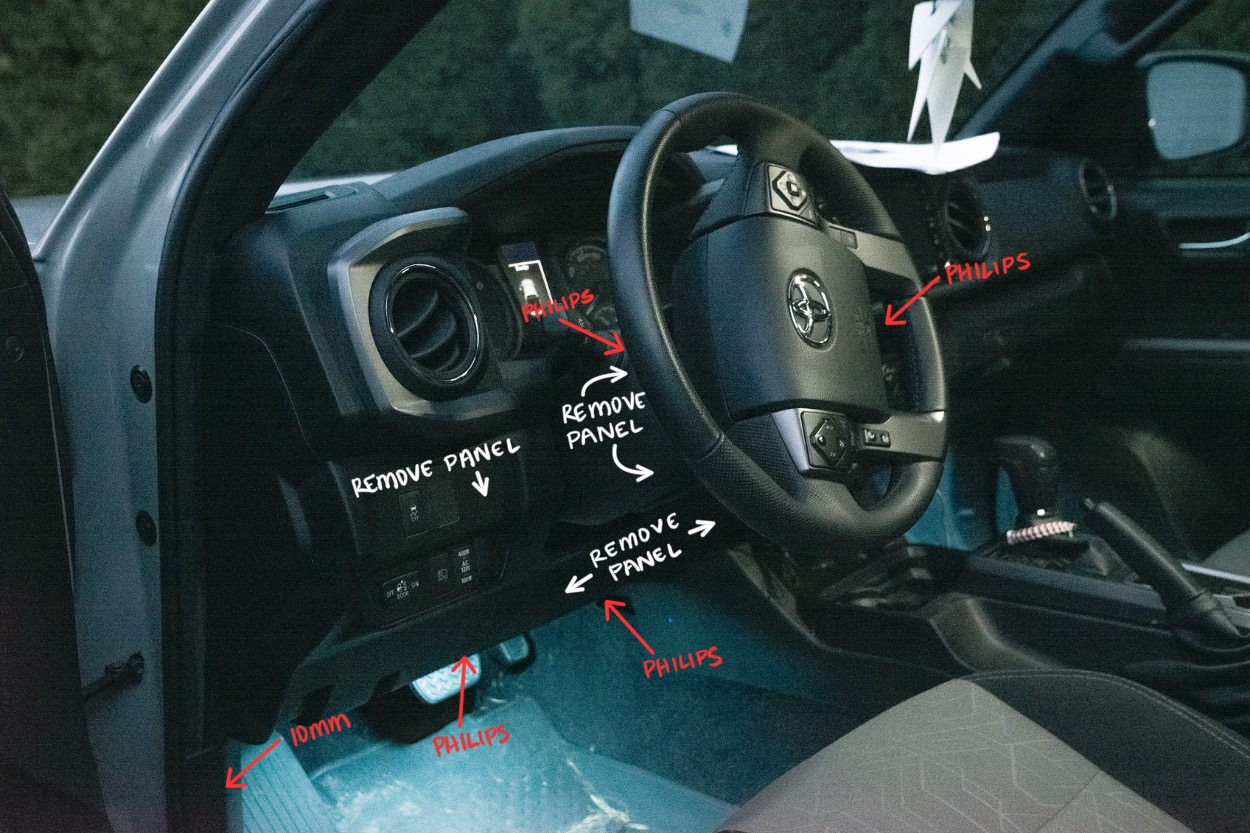
Begin by removing all the plastic panels to expose the wiring. To remove the rocker panel adjacent to the driver’s ankle, gently pull it off or use a pry tool for an easier release. You’ll also need to locate and remove the 10mm bolt to loosen the panels and (2) Philip-head screws located underneath the bottom panel.
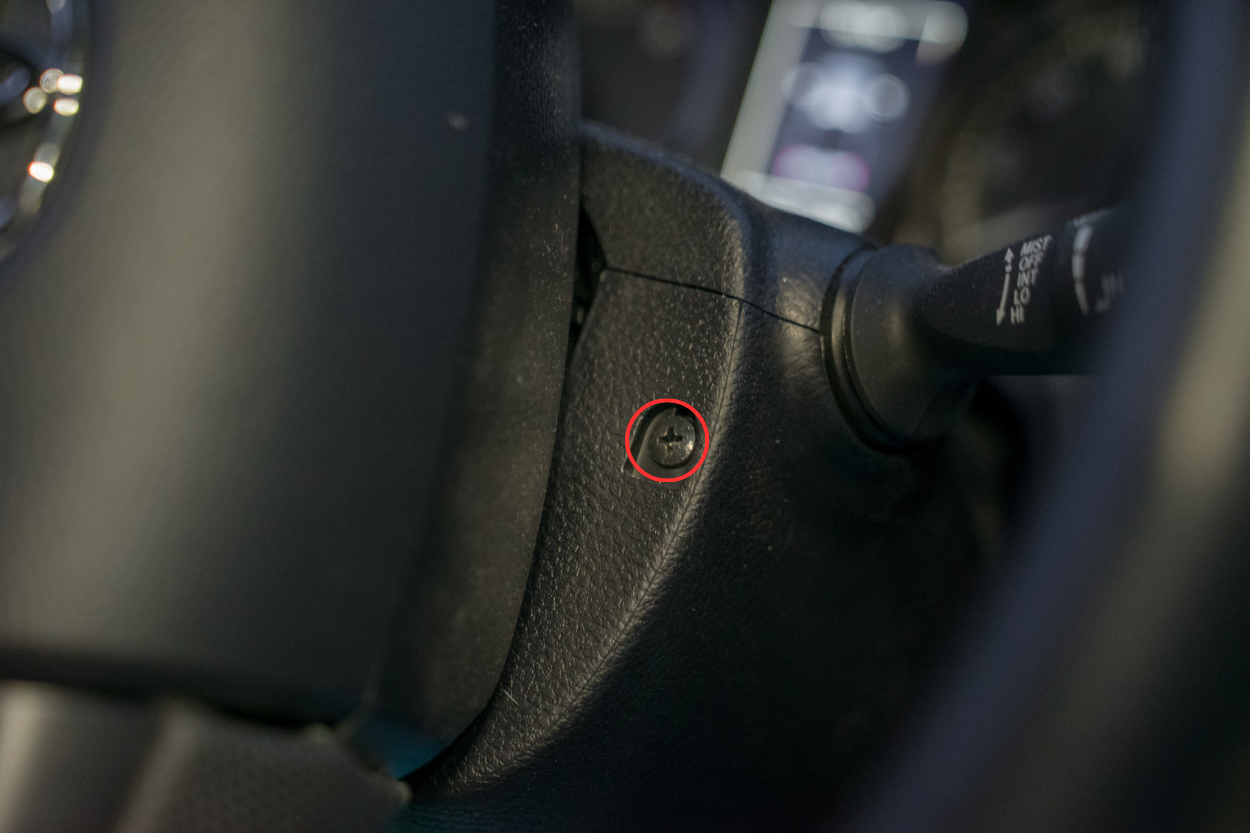
To remove the panels around the steering wheel column, turn on your truck and turn the steering wheel to the right to expose the first screw and unscrew it. Then, turn to the left to expose and remove the second one on the other side.
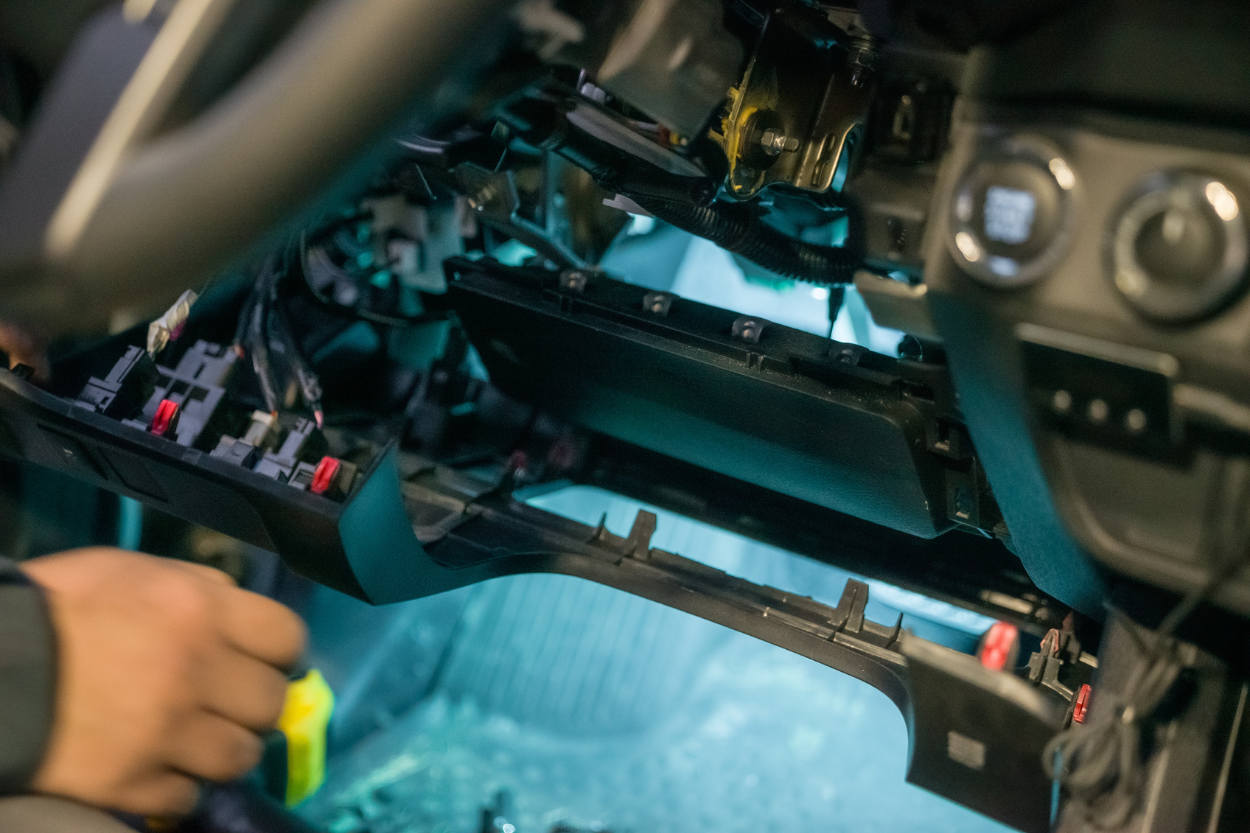
Finally, reposition the steering wheel back to its neutral position and turn off the vehicle. To remove the trim panels, start from the left panel around the battery turn-on button. Gently tug it backward, allowing it to hang (it doesn’t need to be fully removed). Continue by popping off the covers encasing the steering wheel by popping each cover off. Lastly, pull off the larger trim piece located under the steering wheel.
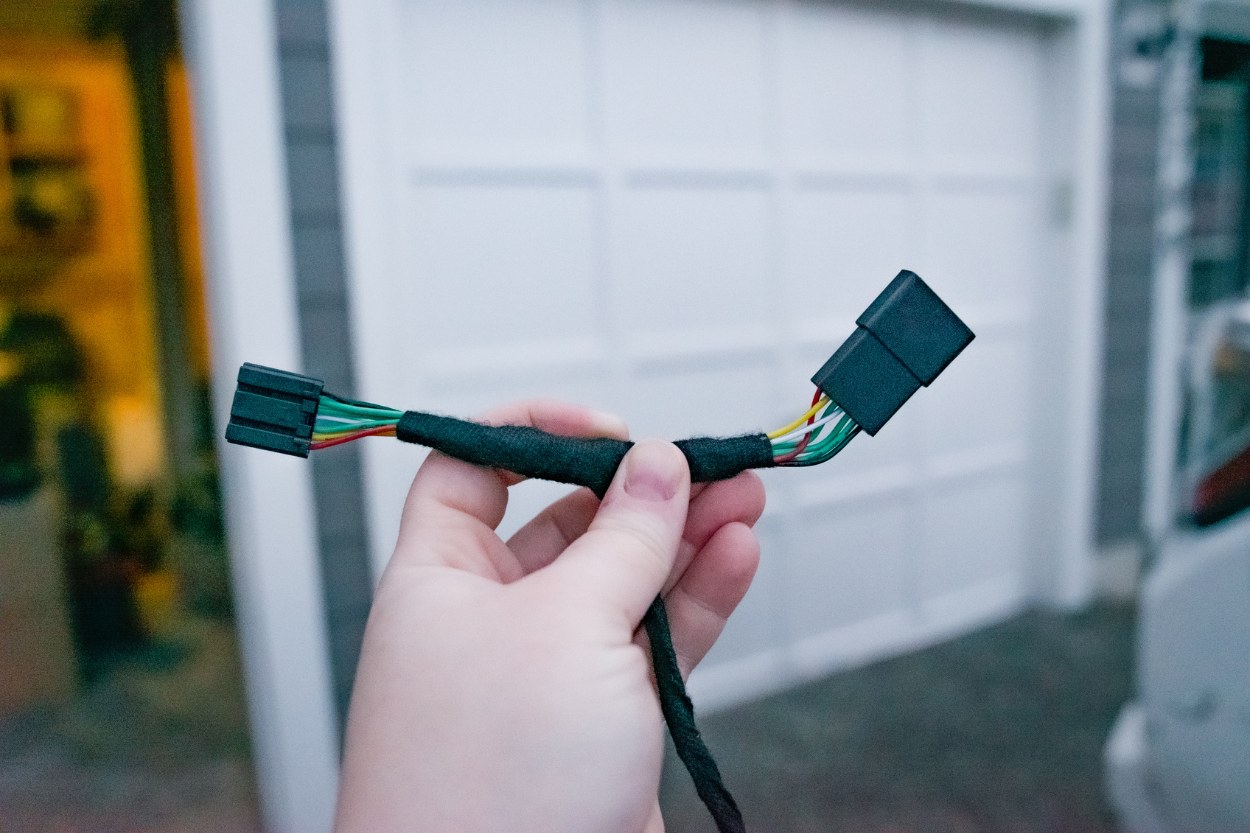
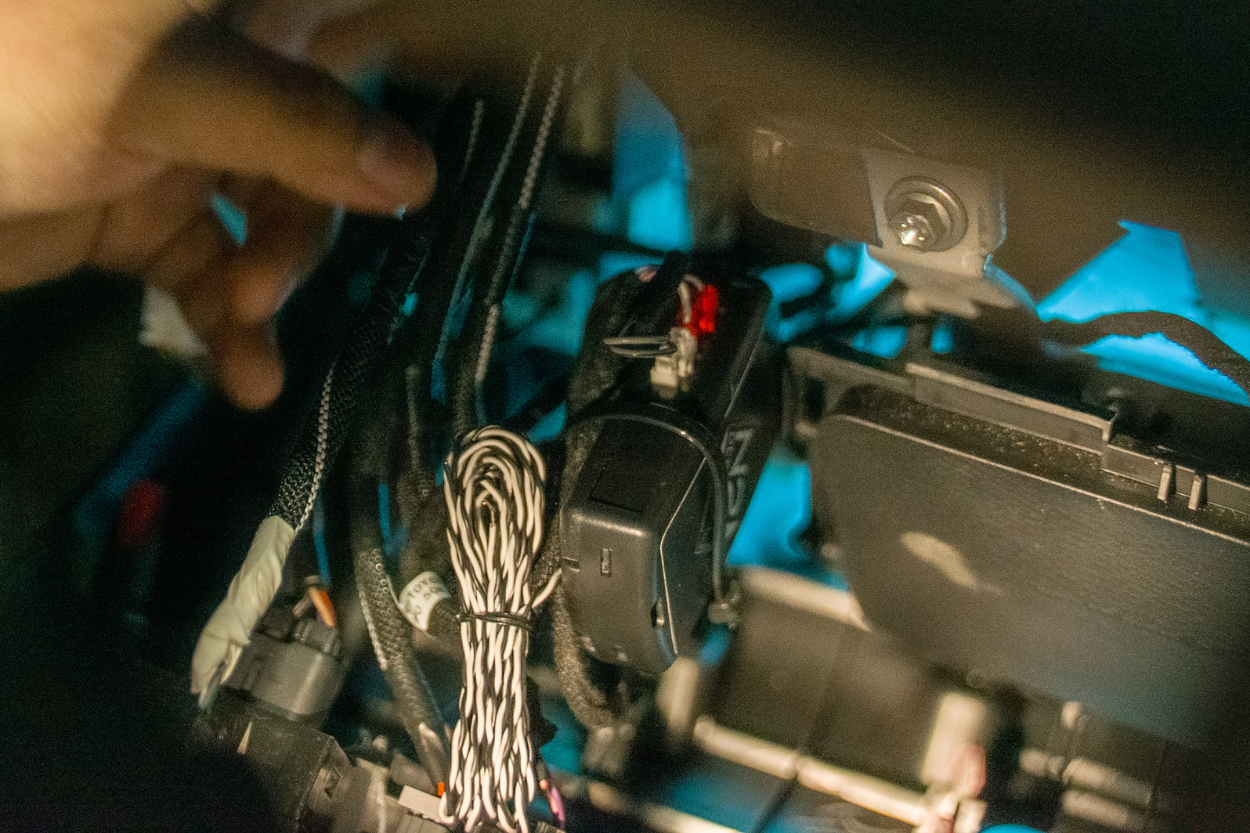
2. Install BCM Wire Harness
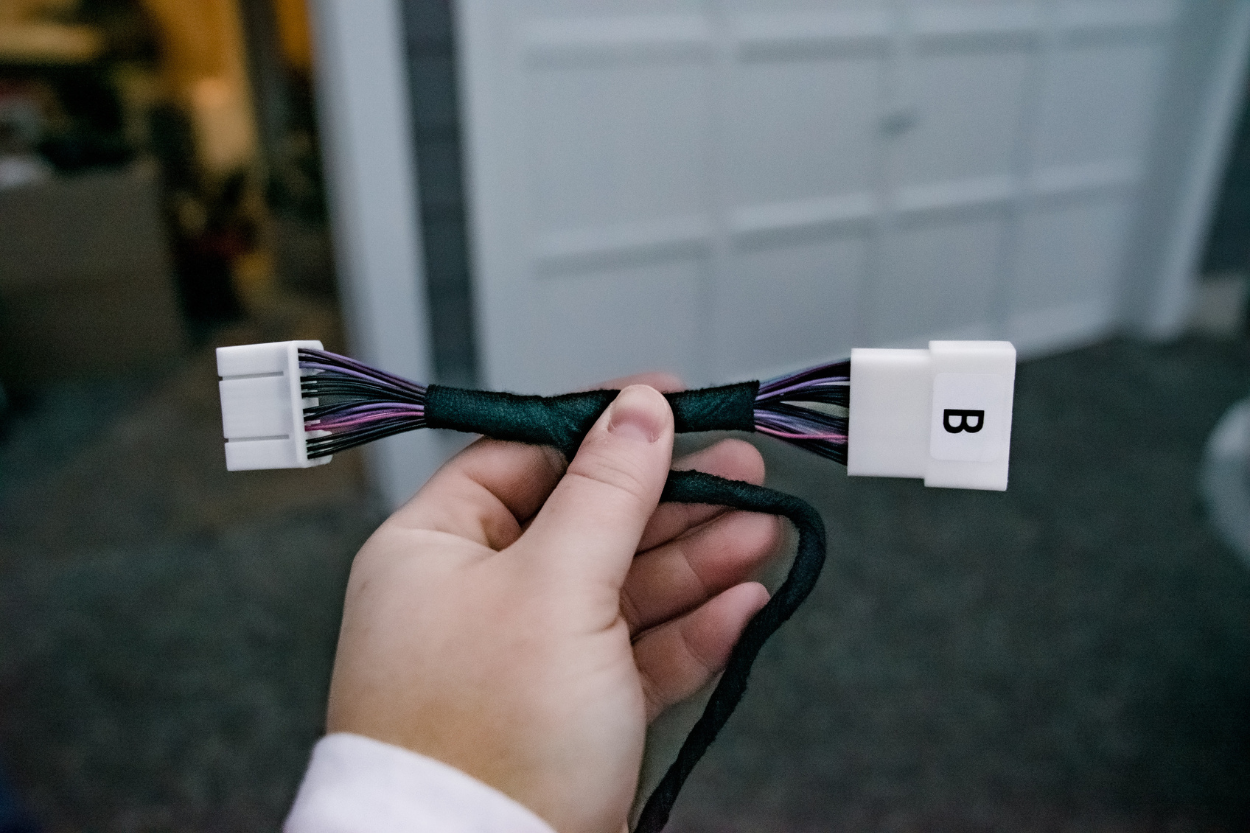
Start by feeding your harness through the back of the bottom panels up into the wiring, ensuring the labeled “B” harness is pulled through to the top. Pull it up until you find a spot that the module can be zip-tied to.
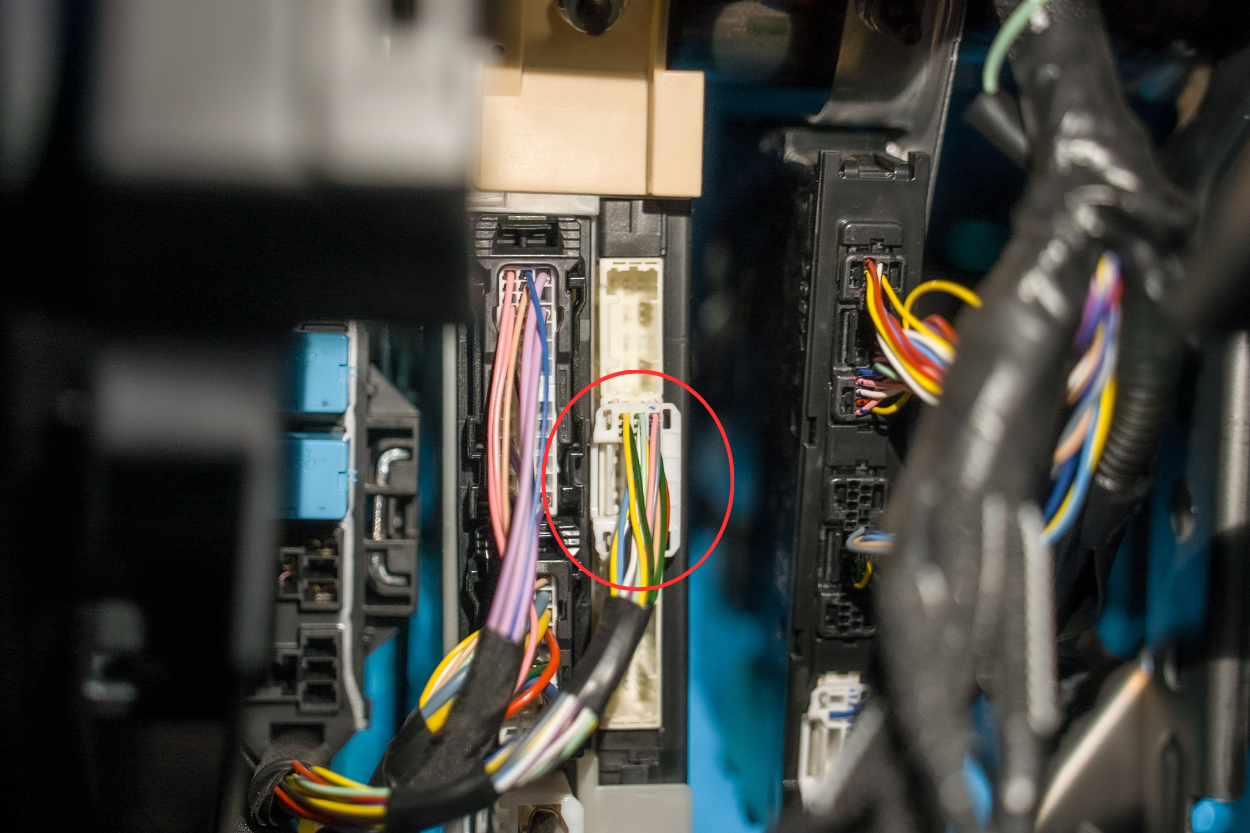
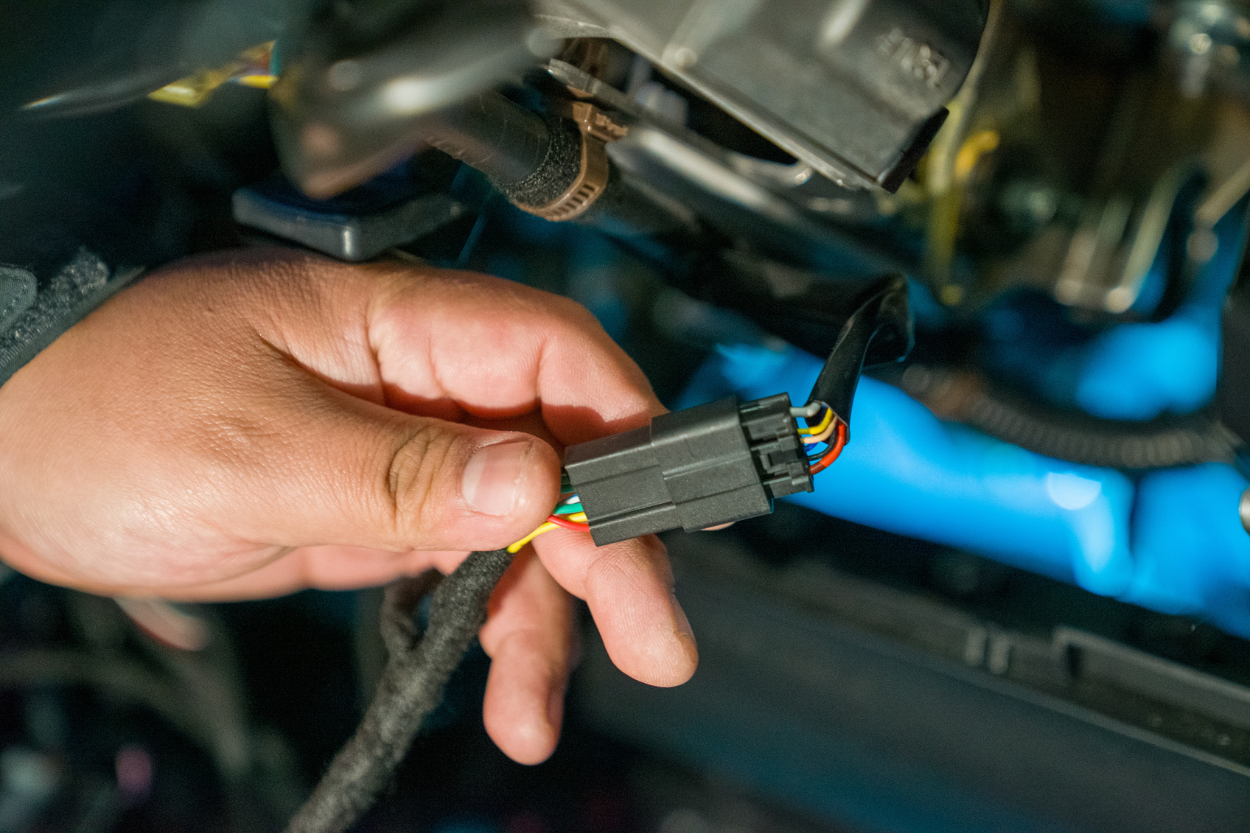
Next, disconnect the factory harness from your BCM (Body Control Module). To release it, identify the tab on the left side, press it in, and gently pull the harness out. It’s important not to tug on the wires to avoid damage.
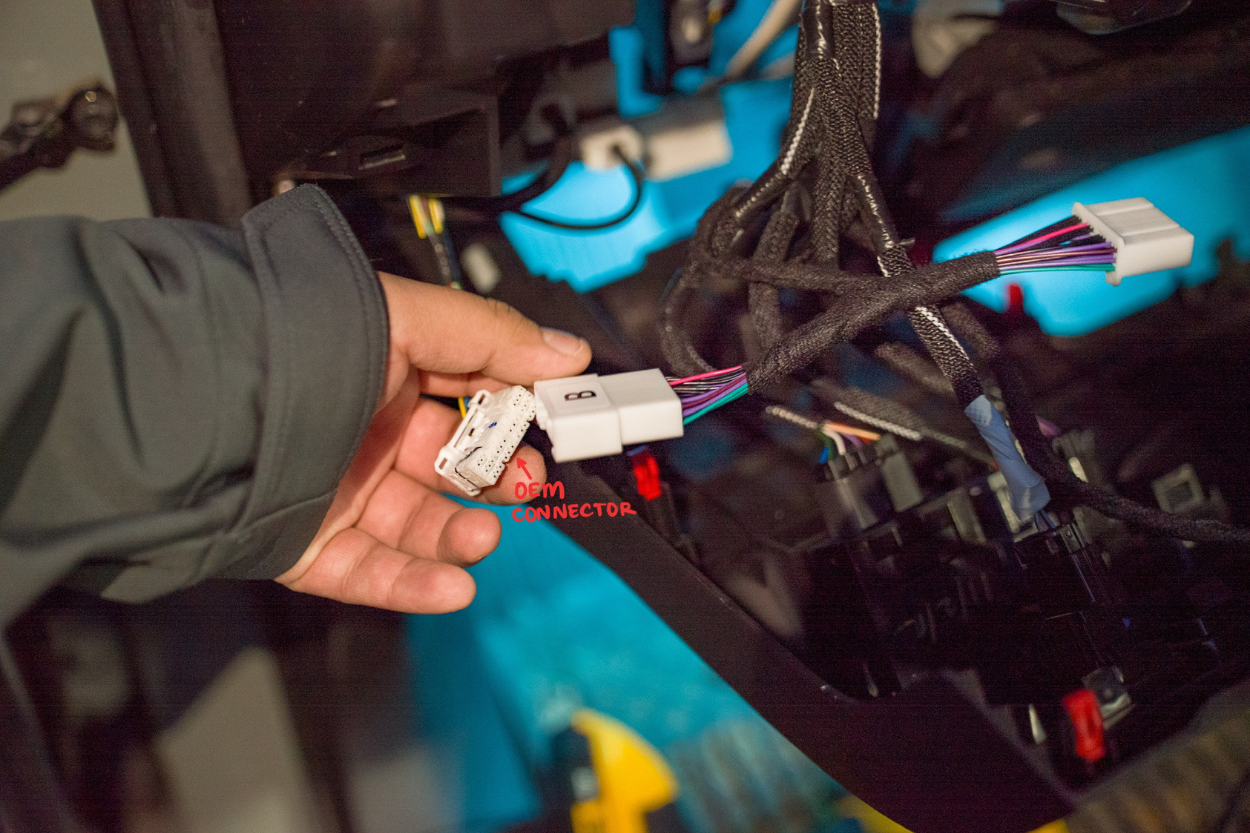
After disconnecting, take the OEM harness and connect it to the corresponding side of the remote start harness labeled “B”. Then, plug the other side back into the truck where the factory harness was installed. Ensure a secure connection by listening for clicks on both ends of the connections.
3. Install Ignition Wire Harness
Now, grab the ignition harness with black connectors. Again, guide it through the back of the panel towards the ignition area.
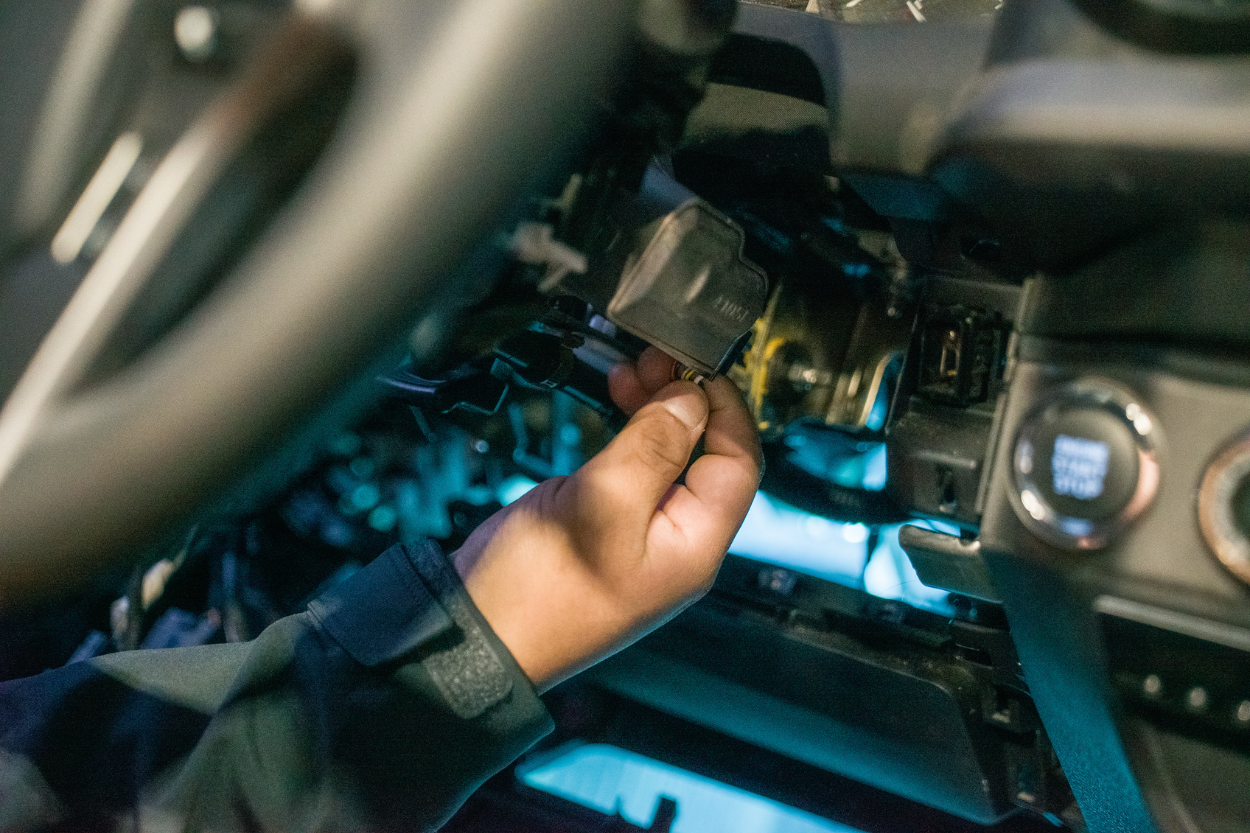
Once positioned, disconnect the OEM ignition harness.
Plug in the new N2 harness between the OEM harness and the ignition harness. During this process, you might hear a chime, which is completely normal.
4. Programming
To program, you’ll need to plug in the N2 module. Remember to keep your keys inside the cabin throughout this process.
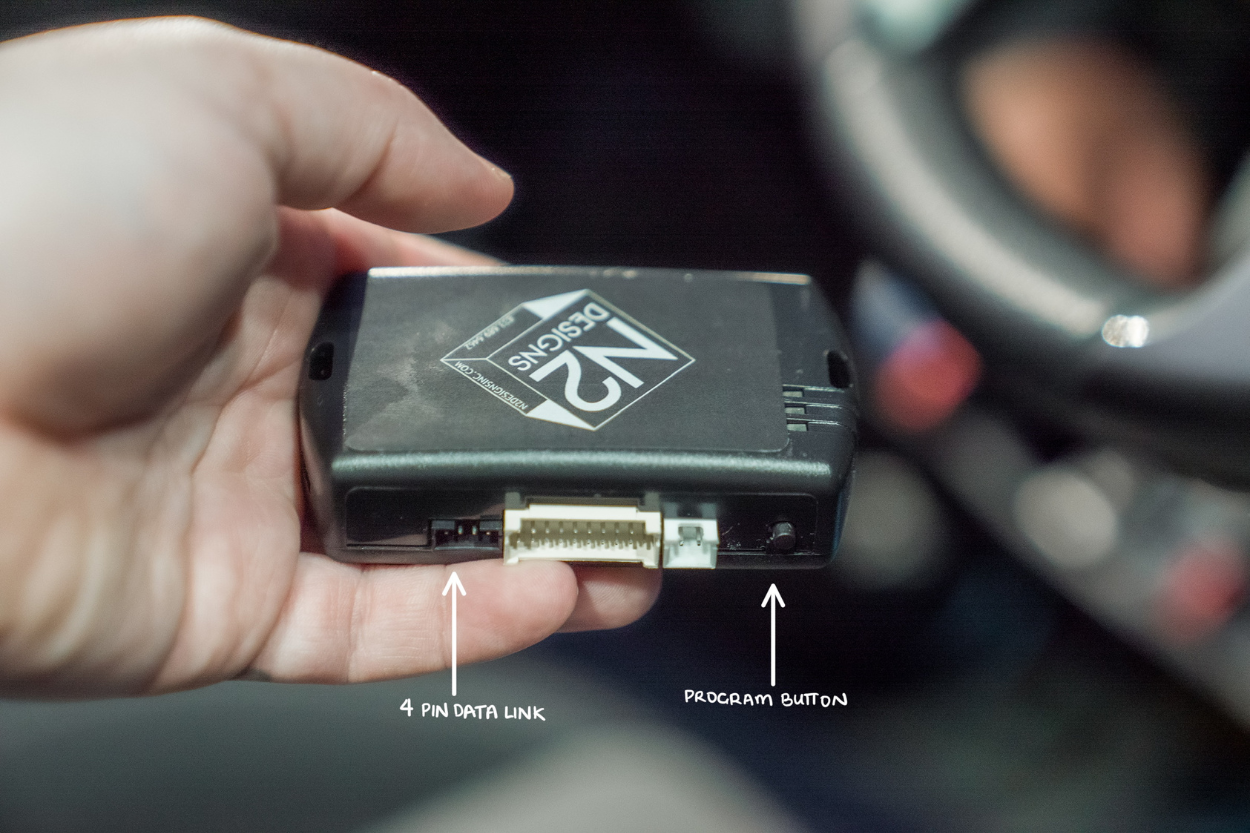
Start with locating the 4-pin data link without the tab—it’ll be one of the smaller black connectors. While holding down the program button on the remote start module, plug in this connector.
Maintain the button press until the module cycles through different colors and settles on a solid blue color. If you make a mistake, simply unplug the black connector and restart this step.
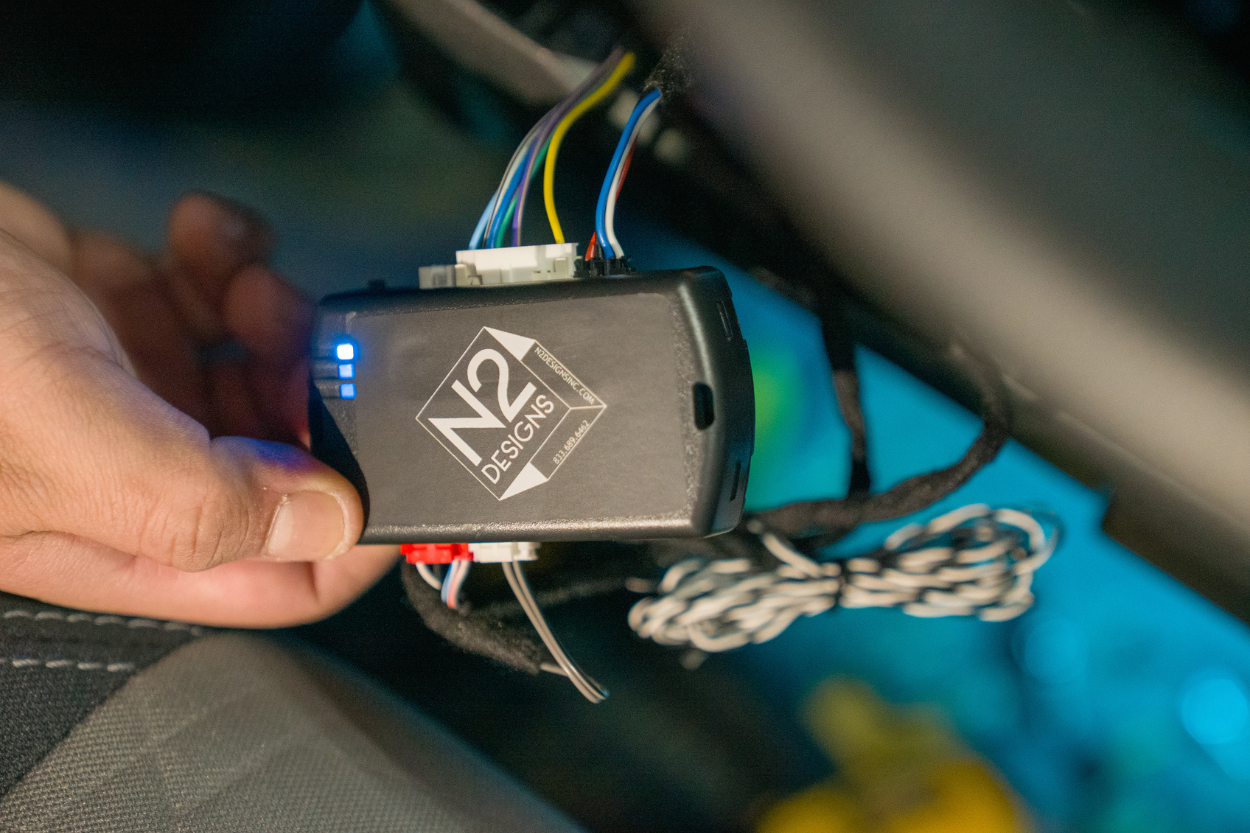
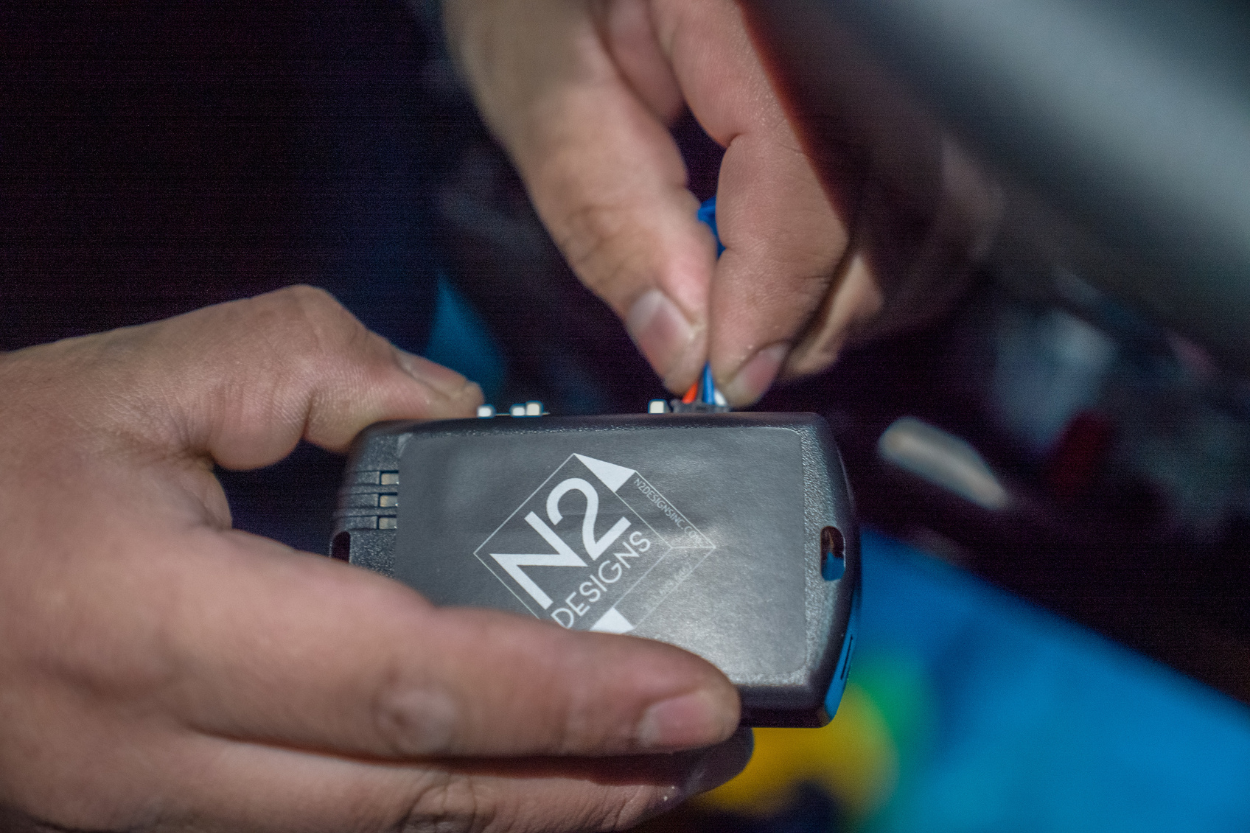
Afterward, connect all the other required connectors to the module, being careful not to press the program button again. If it happens accidentally, repeat this step from the beginning. Once all the connectors are in place, press your ignition button twice, ensuring it begins blinking (without your foot on the brake).
When you notice the blinking, press the ignition for a third time. The module will turn off, indicating the completion of the programming process. This final step confirms that the module is successfully programmed for your Tacoma.
5. Test & Reassemble
Before reassembling everything, it’s important to test the functionality to ensure it operates correctly. To do this, press the lock button on your key fob three times. This will initiate the start-up process for your Tacoma, but may take a few seconds to begin.
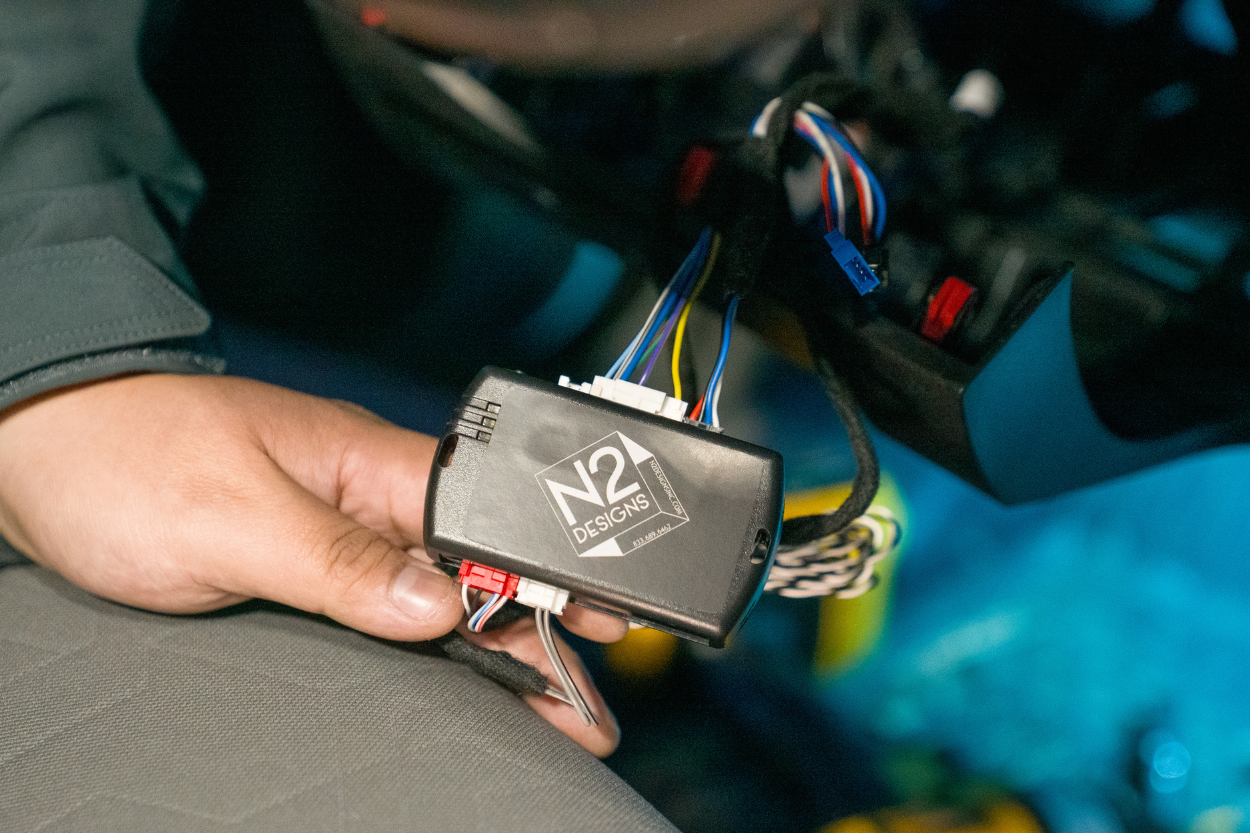
To turn off the engine, either open a door or press the lock button three times again. Once you’ve confirmed that everything is functioning as expected, it’s time to tidy up the wiring. Use zip ties to secure any excess wiring from the harness to the module. Then, secure the module with a zip tie so that it doesn’t move around.
Finally, reinstall the panels that were removed earlier, and you’re all set!
Final Thoughts
This has truly been a game-changer. It’s more than just a convenient feature; it’s become a luxury. Gone are the days of waiting in a freezing truck while it warms up—especially with the chilly, rainy weather we have in Washington.
What amazed me most was how simple the installation was. In just 15-20 minutes, I upgraded my truck’s comfort level without any complicated wiring or needing professional assistance. N2 Designs made the upgrade incredibly user-friendly, which is fantastic.
While this small upgrade isn’t visible to others, it has made a significant impact on the Tacoma, and I couldn’t be happier!