
ARB Safari Snorkel For 3rd Gen (2016-2023) Tacoma: Detailed Step-By-Step Installation Guide, Review & Overview – Protect Your Air Intake From Water & Dust!
Alright, here we go… a mod that I probably waited too long to do. The snorkel.
Before my Tacoma, I had a 4th Gen 4Runner. That truck ran a snorkel for two, call it main reasons.
- 1. It sealed up my exposed air box (missing fender liners) and lifted the air intake to the roof line.
- 2. It looked super rad (in my opinion).
However, that snorkel was a cheap Amazon find. It was for an 80 series (I think). It worked ok. Got the job done. Didn’t sit well or really have any instructions or anything. It also needed a ton of modification. For example, I had to cut into the body to make room for the new tubing – there was no way it was going to fit any other way. The point is.. it worked, but not in a very calculated fashion.
This time, I knew what I wanted (needed). A tried and true, tested system with EVERYTHING I needed, right off the bat. And the ARB warranty and support – which has always been good to me.
Enter the ARB Safari Snorkel. Let’s run through a quick installation guide (ARB also provides one) and review.
ARB is currently sold only through retailers. I got this one from Mudify. These guys stock a ton of ARB products for fast shipping, and also have good customer service.
Find It Online
Why Should You Add A Snorkel?
What Is A Snorkel?
A snorkel is a series of tubing, connections, and airways that takes the point of air intake from a lower point on the vehicle (passenger wheel well, under fender liner) and moves it closer to the roof line. The result is a sealed system that allows temporary exposure to water that may have otherwise been taken into the intake, and immediately into the motor. This would cause catastrophic failure in the form of hydro-lock. Yes, that means a new motor. Not cheap.
Think of it as cheap insurance – especially if you wheel your truck. Exposing your intake to water, especially as a newer driver, is easier than you might think. And freak accidents can happen. Investing in a snorkel is a great preventative measure
Why Would You Want One?
I’m not going to go into anything crazy complicated here. There are a few main reasons to add a snorkel, and a few secondary reasons that I’m sure are up for debate.
First, and most obviously, as described, is moving the air intake out of harm’s way from potential water intrusion. This can protect your vehicle and decrease the likelihood of water getting into your motor. It can also allow you to risk doing deeper water crossings. This can be expanded to include dust, since the fenders are typically more exposed to dust off-road than the roof. So you are avoiding unnecessary dust intake. This can further be improved up with a snorkel pre-cleaner.
Many would argue that a snorkel is a sort of “cold air intake” where air in the fender can potentially be warmer than the ambient air outside. I would guess this applies more to slower driving, as the air movement as you drive 50, 60, 70+ mph on the highway may negate that. However, I still think there is somewhat of a valid point here.
A different line of thinking could also suggest that since the new intake head on the snorkel is bigger than the factory opening, and that it usually faces the rushing air as you drive, that is allows the motor to “breathe” easier. Don’t quote me. I’m not saying you’re getting any true forced induction. But another idea I’ve seen discussed.
Takeaway
Key takeaway – snorkels have value relative to their cost to the decreased risk involved with off-road and overland travel. With some secondary effects. Pretty simple.
This is all reinforced the harder you wheel, and the more water/dust you see. And a snorkel is especially useful if you lose your fender liners like I did, when I trimmed my fenders/flare for tire clearance.
Installation

Install is not as bad at you might think. The right tools are important. You should have a good understanding of hand tools. But there is some room for error when it comes to cutting and drilling. Just move carefully, and really make sure everything lines up. Check it ten times if you have too. Worst case – you can buy a new fender. But we don’t want to do that. So use this guide and take your time.
ARB also gives you detailed instructions.
Required Tools
- Mechanic’s toolset
- Drill + bits
- Cutting tool (jig saw, or similar)
- Dremel (or some kind of smaller saw/cutting tool)
- Screwdrivers
- Utility knife
- Painter’s tape
- Marker
- Double-sided exterior automotive molding tape (optional)
Step 1. Remove Air Box

To start, I’ve seen people get really into removing extra components. Wiring, separating the top of the airbox from the intake, etc.
While you can do that for piece of mind, there is plenty of slack to work with, and you should be able to save some time.
Unclip and open the airbox. Pull out your filter. Check to see if it needs replacing.

Next, take out the bottom portion of the airbox. There are three screws total. Two are pictured here. One is to the left of the box.
Step 2. Remove Air Inlet & Trim Air Box

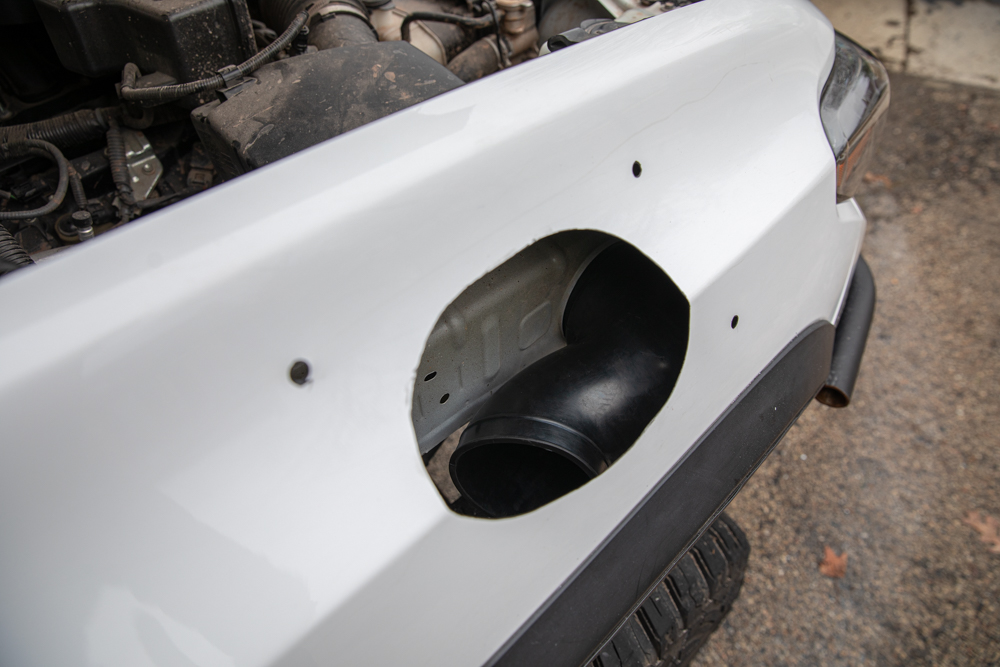
Once you have the airbox out, remove the inlet, seen in the picture above on the bottom. You can dispose of this.
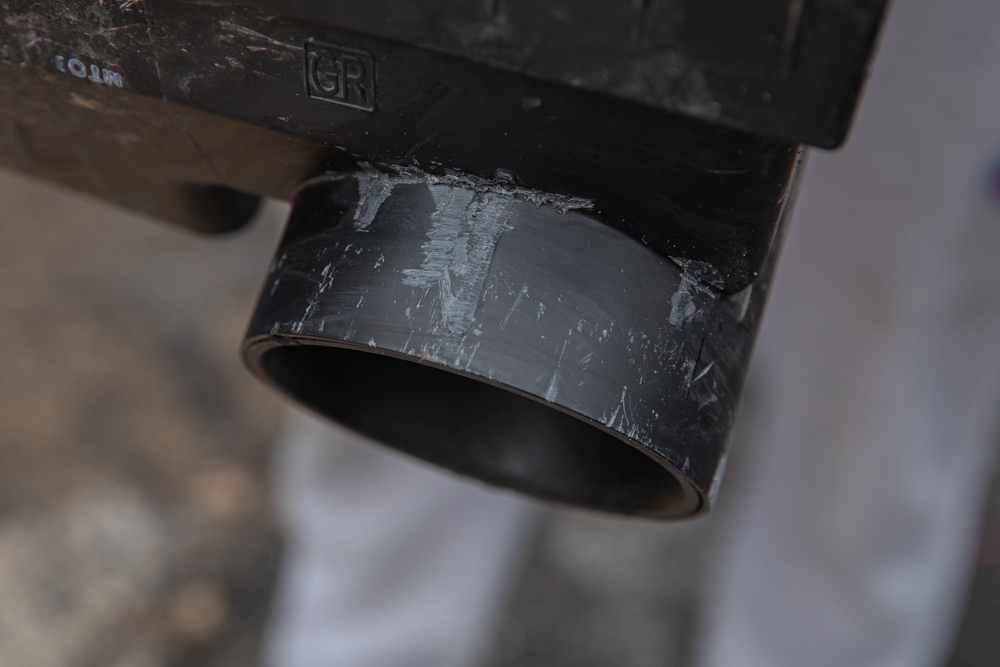
You will need to trim the mounting tabs for the inlet you just removed. I used a Dremel. Simple and easy. Final cuts seen above.
Step 3. Apply Template & Mark Holes
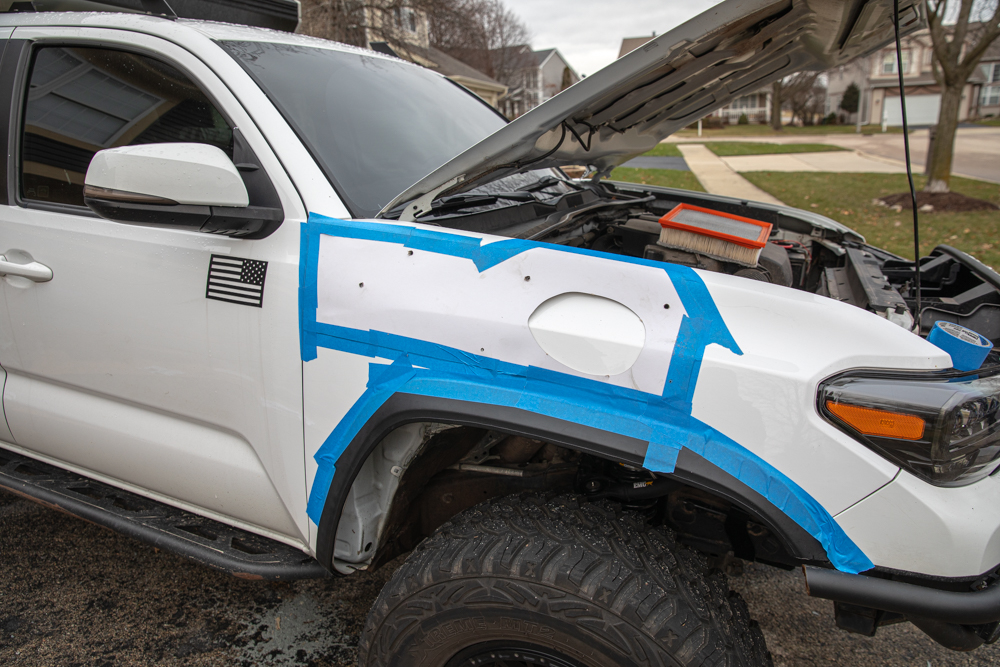
Now apply the provided template to your passenger’s side fender. Make sure that all the lines are evenly matched to the ends of the fender.
Carefully tape it into place. Second set of hands here is nice.
Take a marker and mark all the holes.
Step 4. Drill & Cut Holes

Now drill the holes. Use a step bit, or step up your drill bit size for a clean hole. I used two drill bits to make the smaller holes.
I also make a hole in the larger circle with enough room to get my jigsaw into. Then I made the entire cut. This helps to make it look cleaner.
You don’t have to use a handheld jigsaw, but it is quick and easy.
DO NOT use a hole saw here. It’s a terrible mistake and you will do damage.
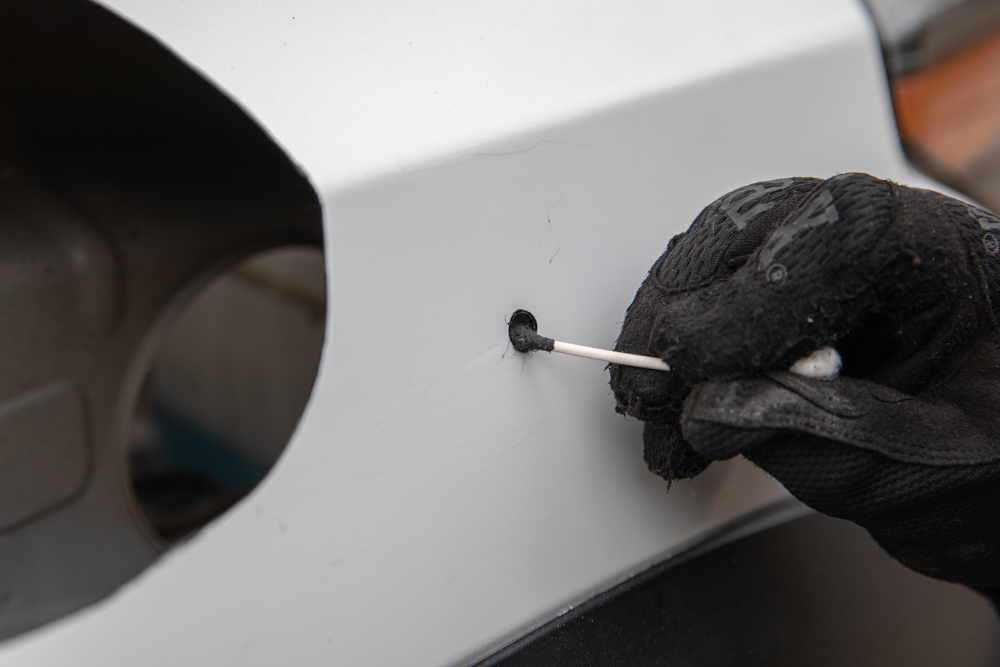
Clean up any burrs. I also used a Q-tip dipped in a small cup of some black spray paint to protect the bare metal on all my cuts. I would not skip this step.
Step 5. Install & Secure Flexible Tube
It’s important to note, if you don’t have an aftermarket bumper or cut fenders/flares like I do, you will need to remove your liner beforehand. There are several clips and a few screws to pop the liner out.
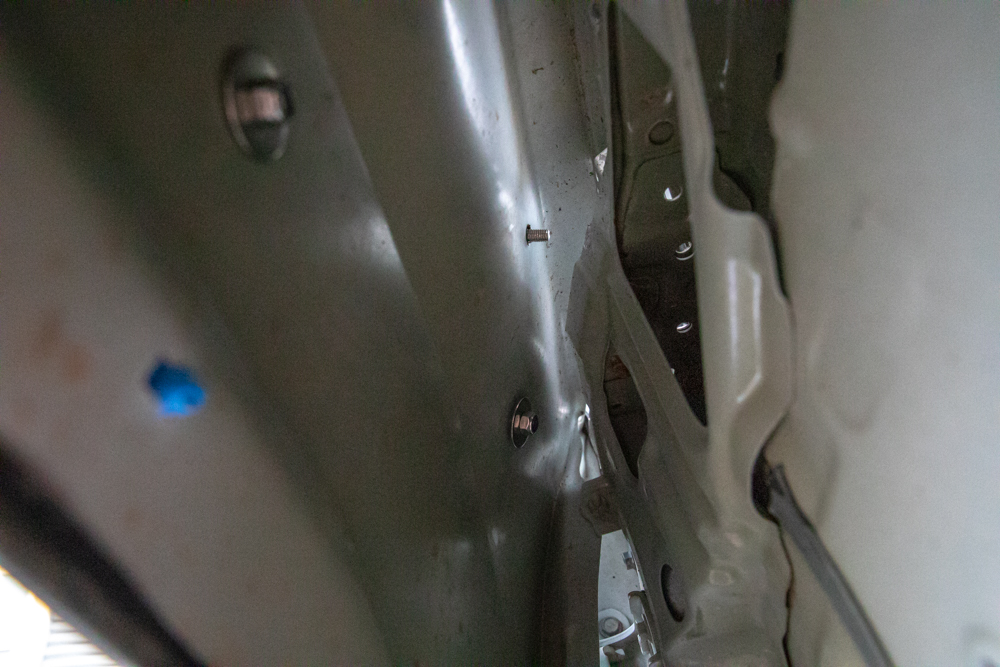
Once the liner is removed, take the large rubber connector tube and insert it through the factory intake inlet hole. There is a notch on the tubing so you understand its orientation. A good reference photo is seen above.

A shot from the inside of the engine bay. Make sure to put the hose clamp on before you reinstall the airbox.

Attach the airbox to the new intake tubing. This can be tedious. Install the tube before you secure the airbox again.
The hose clamp might give you a hard time. Make sure it is sitting in the groove on the tube all the way around. You will have to feel around to make sure. This is crucial because you need a good seal here.
Once that is done, you can reattach the airbox, and reassemble the filter, cover, etc.
Step 7. Prepare Snorkel Body

Prepare the snorkel body with blue thread locker and the threaded studs.
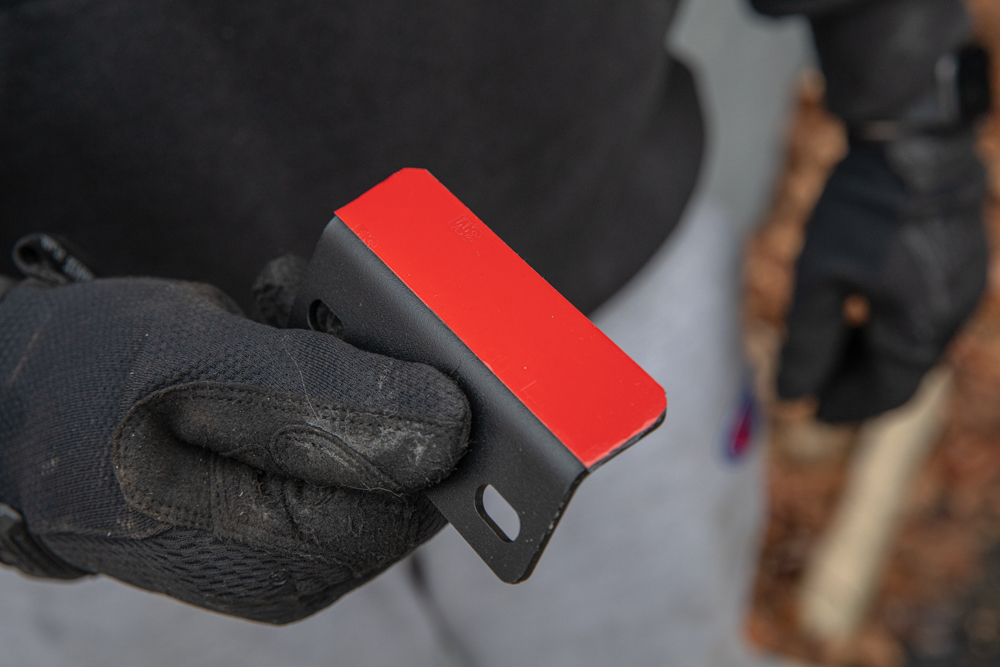
This is another key step. Above you can see the bracket that ARB wants you to bolt to the snorkel, and rivet to the A-pillar.
I chose to use double sided exterior 3M automotive tape. I found it at my local auto parts store. Added a piece along the bracket, and trimmed to fit.
Not necessarily recommended, but not that I am afraid to drill into my truck, I did not want to this time and wanted to test this alternative.
Note: This fitment works okay. I could have done a better job lining it all up with the truck, but there is some movement above 30-40 mpg and at highway speeds. I’m not currently bothered, but know that this is a risk. You can always go back and add rivets. You can’t undo drilling the holes and placing rivets as easily. I do think I could get it a little tighter though, and get less movement, the tape could have better contact.
Step 8. Attach Snorkel Body To Fender

Take your snorkel body and align with the holes. Depending on how well you did, it may slide right in. It may not. You might need to drill out some of the smaller holes. This did happen to me, but no big deal. Only a small delay.
Eventually, with a little physical persuasion (lol), we got it all to line up nicely. Don’t panic if it doesn’t work the first time. Again, some margin for error here.
Obviously be mindful that you also need to get the plastic intake end to meet the new tube. Another set of hands will help here.
Take all the washers and nuts and tighten the snorkel down to the fender.

Add the other hose clamp to the connect between the new tubing and snorkel body.

Bam! Almost there.
Step 9. Mount Snorkel Head
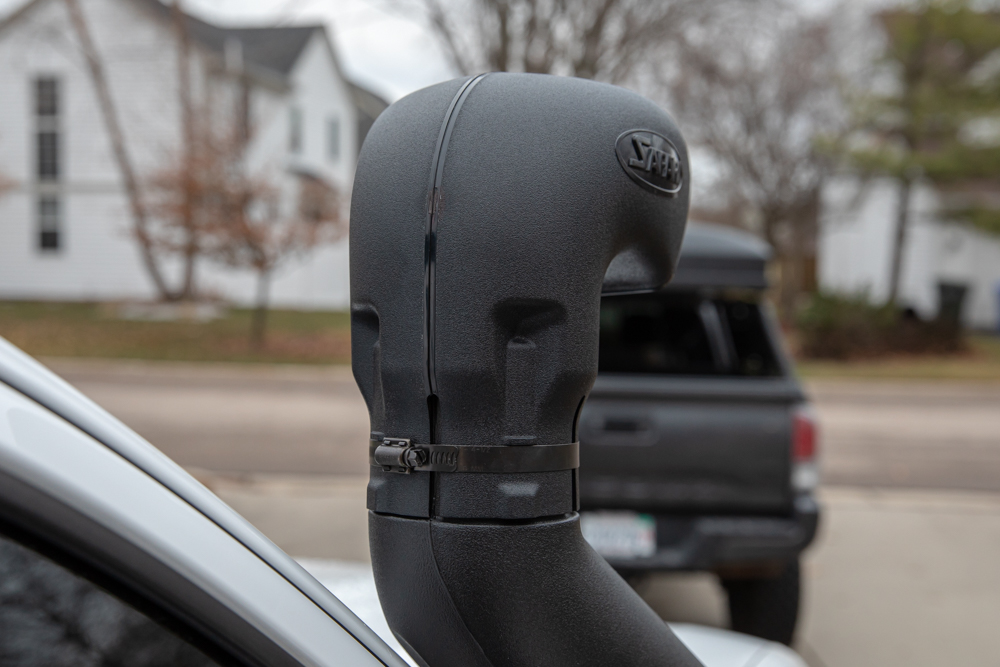
Finally, take the snorkel head and the black clamp, and attach the snorkel appropriately to the body. That’s it! Not so bad.
Finished Install
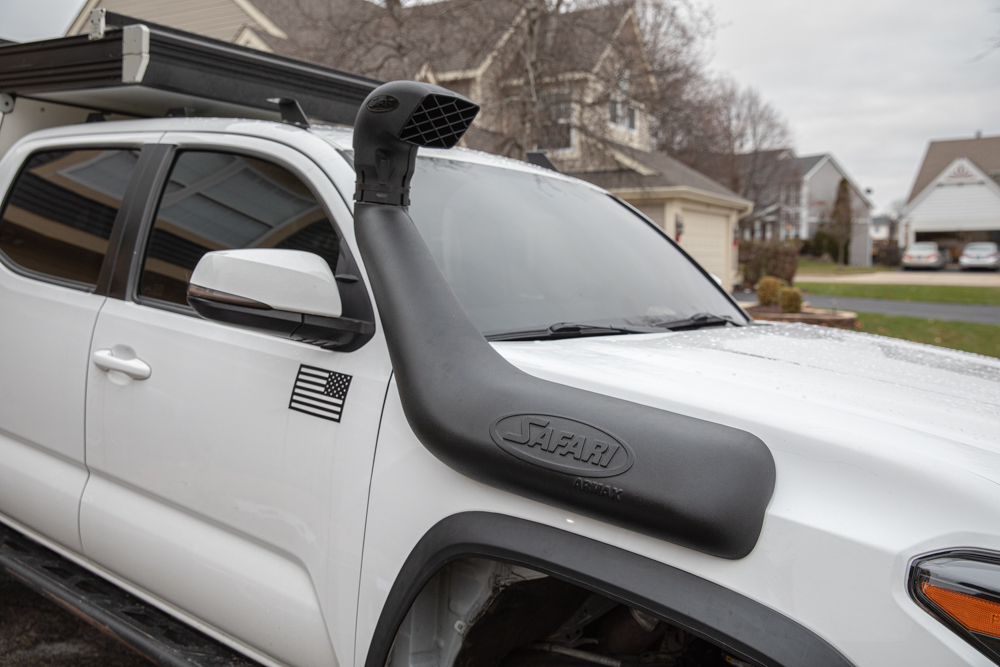
I love it! I’ve done this before, and become more comfortable with cutting trucks. But even with documentation, this was pretty straightforward and we were able to move along.
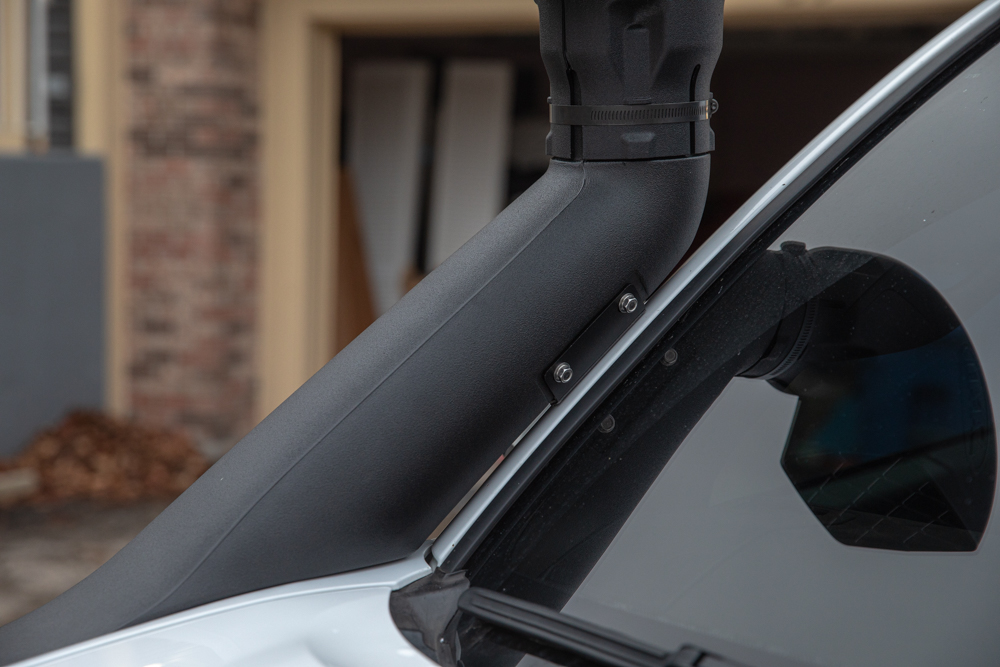
A quick close up shot of the 3M tape and bracket. It attaches relatively well, but again, the contact could be better. I could easily redo the tape though. We will see.
Review

The real question…? Have I crossed any super deep water. The answer… Not yet! However, I don’t need to submerge the truck under a huge amount of water to note that this system fits great, seals really well, and will do the job when expected to.
I’ve used a snorkel before, and I can tell you that I certainly felt better on the occasions where we were wheeling along, many states from home, and unexpectedly dropped into a deeper than anticipated river. The same goes for nights where we saw flooding and I accidentally hit massive pools of water late at night, that could have ended badly.
The fit and finish is awesome. ARB stands behind their products. And to top it off, I absolutely love how it looks. How could I go wrong?
Final Thoughts

Bottom line? Protect your engines. Invest in a snorkel if you plan on wheeling and adventuring hard to remote places.
I’m stoked with how this turned out – no complaints whatsoever. Let me know if you have any questions!