
YotaVerse 3rd Gen (2016-2023) Tacoma TRD Pro Grille (V2) – Detailed Install Guide, Review & Overview
Are you tired of the generic TRD Pro grilles that everyone seems to have for their 3rd Gen? Look no further than the Yotaverse V2 Pro Grille! This unique grille, released earlier this year, stands out in the market because it takes inspiration from the highly anticipated 4th Gen Tacoma and 3rd Gen Tundra. If you want to achieve a similar look to the newest Tacoma/Tundra, the V2 Pro Grille is the perfect choice for you.
In this blog post, I’ll guide you through a detailed step-by-step installation of the grille, while also highlighting its features and why it’s a rad product. Get ready to transform the appearance of your Tacoma with this outstanding grille option. Let’s dive in!
Find It Online
Who Is Yotaverse?

Yotaverse is an established company dedicated to providing quality aftermarket products and accessories for Toyota vehicles. With a focus on innovation and customer satisfaction, they strive to offer unique and stylish solutions that enhance the performance and appearance of your truck. Many Toyota enthusiasts looking to customize and upgrade their vehicles have trusted them over the years.
Direct from Yotaverse…
In 2016 we started this company as a way for Toyota owners to upgrade their trucks as economically as possible while still providing a quality product. We focus mainly on late-model Toyota’s and strive to give our customers whatever they need to upgrade their vehicles exactly how they want. We have personally installed and tested all of the products that we stock so we know that when a customer receives our product they will be 100% satisfied and we guarantee that all of our products will hold up to any abuse you throw at them. With that being said, feel free to send us an email at any time if you have questions about any of our products or would like to special order any parts that you don’t see on our site.
Replica TRD Pro Vs. V2 Pro Grille

Yotaverse offers two grilles for the 3rd Gen. Let’s take a look at how each of these grilles are different.
- The TRD Pro grille is inspired by the OEM TRD Pro grille design and carries a more traditional and familiar look.
- On the other hand, the V2 Pro grille is a distinct design inspired by the 3rd Gen Tundra and the anticipated 4th Gen Tacoma, offering a more unique and custom appearance.
- The V2 Pro grille incorporates integrated raptor lights, which are not found in the TRD Pro grille (separate product).
- The V2 Pro grille has side DRL lights that have the option to be white DRLs or amber turn signals, the TRD Pro grille does not.
- The mesh pattern on the V2 Pro grille is significantly bigger than the one on the TRD Pro grille.
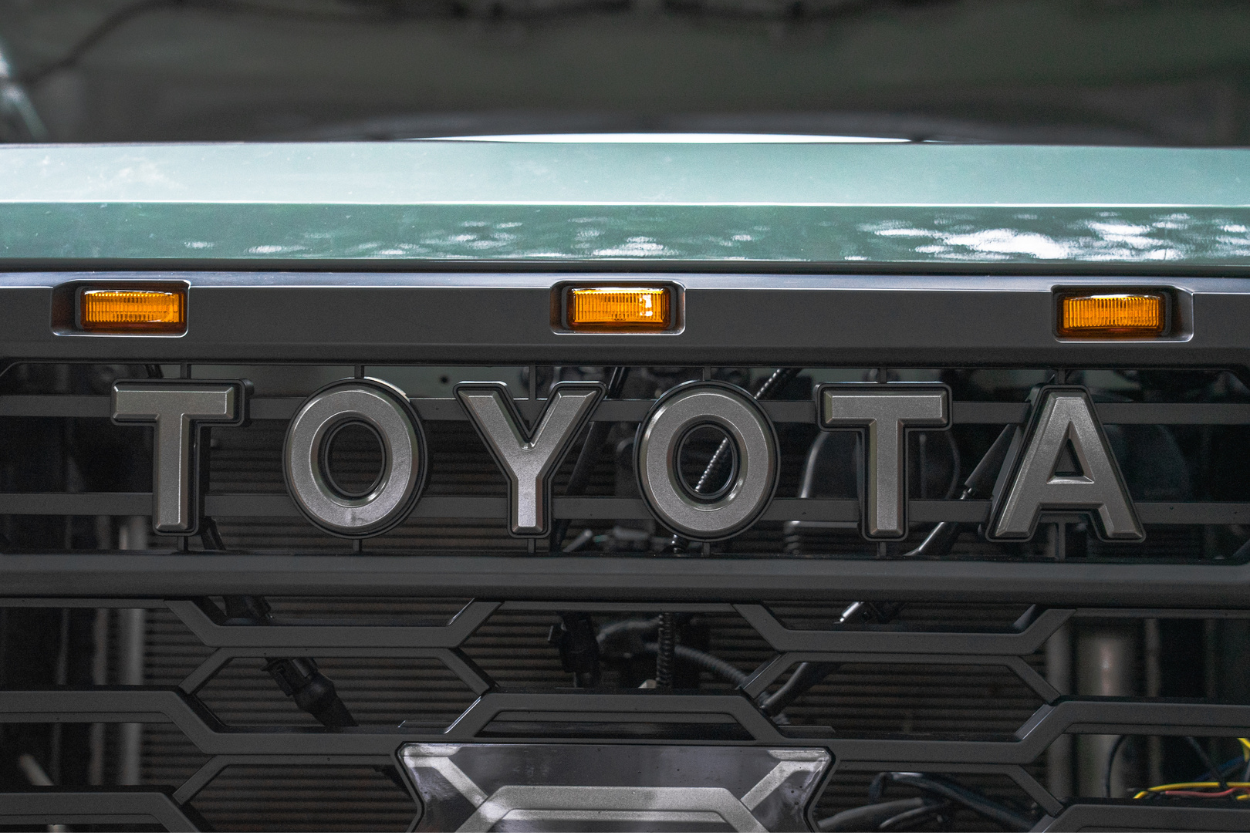
- You can choose to use the provided Toyota lettering (as seen in this post), or you can reuse your factory center emblem on a bracket that comes with the kit. This is not preferred by most, as it leaves two gaps on the grille and most people like the heritage Toyota lettering more.
Overall, while both grilles aim to enhance the aesthetics of Toyota vehicles, the TRD Pro grille embodies a more traditional design, while the V2 Pro grille offers a distinct look with newer upgrades.
Just for reference, the above photo shows how the grille can integrate your OEM logo.
V2 Features

Along with its upgraded appearance, this grille introduces several new features that have become highly appealing to owners.
Integrated Raptor Lights
With the increasing number of Tacoma owners opting to add aftermarket raptor lights to their grilles, it was only a matter of time before a grille like the V2 Pro came along, integrating these sought-after lights seamlessly.
Not only do they offer increased light output for your truck, but they also give off a factory-like appearance.
Side DRLs (Amber / White)

The unique feature of these lights sets the Pro-style grille apart from others on the market. They serve a dual purpose, functioning as white daytime running lights and transforming into amber turn signals.
Personally, I find these features quite impressive, although I do wish the wiring process could be simplified for easier installation.
TSS Sensor Garnish

Our OEM grille included a TSS cover. It was great that Yotaverse provided a new cover specifically designed to fit their grille more seamlessly.
As of today, we haven’t encountered any problems with the TSS functionality using this new cover.
Mesh Pattern

One of the biggest changes between the OEM grille I had on my TRD Off-Road and the new one is the mesh pattern. On the OEM grille, the pattern is much smaller.
Yotaverse designed the grille like this with the purpose of improved airflow and also for a crazy aggressive look.
My Configuration

When purchasing the V2 Pro grille you have a few options to customize it to your liking. The first of which is the color of the grille, you have the option to pick between silver or black. Then you can either purchase the grille with the side DRLs or without.
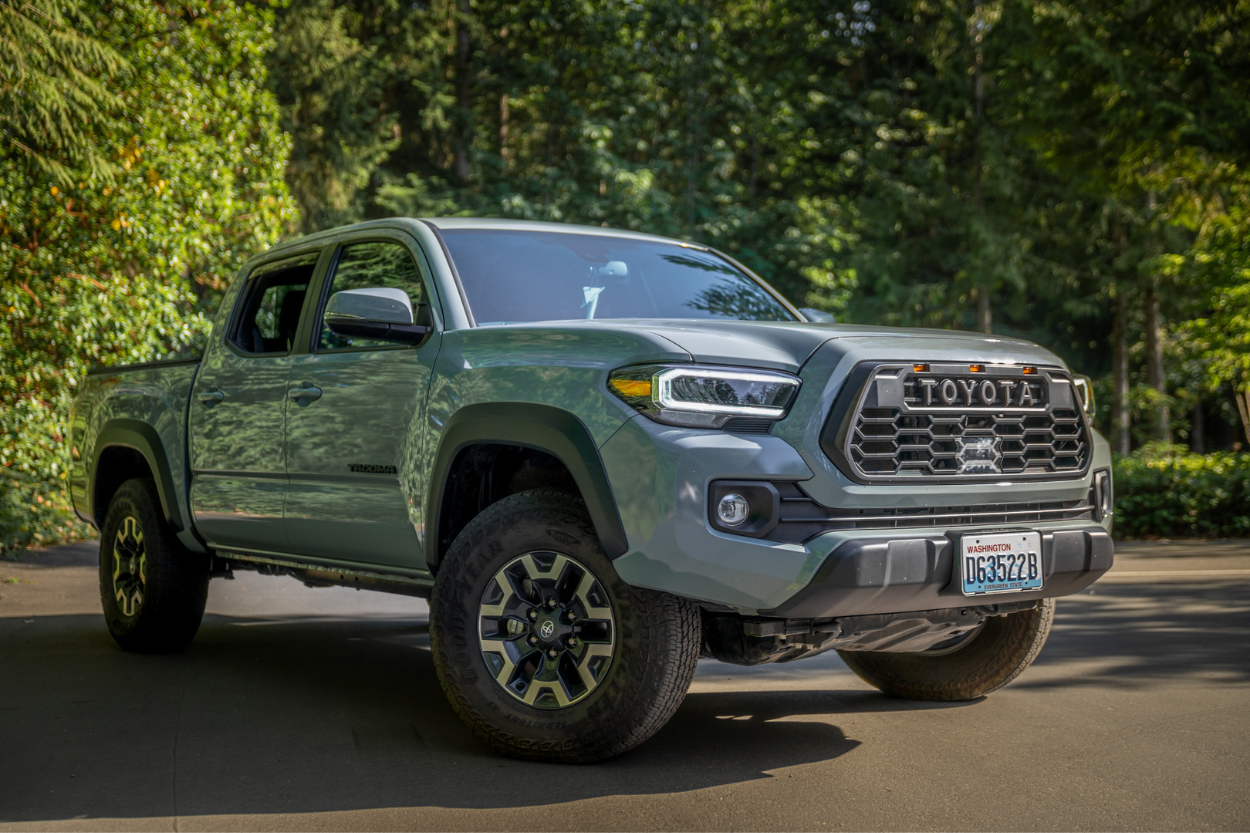
I decided to purchase the grille in black and with the side DRLs. In my opinion, the black color provides a better contrast against the Lunar Rock exterior of my truck, especially considering the existing black accents I have already throughout the truck. I chose the side DRLs because they add a cool and unique feature to the overall look. Although I haven’t connected them yet, I plan to do so in the near future, and I’m confident it will enhance the appearance of my truck.
Before You Begin

There will be a few tools and parts needed to complete this installation.
These include…
- Phillips-Head Screwdriver
- Trim Removal Tool (optional but recommended)
- 10mm Socket
- Ratchet
- Flathead Screwdriver
- Bussmann Fuse Tap 2-10A – HHH ATM (optional if installing the Raptor Lights)
- 7.5-Amp Fuse (optional if installing the Raptor Lights)
- Crimper (optional if installing the Raptor Lights)
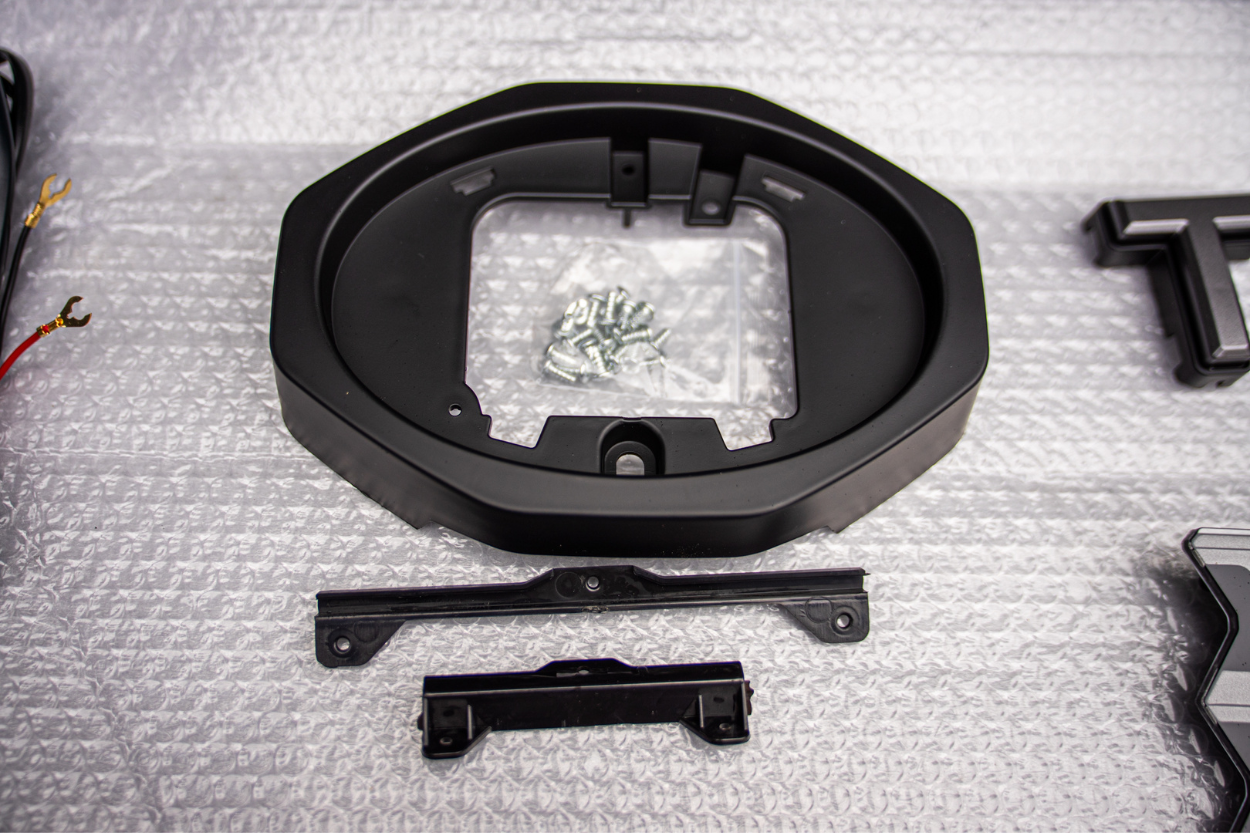
One of the coolest features of the grille is the interchangeable grille emblems. This grille offers multiple emblem options and you have the choice to either use the OEM Toyota emblem from your stock grille or select from the letters provided with the grille.
The grille I received, came with the Toyota logo, however I wanted to change it to the “TOYOTA” lettering. If you are wanting to change out the emblem you have, you will need to use the small screws and a Philips-head screwdriver to secure the emblems to the grill.
1. Remove OEM Grille & Grille Insert

There are a few different parts to removing the OEM grille. Make sure you keep everything that you remove because you will be reusing them after.

Using a 10mm socket and ratchet start by removing the two bolts connecting the grille to the engine bay.

Remove the tabs located on the outer side. You can use a pry tool or any flat tool, such as a screwdriver, to carefully pry them out. We recommend using a pry tool for easier removal.

Unclip the Toyota Safety Sense (TSS) harness from the bumper cover. This harness will be transferred to the new grille.

Use a pry tool to unclip the TSS harness from underneath the attachment connecting to the front bumper cover. Gently release the clips using the pry tool.
Grab either end of the OEM grille and slowly unclip it from the front end. Be gentle to avoid any damage.

Next, remove the grille insert. Push out 8 tabs (red), 6 on the bottom and 2 on the top, to release the grille insert. Additionally, unclip the TSS harness (red) that is secured to the back of the grille insert. And you will also want to unscrew 9 screws (blue).
2. Remove TSS Sensor

Now that you have removed the OEM grille, it’s time to detach the TSS sensor from it in preparation for installation on the new grille.
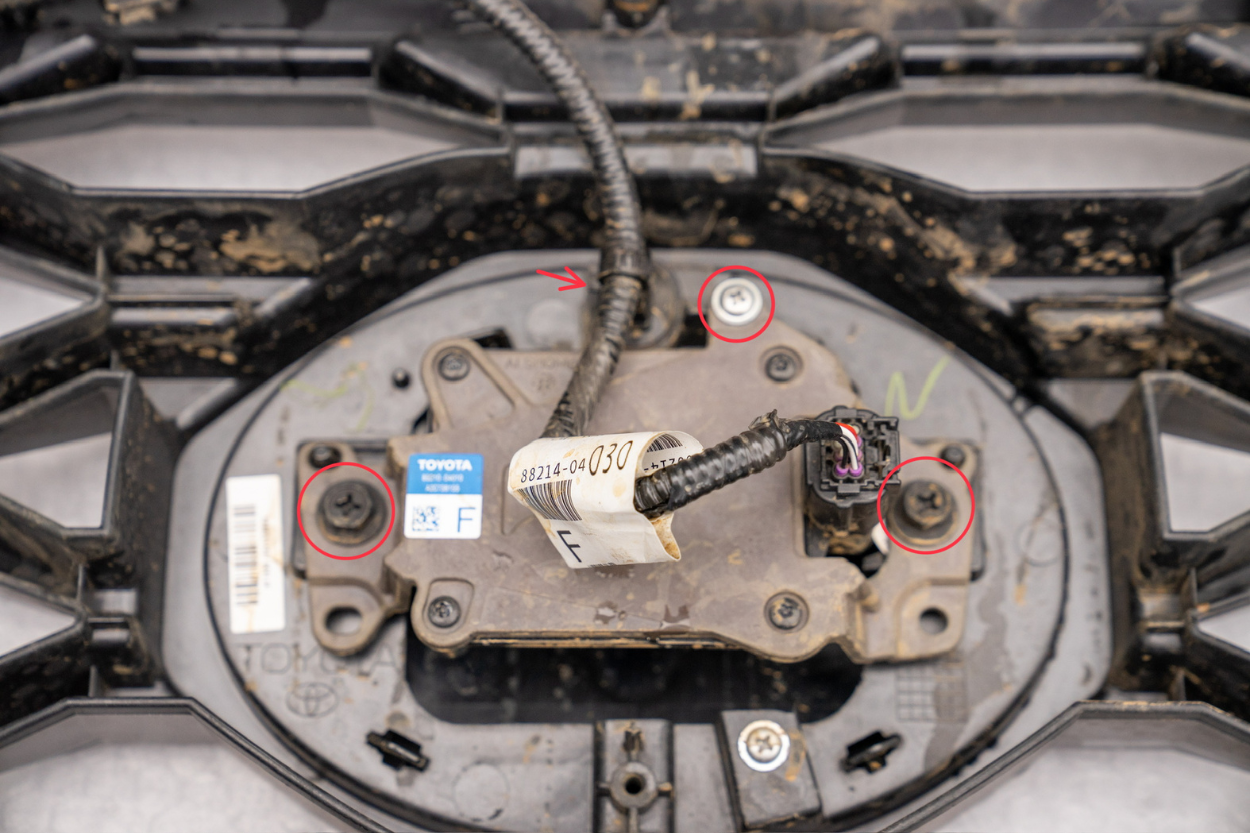
Begin by using a Philips head screwdriver to remove the three screws that secure the sensor to the old grille. These screws are typically located near the top or sides of the sensor. Set the screws aside for later use.
After removing the screws, unclip the harness that connects the TSS sensor to the OEM grille. Gently press the release tab or connector latch, then separate the harness from the grille. Take care not to damage the wires or connector during this step.

With the sensor detached, you will notice two silver spacers positioned beneath it. These disks are crucial for installing the TSS sensor on the new grille. Slide them out from underneath the sensor and make sure to keep them handy, as they will be required for the installation process on the new grille.
3. Install V2 Pro Grille

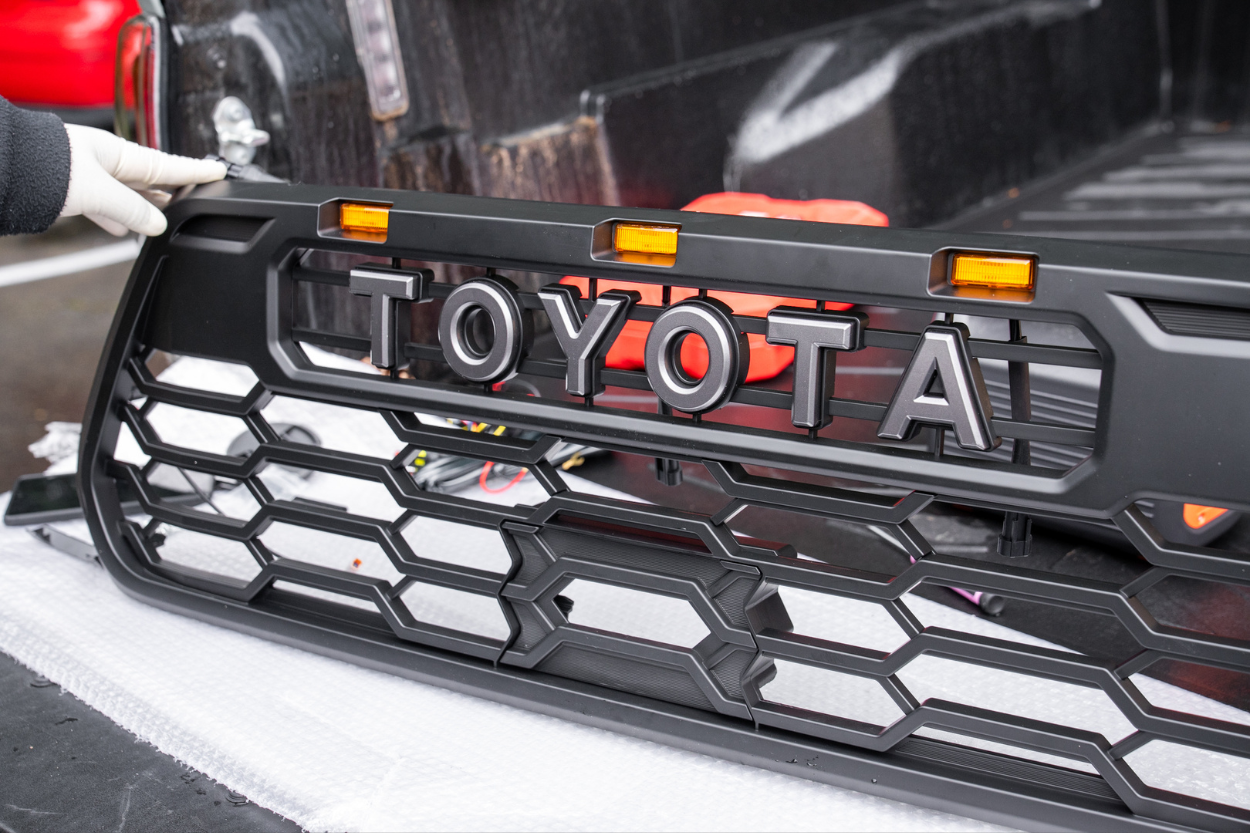
Before starting the installation, ensure that you have the grille in the correct orientation. Double-check the positioning to make sure it aligns properly with the grille cover.
Take note of any wires hanging off the grille. Carefully tuck them into the center of the grille so that they don’t get trapped or tangled when you reattach the grille to the cover. This step helps ensure a smooth and hassle-free installation.

Align all the tabs on the grille with the corresponding holes on the grille cover. Take your time to position them accurately. Once aligned, apply gentle pressure and push the grille and cover together. You should feel and hear the tabs clicking into place as they securely attach.
4. Install TSS Sensor On New Grille

Before installing the grille back onto the Tacoma, you will need to get the Toyota Safety Sense back onto the grille. The steps will be the same as when you removed it from the OEM grille, just this time in reverse.

Begin by installing the TSS garnish, which goes in the front of the grille. Use a Philips head screwdriver to secure it in place with the four screws provided. Ensure the garnish is aligned properly and tightened securely.

Find the circular spacers that were removed from the old grille. Slide these spacers onto the new grille, making sure the larger side is facing upward.

Now, it’s time to reinstall the TSS sensor onto the new grille. Use the same three bolts that were used to attach it to the old grille. Align the sensor with the designated mounting points on the new grille and tighten the bolts securely. Ensure the sensor is positioned correctly and snugly attached.
Note that there is no clip to hold the harness of the TSS in place on the new grille. If desired, you can use zip ties to secure the harness and provide additional stability. However, it is not necessary if the harness fits securely without any movement.
5. Reinstall Grille

To reinstall the grille onto your Tacoma, simply follow the steps listed in the first section, in reverse order. Begin by aligning the grille tabs with the corresponding holes and firmly clicking them back into place. Once the grille is securely attached, reinstall the harness and ensure it is neatly tucked underneath the bracket.
Next, reattach both tabs that were previously removed, making sure they are properly positioned. Finally, complete the installation by reinstalling the two 10mm bolts, using a socket and ratchet to tighten them securely.
6. Optional: Wire Raptor Lights

Start by connecting the provided harness to each of the three raptor lights. Once connected you will want to pull the wires up over to the fuse box. At this time you can also clean up any excess wiring.

Next, ground the black clip of the harness in the engine bay. A suitable spot for grounding is the bolt located directly above the fuse box cover, as you will be connecting the other wire to the engine fuse box. To ground the wire, slightly loosen the bolt, slide the black wire through, and then retighten the bolt. Give it a firm tug to ensure it remains securely in place.
Remove the fuse box cover and then locate the pliers that are secured to the lid of your fuse box and pull them out. These are the pliers that you will be using to pull the fuse.

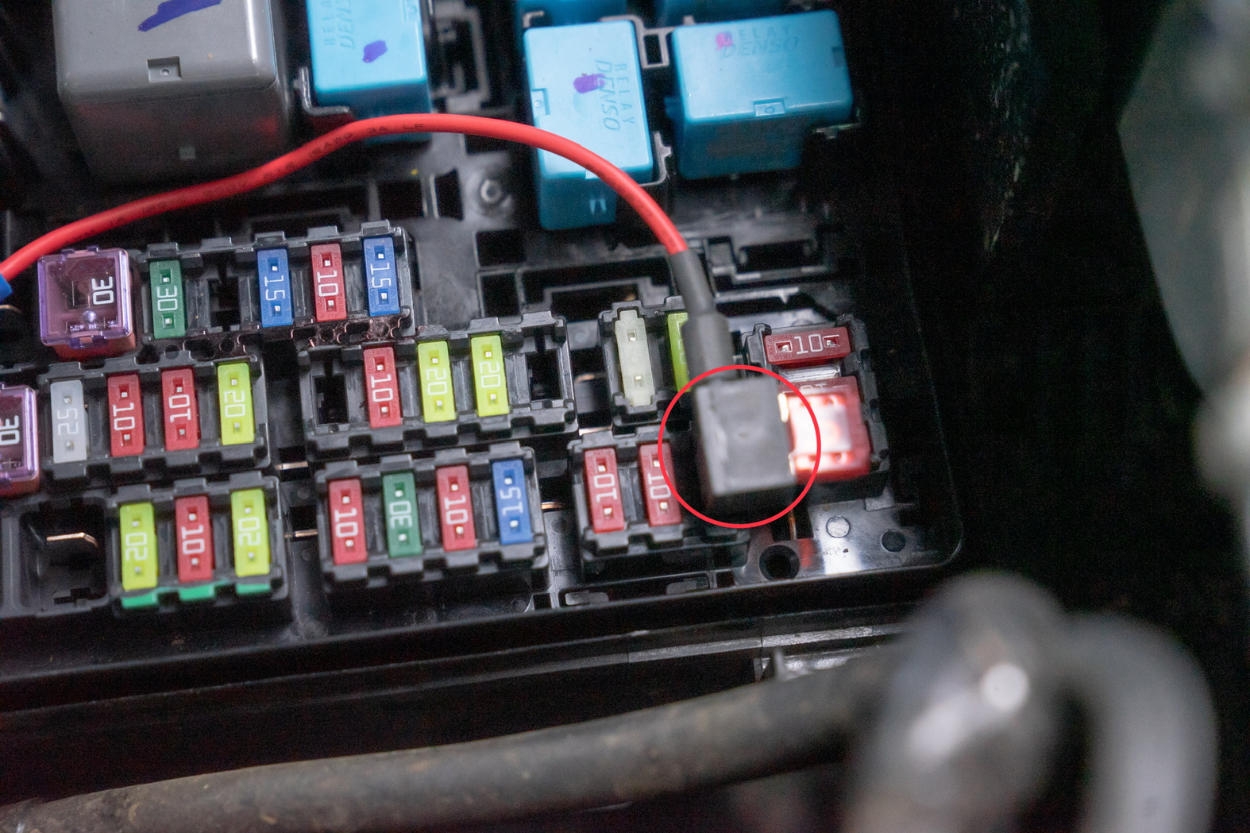
Locate the 10-amp fuse that you will be tapping into. We decided to use the right headlamp which was the first 10-amp fuse on the first line (refer to the photo). If your fuse box is different, consult the fuse box diagram on the interior of the lid for guidance. Look for the fuse labeled “H-LP RH-LO.” Alternatively, you can connect the fuse tap to a different 10-amp fuse, but we found this to be the easiest option.
Once you have located the fuse, carefully remove the 10 amp fuse from the fuse box using the provided pliers. Insert this fuse into the top slot of the fuse tap. Then take the 7.5-amp fuse that you purchased and place it in the other slot of the fuse tap.
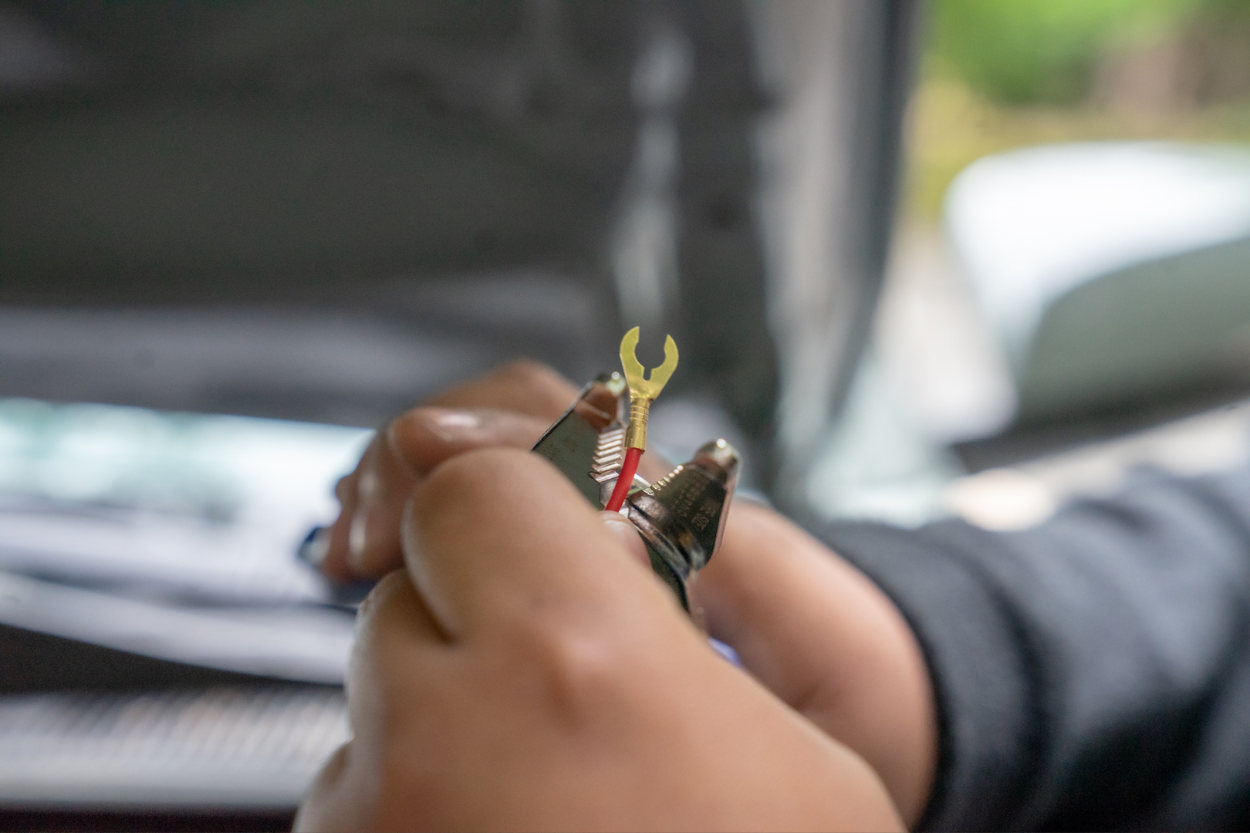
With everything securely in place, connect the red wire from the raptor lights harness to the fuse tap. Use a crimping tool (or your preferred tool) to remove the claw from the red wire and strip down some of the insulation.

Insert the red wire into the blue cover on the fuse tap and secure everything using the crimping tool. Give it a gentle tug to ensure it is secure. If it doesn’t come out, you’re all set.
Complete the installation of the raptor lights by placing the fuse tap back into the fuse block. Test the lights to ensure they are functioning properly.
7. Optional: Wire Side DRL

The V2 TRD Pro grille we received includes side DRLs, but we haven’t discovered a wiring method that avoids splicing or cutting into the headlight wires yet. However, Yotaverse has provided us with a video guide for installation. Additionally, there is an alternative option available for those seeking an alternative solution. Both linked below.
Initial Review
When I first saw this grille, I was immediately drawn to the unique design that set it apart from other TRD Pro grilles available in the market. What caught my attention the most were the integrated raptor lights, which added a nice touch and enhanced the overall aesthetics.
One feature that impressed me was how they ensured the grille’s durability by sealing all the openings, preventing water from penetrating into the wiring of the raptor lights and side DRLs. This was a great add on their end because I know many other raptor lights on the market tend to have water leak issues because they are not sealed properly.
Another feature I was excited about was the option to select my preferred emblem. As mentioned above, the grille comes with two options, reusing your factory badge and the “TOYOTA” lettering. I opted for the Toyota lettering because it felt more like the TRD Pro grille and in my opinion, it just looked nicer.
Finally, the installation process was straightforward, and everything fit perfectly within the bumper cover, making the overall experience even better.
Final Thoughts

I hope this blog post has given you valuable insights! From the eye-catching design to the seamless integration of raptor lights, the V2 TRD Pro Grille delivers both style and functionality.
I am currently figuring out a solution for wiring the side DRLs on the Tacoma and when I do, I plan on writing a separate post as an update. In the meantime, feel free to leave ideas in the comments below!