This full-body backbend engages muscles all the way from your neck to your feet, and puts your body in a position we never normally get into during daily life. Depending on how much back mobility you have, that can feel really refreshing—or really awkward.
“Locust pose is a bit of a backbend and a bit of a back strengthener,” says Rachel Hirsch, RYT, founder of Empowered Yoga in Los Angeles. “You’re opening the front line of the body, you’re working the back line.”
And if you do locust pose in yoga right, you just might spend the rest of your day feeling a little taller and longer.
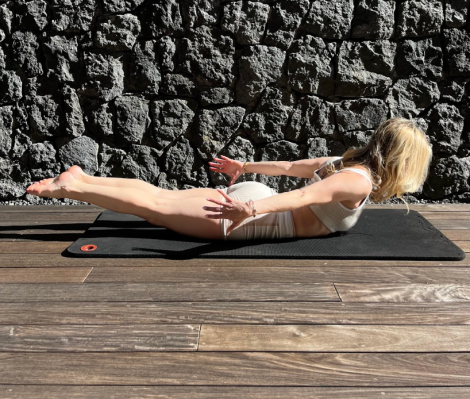
How to do locust pose with perfect form

- Lie all the way down on your belly with your hands down by your hips and your head turned to one side. Some teachers will cue you to keep your feet together, but Hirsch says that keeping them hip-width apart can be helpful if you have low back issues.
- Pull your belly button to your spine as you press the pelvis into the ground and draw your shoulders back to peel your head, chest, arms, and legs off the floor as you reach your arms back and point your toes.
- Hold for three to five breaths, then relax back down on the floor, turning your head to the other side.
Which muscles are you working?
With the right approach, locust pose is a foundational yoga pose that can strengthen nearly the entire back of your body. You’ll feel it most in your back muscles and glutes, but it’ll also work your hamstrings, inner thighs, quadriceps, triceps, deltoids, and even the calves and feet.
“When you’re doing it right, it is so intense,” Hirsch says.
The biggest benefits of locust pose
There’s a few reasons why yoga teachers often include this position in their flow.
1. It strengthens your lower back
Lifting up from a face-down position this way engages the back muscles first and foremost, building strength in this part of the body that’s all too often prone to injury.
2. It improves your posture
Locust pose can help improve your posture—yes, even if you’re a chronic sloucher.
“So often, especially desk sitters, you start to curve forward and slump,” Hirsch says. “So this helps realign your spine, lifting you up and creating proper alignment, which should relieve a lot of back pain [and] shoulder pain.”
She says this can be especially helpful during the winter months when we tend to hunch a lot. (You may also want to add these other yoga poses for better posture into your practice!)
3. It can energize your body
This heart-opening position with the chest spread wide is incredibly energizing, adds Wendy Cope, a yoga instructor with Crunch Fitness. “If you just need to shift some energy around, you’re feeling stale, this is a really good thing to do to make you breathe and connect with your body,” she says.
“So often, especially desk sitters, you start to curve forward and slump. So this helps realign your spine, lifting you up and creating proper alignment, which should relieve a lot of back pain [and] shoulder pain.” —Rachel Hirsch, RYT
Variations to make locust pose more accessible—or more challenging
While doing locust pose with your hands reaching back may be the most classic version of this pose, there are a few other arm variations that can offer slightly different benefits.
1. Hands clasped
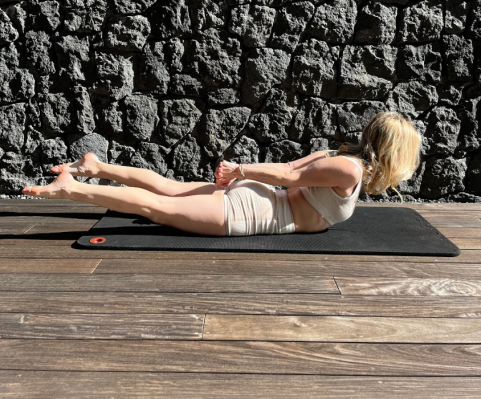
If you’re looking for more expansion through the chest, a popular locust pose variation is to clasp the hands into a fist behind your back, and float them above your hips. Hirsch says that this will give you a little more leverage to lift up higher, and will help you roll the shoulders back more.

- Lie all the way down on your belly with your hands down by your hips and your head turned to one side. Some teachers will cue you to keep your feet together, but Hirsch says that keeping them hip-width apart can be helpful if you have low back issues.
- Pull your belly button to your spine as you press the pelvis into the ground and draw your shoulders back to peel your head, chest, arms, and legs off the floor as you reach your arms back and point your toes.
- Clasp your hands together behind your back.
- Hold for three to five breaths, then relax back down on the floor, turning your head to the other side.
2. Swimming
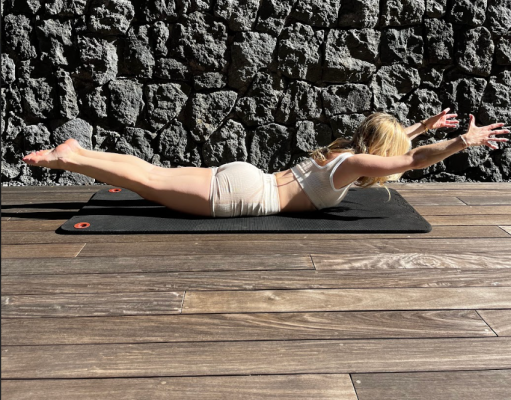
If you’re working toward a handstand, this variation can help strengthen the shoulders to prepare for it. Start with your hands back, like in traditional locust pose. Then bring your arms out and around to reach forward, “almost like you’re swimming,” Hirsch says. But be warned: This version can be intense, and will get your heart pumping.

- Lie all the way down on your belly with your hands down by your hips and your head turned to one side. Some teachers will cue you to keep your feet together, but Hirsch says that keeping them hip-width apart can be helpful if you have low back issues.
- Pull your belly button to your spine as you press the pelvis into the ground and draw your shoulders back to peel your head, chest, arms, and legs off the floor as you reach your arms back and point your toes.
- Then bring your arms out and around to reach forward
- Return your arms to starting position.
- Continue alternating your arm position for three to five breaths, then relax back down on the floor, turning your head to the other side.
3. T-shaped arms
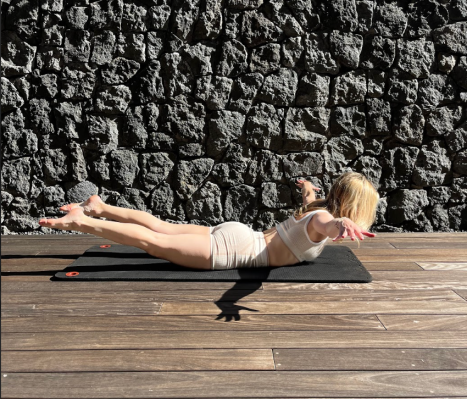
If going into a full forward reach (like in the swimming variation) feels too intense, you can take your arms straight out to either side. “That helps when you have really tight shoulders,” Hirsch says.

- Lie all the way down on your belly with your hands down by your hips and your head turned to one side. Some teachers will cue you to keep your feet together, but Hirsch says that keeping them hip-width apart can be helpful if you have low back issues.
- Pull your belly button to your spine as you press the pelvis into the ground and draw your shoulders back to peel your head, chest, arms, and legs off the floor as you point your toes.
- Lift your arms straight out to your sides so that your body forms a T-shaped position.
- Hold for three to five breaths, then relax back down on the floor, turning your head to the other side.
Common form mistakes to avoid
People sometimes try so hard to lift off the ground in locust pose that they crunch their neck or the lower back (or both!). To avoid this, think of creating length throughout the body by reaching forward through the top of the head and out through your toes—and making sure your core is engaged.
“We want to imagine lengthening that spinal cord as much as possible,” Cope says. “You don’t want any of those vertebrae to jam against each other.”
Cope also warns to keep the legs straight. “Because if you bend your knees, that’s going to put more pressure on your lower back,” she says.
If you feel any pain in this posture, that’s likely a sign that you’re compressing somewhere you shouldn’t be, so back off a bit. “If something doesn’t feel right, it’s probably not right,” Hirsch says.
Beginner tips for locust pose
With an intense posture like locust pose, it’s sometimes easy to forget the most basic step: breathing! “Everyone forgets to breathe,” Hirsch says.
Also, don’t get caught up in how high you can lift off of the ground.
“Height matters the least for me when I’m teaching: I care about length first, because once you get the hang of length, you’re really set up for success in back bends,” Hirsch says. “You understand the alignment more, and then we can add the lift.”
Safety first: Remember to warm up
There’s a reason why locust typically comes near the end of a yoga flow—it’s an intense position that challenges your body in multiple ways. If you’re practicing it on your own, be sure to warm up first and get the blood flowing to your back with movements like cat-cows and downward dogs into planks.
FAQ
1. What is locust pose good for in yoga?
Doing locust pose regularly can build back strength (particularly in the low back) that you might not otherwise target through everyday activities. “As we get older, that can protect our low back, which people so often injure,” Hirsch says.
This pose can also help counteract the effects of sitting for long hours. “[For] people who are desk jockeys, this would be something good to do maybe once a day just to really squeeze the shoulder blades back and get a different perspective,” Cope says.
2. How long should I hold locust pose?
Hirsch recommends holding this posture for three to five breaths, and repeating it up to three times.
3. Who shouldn’t do locust pose?
While practicing locust pose can help build strength in healthy backs, if you have clinical back pain, talk to your doctor first about whether this kind of back bend is safe for you before trying it. And if you’re pregnant, you’ll want to avoid this pose altogether. “We don’t want to put pressure on the belly in pregnancy for anything,” Cope says.
