Installing a suspension lift on your Jeep Wrangler is one of the most exciting and most common upgrades any Jeep owner can think of. Lifting your Jeep Wrangler results in higher ground clearance, better approach, departure and break over angles and ability to put on larger tires. That means you can take your Jeep out to the backcountry and enjoy some real offroading. With all that fun, you might eventually find yourself doing a water crossing, or simply playing in mud.
Lifting your Jeep Wrangler increases the distance between the frame/body of your Jeep and the axles. In addition to installing longer shocks, springs, control arms and sway bar links, there are several hoses and cables that connect the body of your Jeep to both axles, which will need to be extended as well, especially if you’re lifting your Jeep more than 3″. One of the elements that is often overlooked, is the axle vent hose.
On any Jeep Wrangler, both front and rear axles have vent hoses installed, right next to the differential, which run up from the axles and terminate at a higher level, typically on top of the wheel well.
The purpose of the vent hose is to keep the vent opening further away from the axle tube where there is dirt and moisture (water) that might enter the axle and differential. Using the hose restricts debris while allowing air in and out easily. Axle vents allow pressure inside the differential to equalize with the atmospheric pressure.
There are in fact a total of four elements of your typical Jeep Wrangler that have vent hoses installed: front axle, rear axle, transfer case and auto transmission. While you can consider extending all four during suspension lift installation, it’s the axle vent hoses that are impacted directly by the lift. Those are also the hoses that terminate inside the wheel wells, and need extending if you plan on doing any water crossings in your Jeep. The transfer case and transmission vent hoses terminate inside the engine bay, right below the plastic engine cover.
Leaving the axle vent hoses at their stock length might result in them getting disconnected from the axles during flexing on the trail, and can lead to debris and water entering the axles and differentials, contaminating gear oil and ruining your axles and gears.
It is a good idea to plan on running the extended axle vent hoses higher that the stock termination location. For the front, it could be the top of the engine bay, and for the rear it could be right behind the passenger side tail light. That way there is less chance of water being sucked into the hose and eventually the axle, during deep water crossing. If the water level is higher than that, you have bigger problems 🙂
Under normal operations, drivetrain assemblies heat up and the air inside expands, increasing the pressure and thus the need to be vented to the atmosphere is created. When the drivetrain assembly cools down the air inside contracts and creates a vacuum.
Driving through water crossings creates a vacuum caused by the drivetrain assembly being cooled rapidly by the water.
You could run into a situation where the cap at the end of the vent hose is clogged by mud or debris, due to being located right inside the wheel well. Pressure inside the axle can’t be equalized so the air will be sucked thru the axle seals. Many times the seals are still submerged below water, leading to the water being drawn into the drivetrain.
Even with the vent hose cap not plugged by debris, if it’s below water level, it’s going to pull water inside the axles as well.
It is highly recommended that you perform a differential fluid change after your Jeep has spent any extended period of time in water.
In order to avoid vent hoses coming off the axle housing during flexing while offroading, and assuring that the open end of the breather hose is always above water level, I would highly recommend that you put in this Jeep JK axle vent hose extension after installing a lift.
You can simply buy extra 3-4″ of fuel line and add it to the length of each vent hose with the help of a hose mender, or you can replace the entire hose with a longer one. I opted for buying new, longer hose. You want to purchase fuel line and not a plastic or vinyl hose, because gear oil and ATF are too aggressive towards regular hoses. The chemicals will coat the inside of the vent hose and break down plastic eventually. Any hose mender or adapter used, should be made of brass and not plastic.
I have a 2012 Jeep JK so if you own a different Model Year Wrangler, some things might look different, but hopefully you can use most of the information provided.
Disclaimer: Like I always mention I am not a professional mechanic, I just try to do as much work on my Jeep as possible. It helps me learn more about my vehicle and save some money that can be spent on parts and upgrades.
I take no responsibility for any injury or breakage which might occur if you decide to follow these steps. You have to decide if you’re comfortable working on your Jeep. If you’re not, please have a professional complete this project for you.
As an Amazon Associate I earn commission from qualifying purchases. It allows me to offer contents of this website free of charge to everyone.
Parts and tools needed:
2. Stainless Steel worm gear hose clamps
3. 5/16″ Hose Mender (optional)
6. Zip Ties
7. Flathead and Phillips screwdrivers
8. Brass Hose Barb Fitting, Female Adapter, 5/16″ Hose ID Barbed x 1/4″ NPT Female (optional)
9. Pneumatic Muffler Silencer, 1/4″ Male Thread Brass (optional)
10. Four feet of twine, rope or paracord with a weight attached
11. Safety Glasses
Procedure:
Step 1:
Prepare your tools and get everything ready before you start the project. Park your Jeep on a level surface with your front wheels turned all the way to the right, apply emergency brake and put your transmission in park or in gear if you have a 6-speed manual transmission.
Step 2:
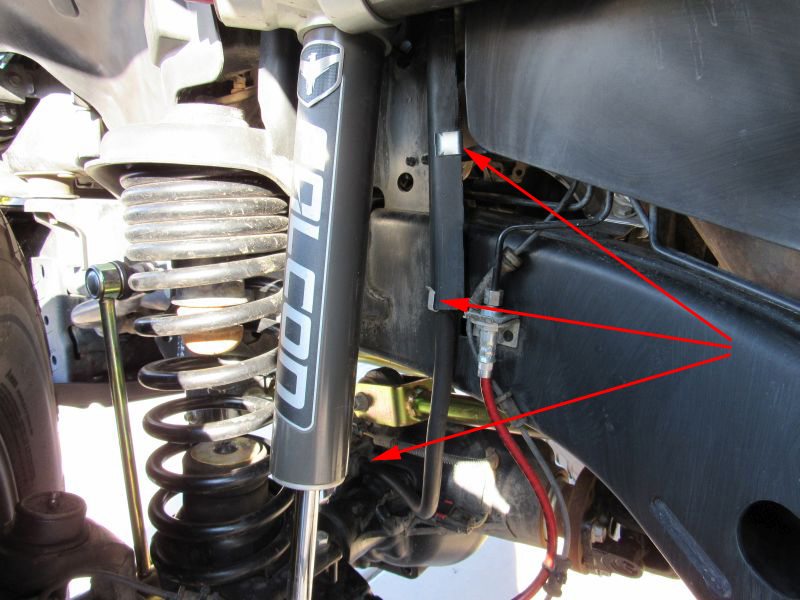
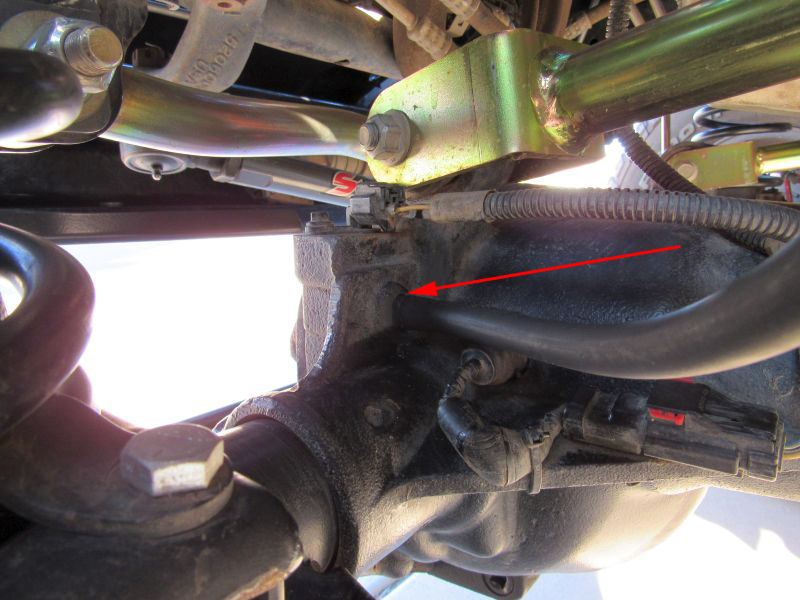
Locate the front axle vent tube. Note where it connects to the axle housing and the two clips securing it to the side of the shock tower.
Step 3:
Pull the vent hose from the axle. There might be some gear oil coming out of the nipple, so have a rag or paper towel handy.
Step 4:
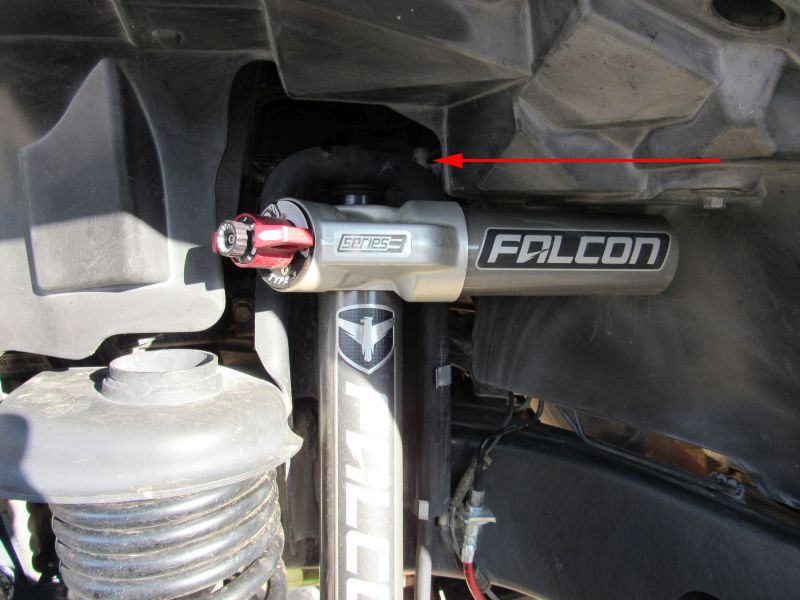
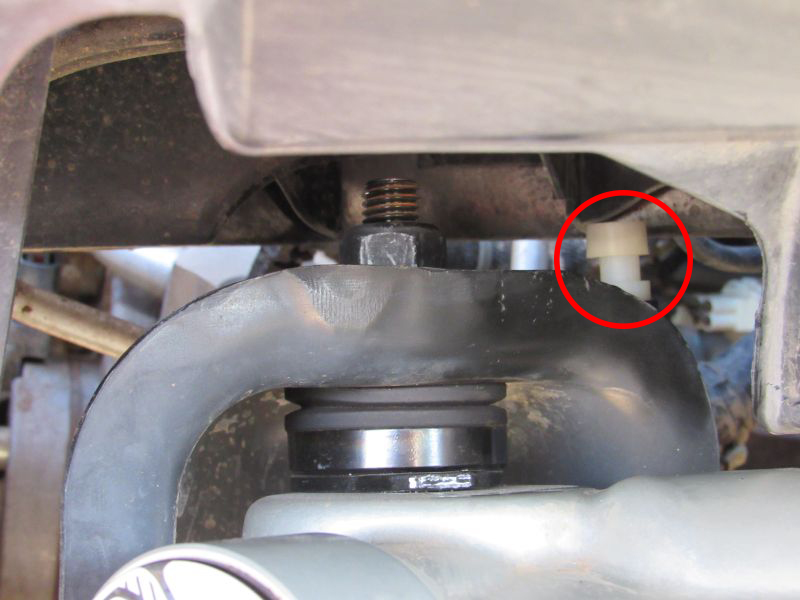
The top end of the vent hose has a white plastic cap installed. It is located at the top of the wheel well, above the top shock mount.
Step 5:
Slide the two clips securing the hose, from the side of the shock tower, and pull the hose down towards the ground.
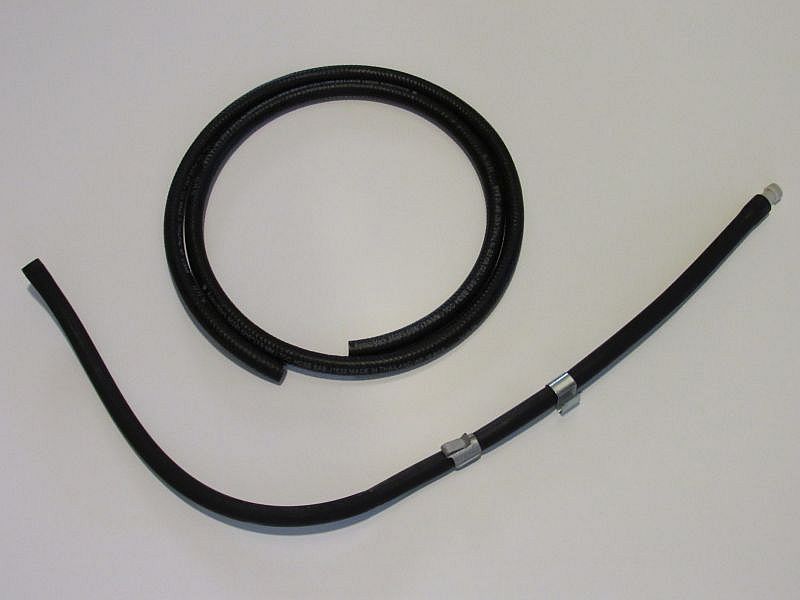
Stock front axle vent hose is 27″ long. For the new, extended hose, you will need 60″ of 5/16″ fuel line.
Step 6:
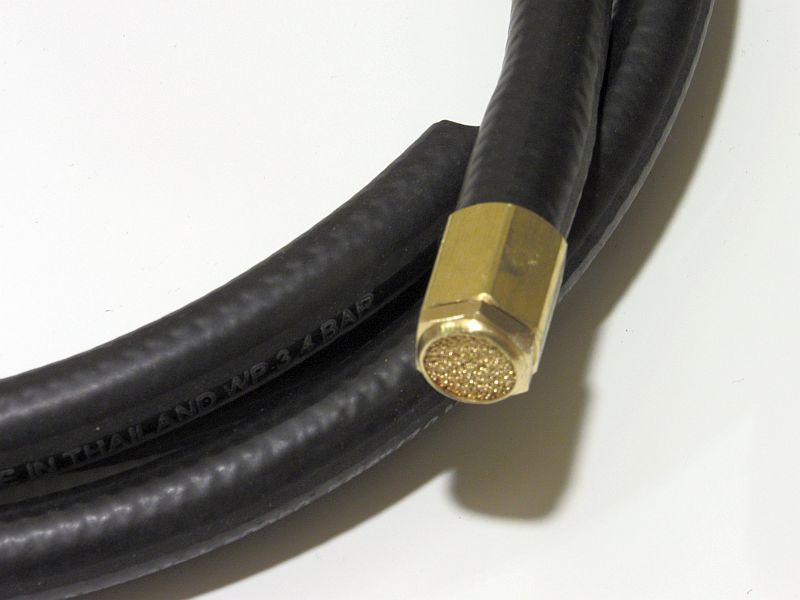
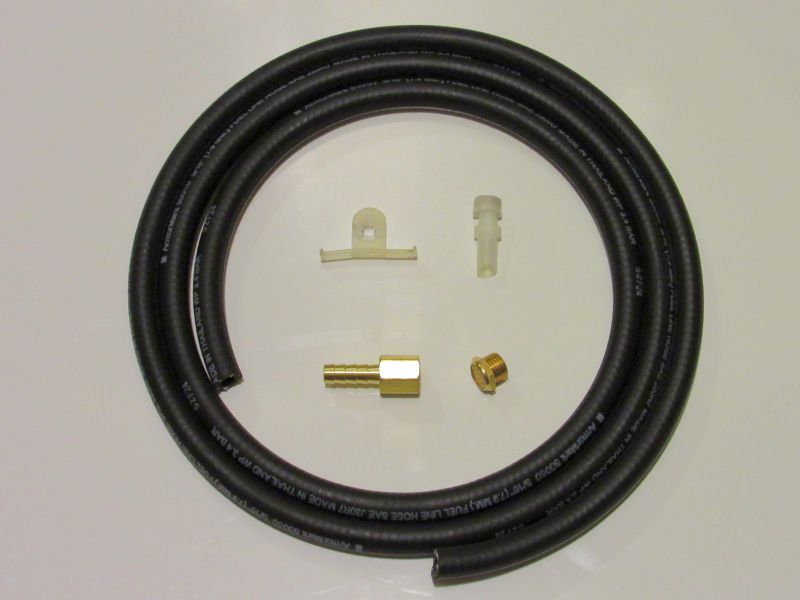
You can simply remove the white plastic jiggle cap from the factory vent hose and use it for the new hose. I decided to try something different and purchased a brass hose barb fitting, together with a pneumatic muffler silencer. It is an industrial filter.
Step 7:
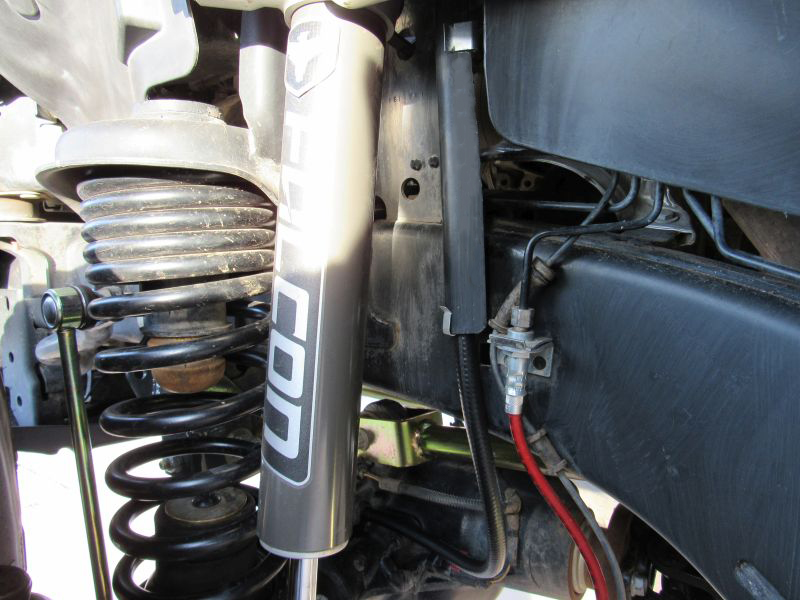
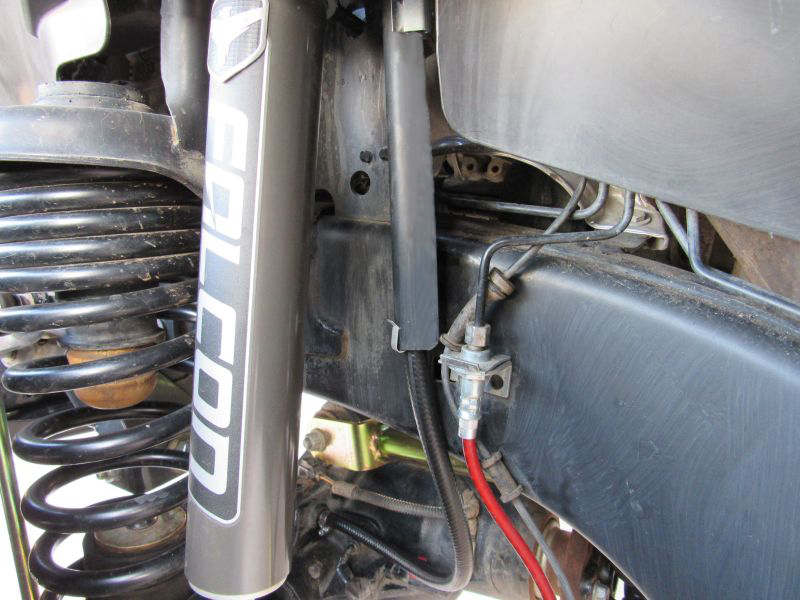
Push the new, extended vent hose onto the nipple on axle housing, and route the hose up the side of the shock tower, using the original clips to secure it into place.
Step 8:
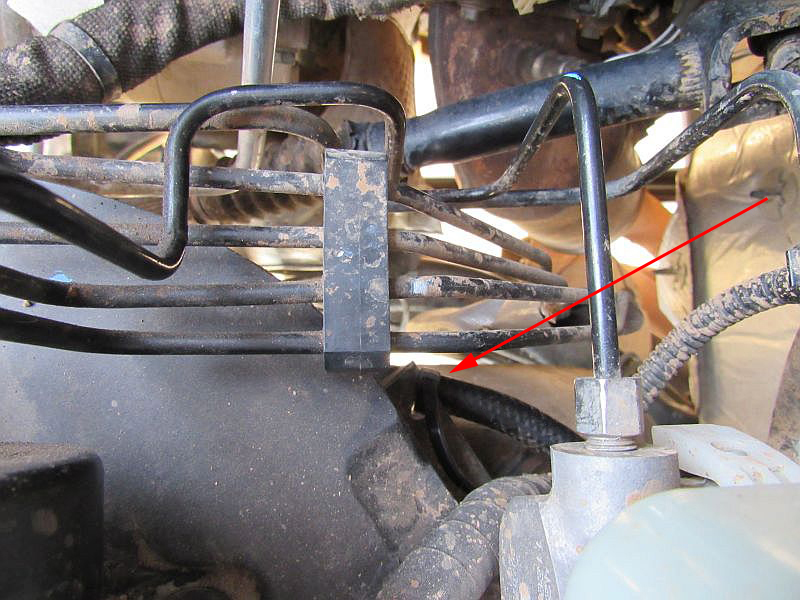
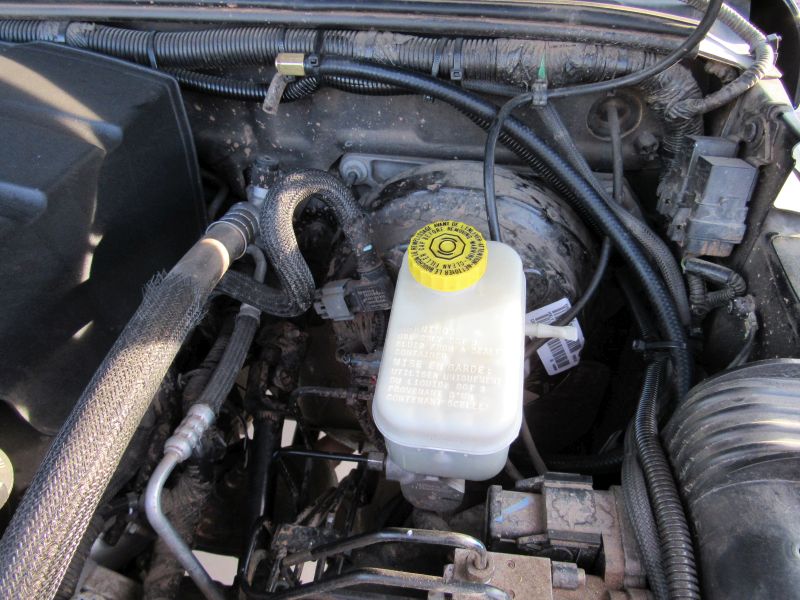
Grab the hose inside the engine bay. It will come out right below all the solid brake lines connecting to the ABS module. Route it below the brake master cylinder, towards the fender. You can secure it to a plastic tab with a zip tie.
Step 9:
Route your new axle vent hose around the brake booster and towards the top of the firewall. Secure it in a couple of places and then zip tie the end of the hose to the wire loom.
Step 10:
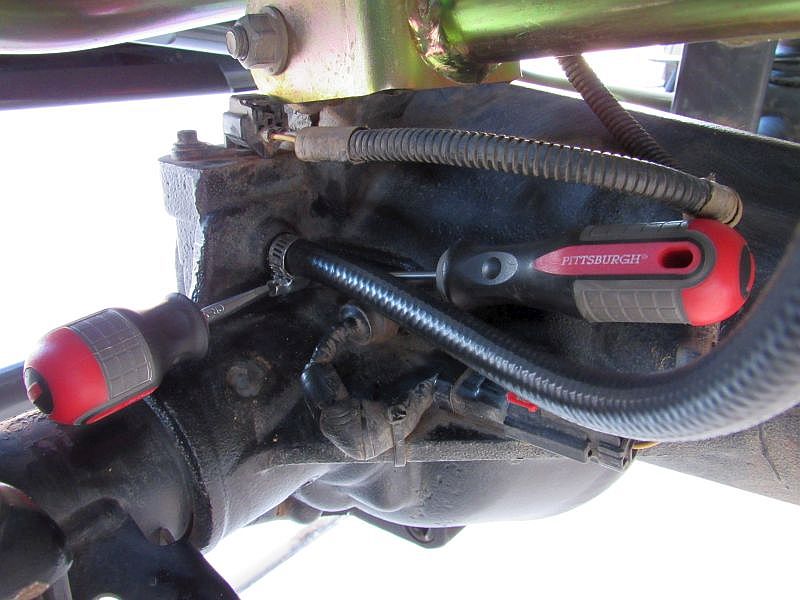
Secure the hose to the axle housing nipple, using a stainless steel worm gear hose clamp. Use a stubby flat head screwdriver to tighten the screw, and a large screwdriver to prevent the clamp from spinning while you’re tightening it.
Step 11:
Make sure your new vent hose has enough slack between the shock tower and the axle, to allow for flexing on the trail.
Step 12:
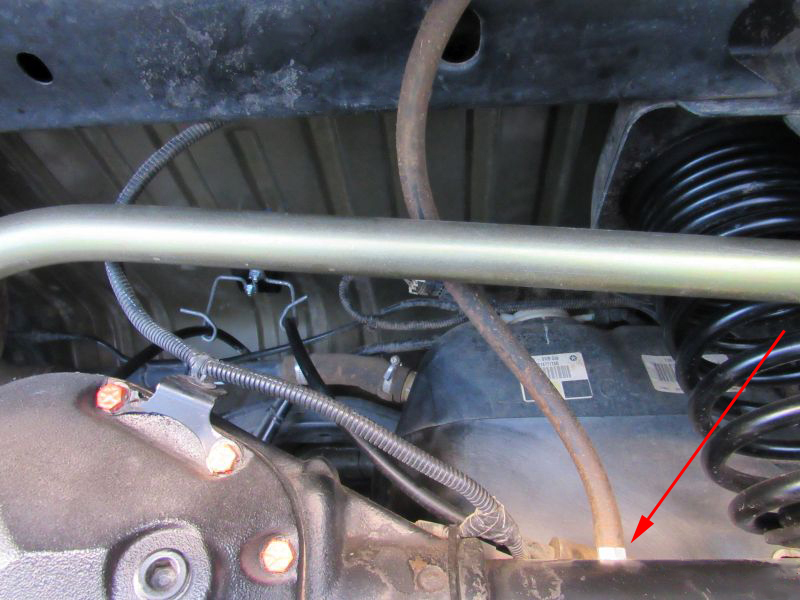
Locate the vent hose on the rear axle housing.
Step 13:
Pull the vent hose from the brass nipple to disconnect it from the axle.
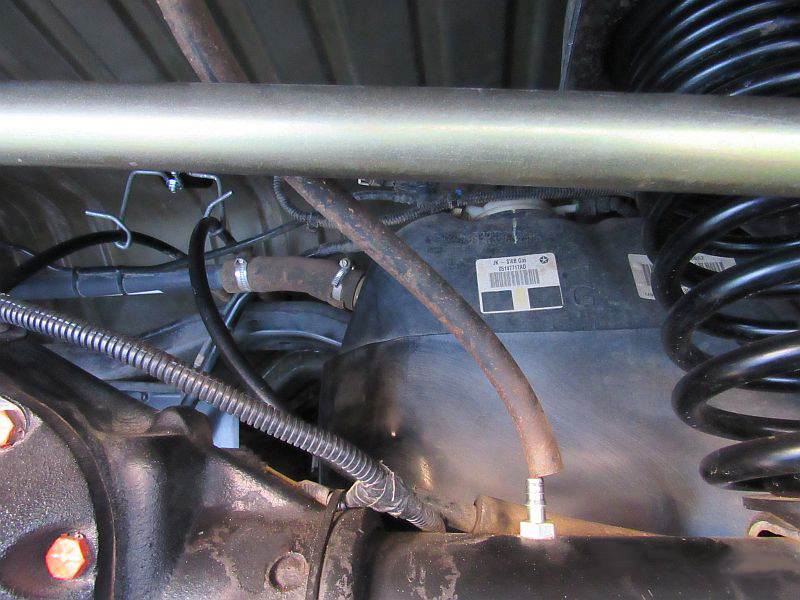
Step 14:
Locate a clip securing the hose to the frame, above the top rear shock mount. Slide the clip off to release the hose.
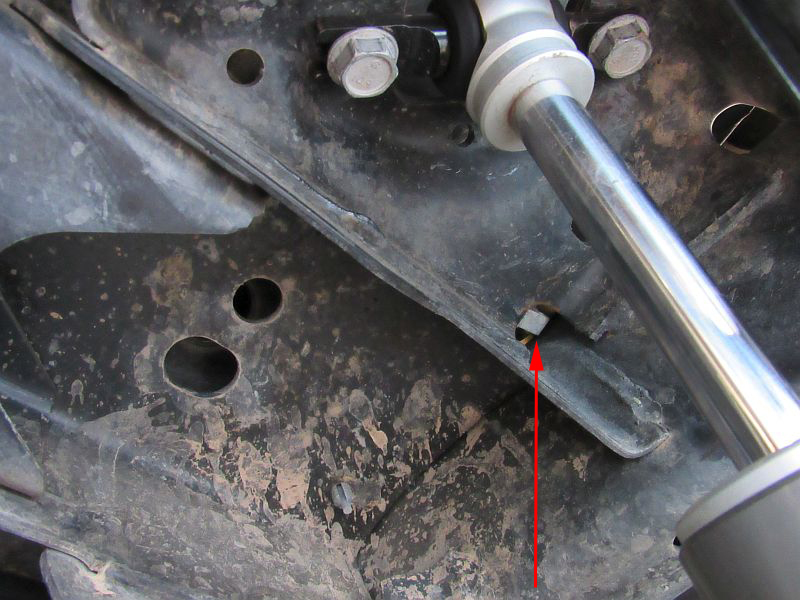
Step 15:
Find the end of the vent hose with a white plastic cap, located at the top of the rear passenger side wheel well. Factory setup has a plastic clip holding the end of the hose to the liner. You might need a flat head screwdriver to release the end of the hose from the liner.
Pull the entire vent hose out.
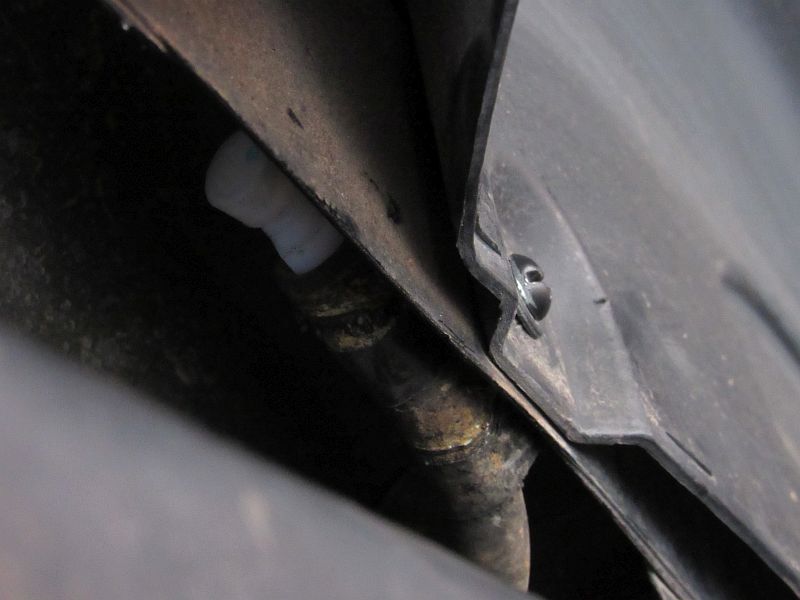
Step 16:
Stock rear axle vent hose is 30″ long. For the new, extended hose, you will need 66″ of 5/16″ fuel line.
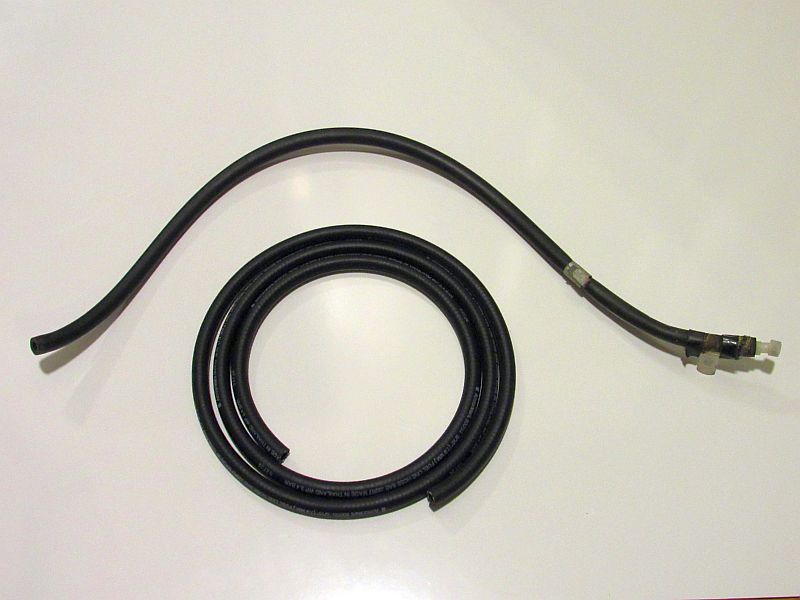
Step 17:
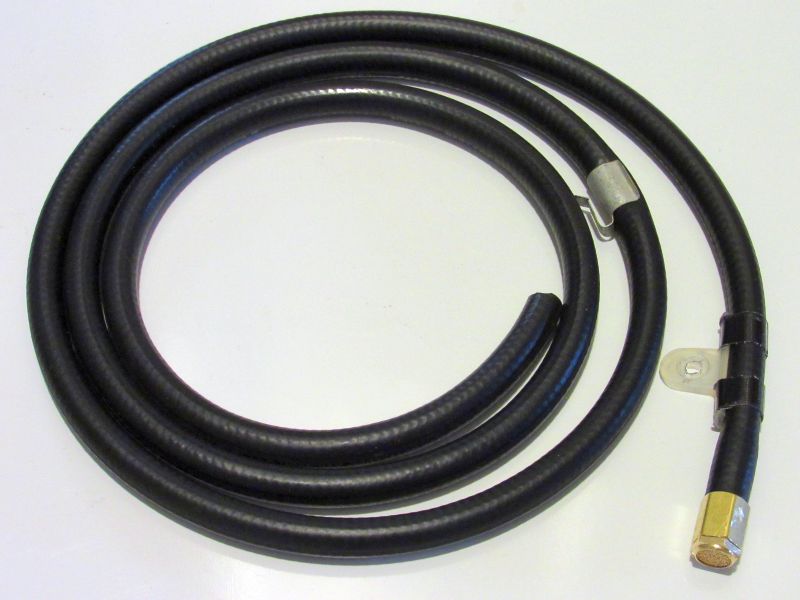
Remove the factory plastic jiggle cap, as well as the attachment tab from the factory hose. Be careful, because the old duct tape will be really messy and sticky. Use rubber gloves. Clean all the plastic parts and re-attach to your new hose.
Step 18:
I grabbed a 1″ wide Gorilla tape, cut in half, since you only need a 0.5″ wide strip of tape to attach the original plastic tab. I also used a brass hose barb fitting, together with a pneumatic muffler silencer in place of the original plastic jiggle cap.
Step 19:
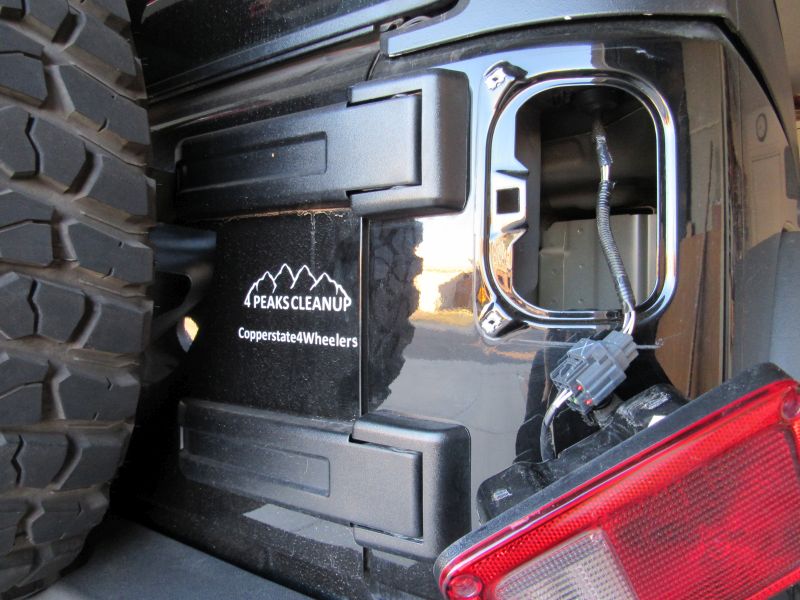
Remove the passenger side tail light. You only need to remove the two screws closest to the center of the Jeep.
Step 20:
You will most likely have to route your new vent hose over the metal plate inside the opening behind the tail light. The bottom of this area will probably be filled with insulating foam from factory, as is the case in my Jeep.
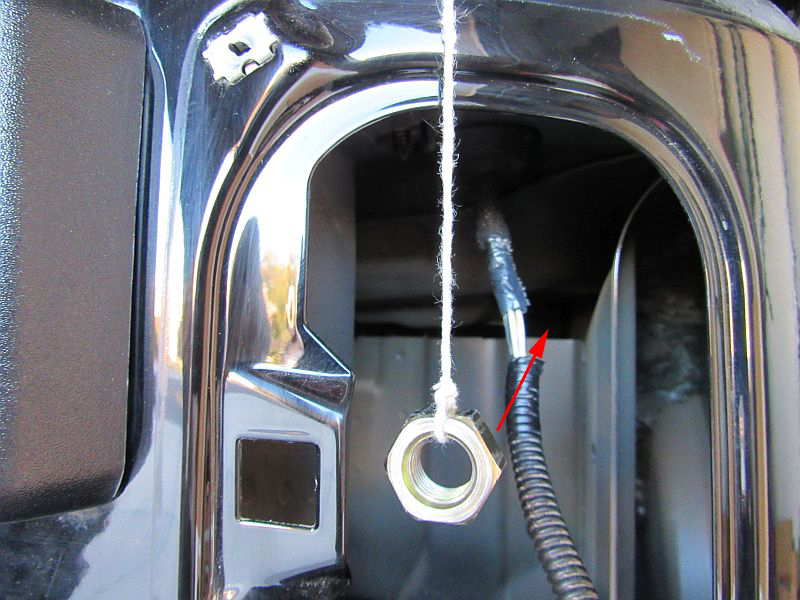
Use some twine, rope or paracord with a heavy item attached, and drop it behind the metal plate and fish it out at the bottom, inside the wheel well liner. Attach the rope to your new vent hose and carefully pull it up into the tail light area.
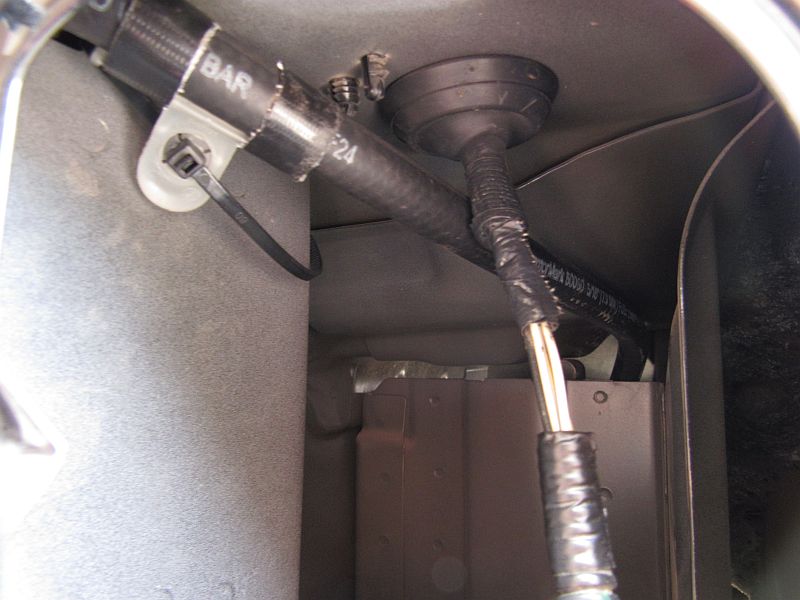
Step 21:
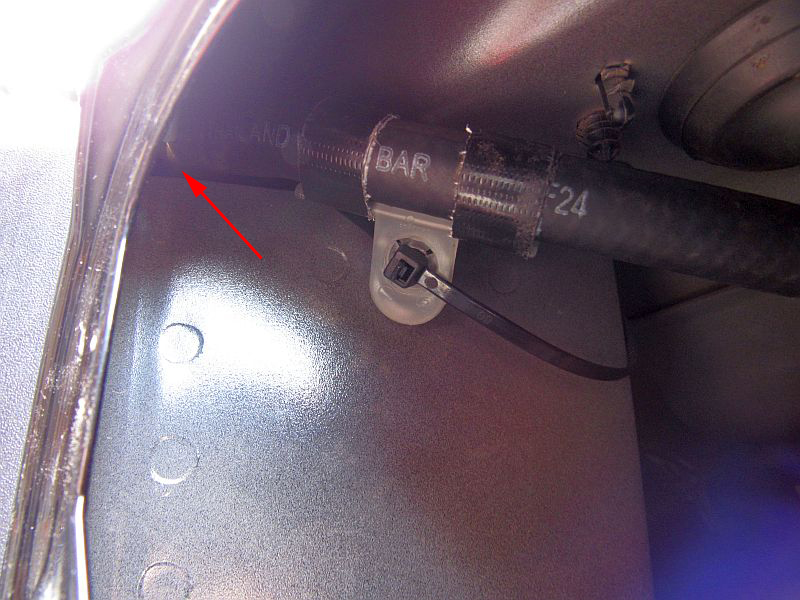
Secure the hose using two 6″ long zip ties connected together. Feed the zip tie thru the clear plastic clip taped to the hose.
Step 22:
The open end of the vent hose now terminates at a much higher and more protected location.
You can now re-install the tail light.
Step 23:
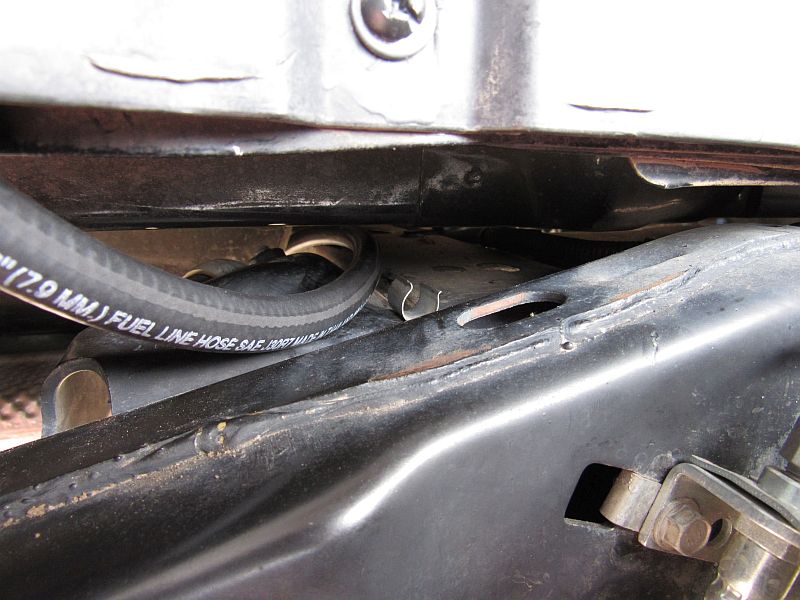
I found it much easier to install the metal clip above the top rear shock mount first, before attaching the hose to it.
Step 24:
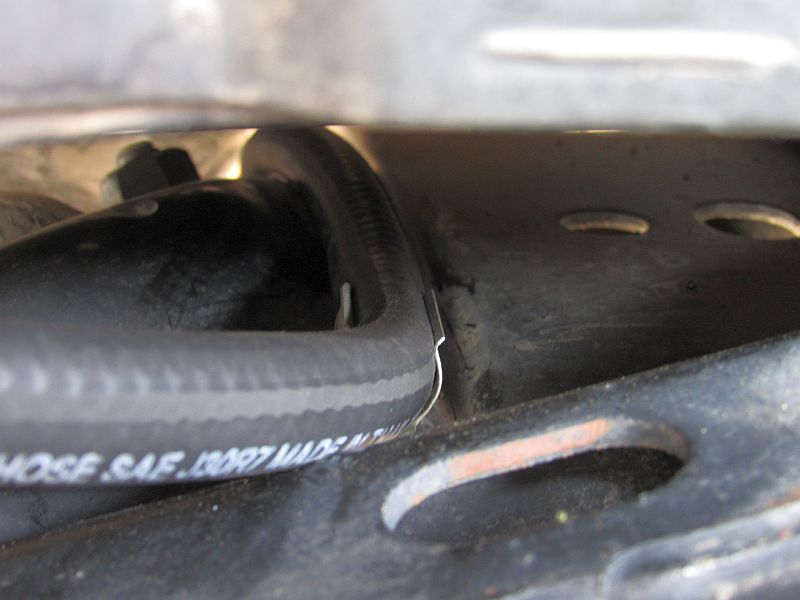
Push the hose into the clip to secure it in place.
Step 25:
You can route the hose above or below the crossmember. I decided to run it below, to imitate the stock setup. You can secure the vent hose to the crossmember with a zip tie. Make sure your new vent hose has enough slack between the crossmember and the axle, to allow for flexing on the trail.
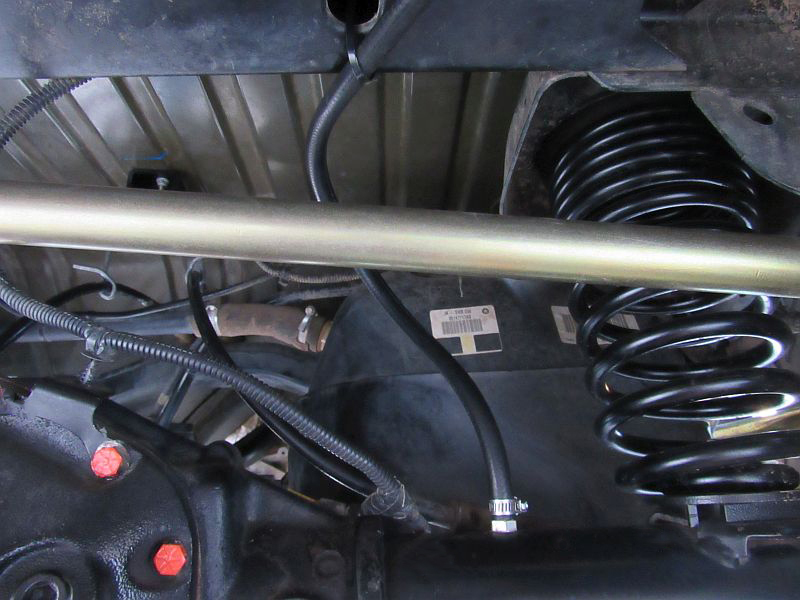
Secure the hose to the axle housing nipple, using a stainless steel hose clamp.
If you have any questions or suggestions, feel free to comment below.
