Melipron Universal Spare Tire Carrier: A Simple, Cost-Effective Mounting Kit Compatible With Most Roof Racks & Bed Racks – Install & Review
Relocating your spare tire is important when off-roading and overlanding for a multitude of reasons. The Melipron Universal Spare Tire Carrier is perhaps the easiest and most cost-effective solution for doing that.
This kit comes with everything you need to mount your spare tire on most bed racks and roof racks, including both platform and basket-style roof racks. This carrier is powder coated for maximum rust and scratch resistance and is lockable to prevent theft.
Considering its price point and simple installation, this spare tire carrier should be considered by all serious off-roaders and overlanders wishing to relocate their spare.
Find It Online
Universal Spare Tire Carrier
Why Relocate Your Spare Tire?
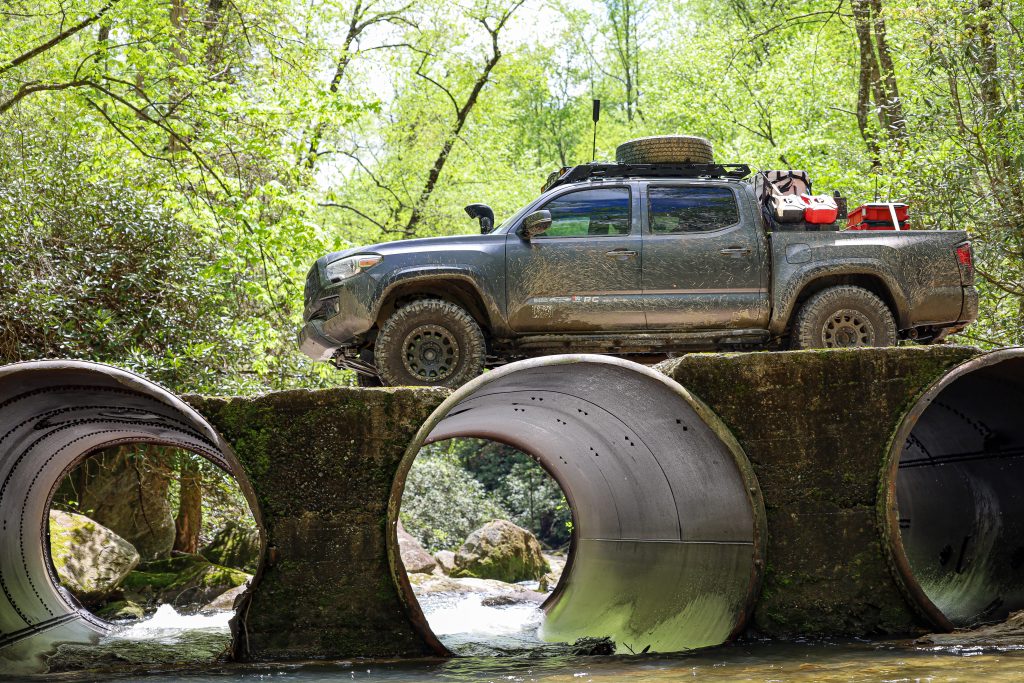
A spare tire is of the utmost importance when off-roading, especially on multi-day overlanding excursions. Even if you carry a tire plug kit or fix-a-flat, these will be of no use in the case of a ruptured tire or a punctured sidewall.
Furthermore, deflating your tires, while necessary when off-roading, increases the likelihood of your tires coming off the bead. If you’ve ever encountered this, you know that reseating a tire is a difficult repair out on the trail. Additionally, if your spare tire gets damaged beyond repair, you can be left immobile on the trail with few options.
When stored in the factory location, your spare tire is subject to all kinds of abuse, both on and off the road. Off-road, your spare is susceptible to mud and debris that can lead to corrosion and wheel damage.
A lesser-known fact is that mud can get caught in between the bead of your tire and cause a flat. With the spare mounted underneath the bed, the spare gets covered with mud and dirt that could cause a flat or damage. This is especially common in the Southeast where red clay and sandy mud are commonplace.
Furthermore, there is also the risk of puncturing your spare tire when bottoming out over rocky terrain. Relocating your spare tire from underneath your bed will prevent this from happening, and give you a bit more ground clearance in the rear.
Running Larger Tires?
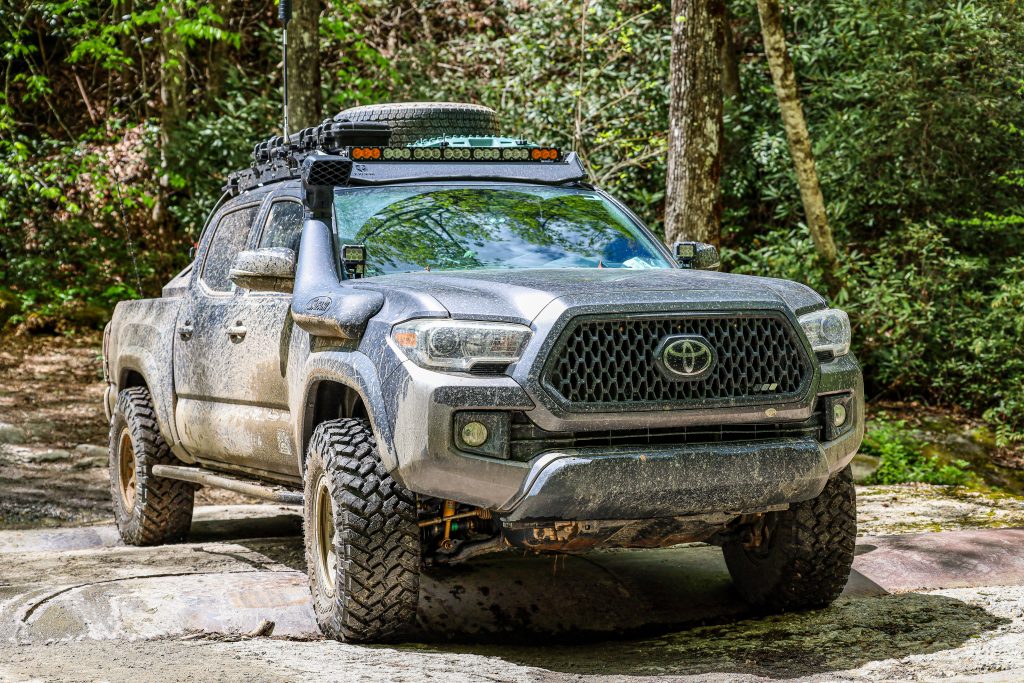
Relocating your spare tire will also help you avoid unforeseen issues when getting bigger tires. It’s important to have a full-size spare tire. Driving on a smaller spare tire puts more strain on your drivetrain, suspension, axles, and differentials. Your differentials work to spin your tires at different speeds to aid in cornering, and a smaller tire on one side will undoubtedly affect this.
While smaller spares can be used in a pinch, they are a temporary fix that can cause a plethora of issues if used more than 50-100 miles. This can be a real issue when on a rough trail miles away from a tire shop, not to mention it is uncomfortable to drive when one side is lower than the other.
The point is, bigger tires (anything above 32″ in diameter) will likely not fit underneath the bed without modifications.
Other Relocation Solutions
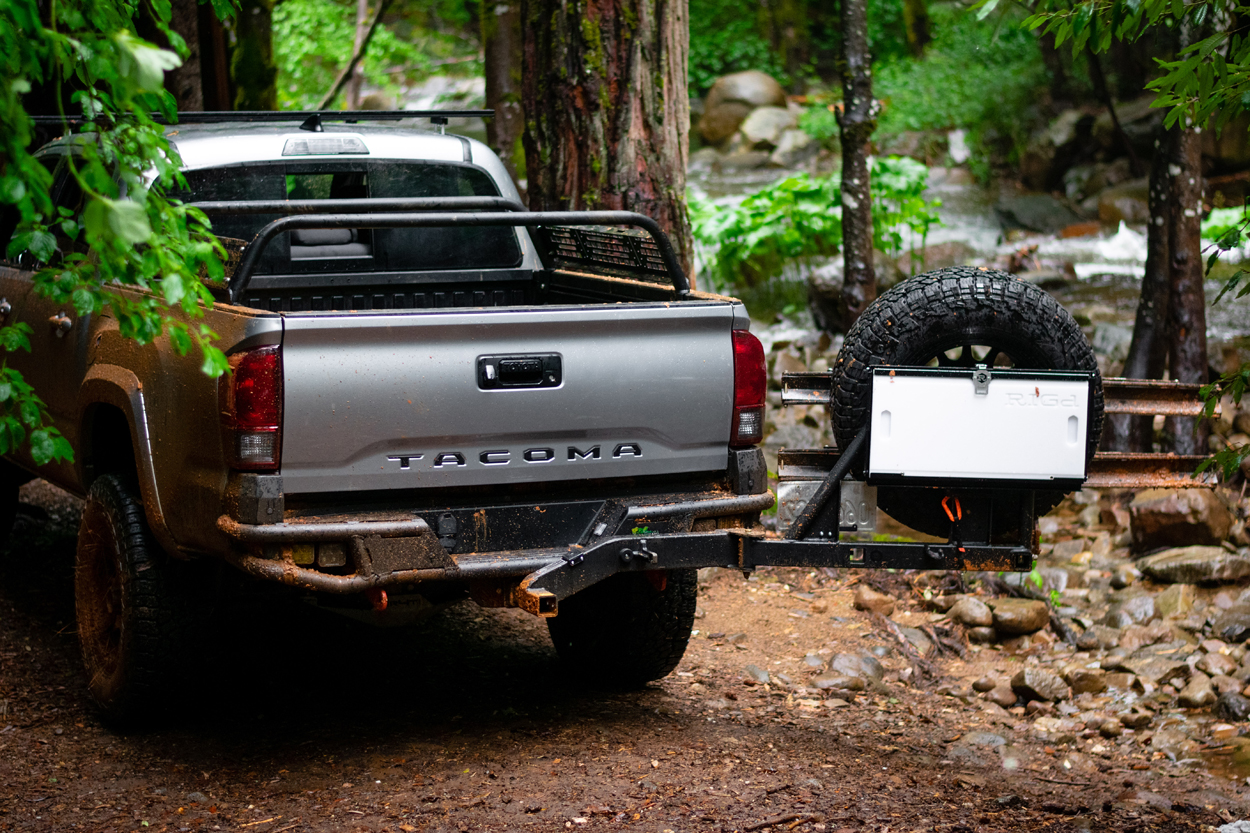
For us Tacoma owners, other than the factory location, there are few options to store and mount a spare tire.
Full replacement rear bumpers with swing outs, while nice, can be costly and they can restrict access to your tailgate. They also cover your backup camera and license plate and prevent you from hauling long items with the tailgate down (such as kayaks/canoes, lumber, furniture, etc.).
Hitch-mounted spare tire carriers share these same pitfalls. They can also shift weight farther to the rear and reduce your departure angle.
Others may simply throw their spare in the bed; not only does this take up a lot of bed space but also risks damaging your spare with all the other gear in the bed crashing into it on bumpy trails.
For these reasons, I decided to go with this Melipron Universal Spare Tire Carrier. It’s much less expensive than other options and can be mounted on most roof racks, bed racks, and MOLLE panels in a few minutes.
Installation
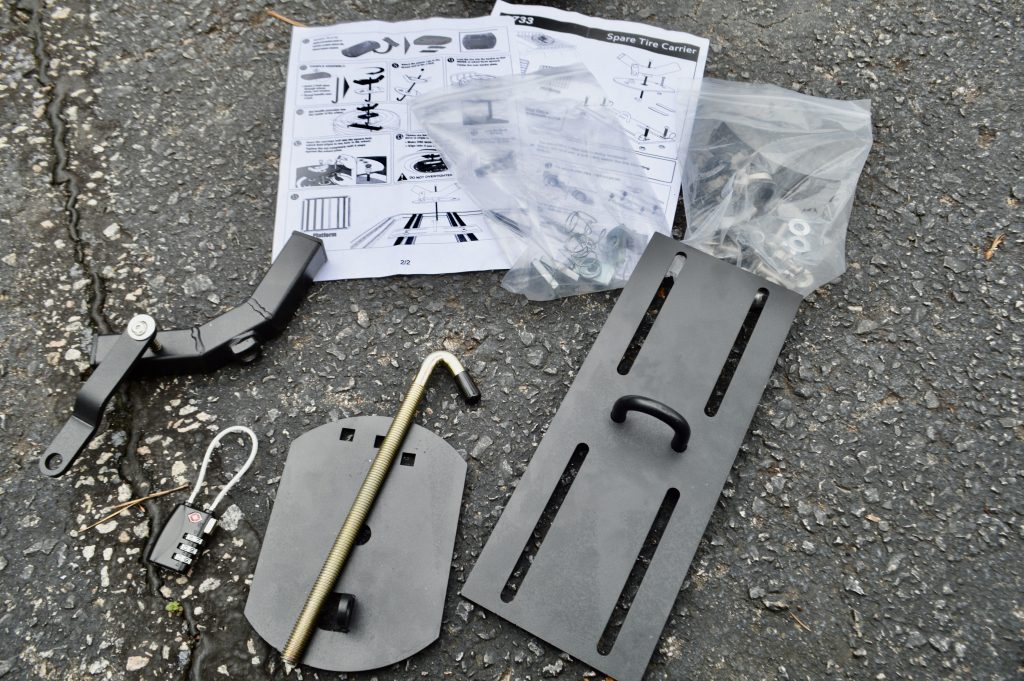
This install is fairly simple and does not require many tools. All you will need is a socket set or adjustable wrench to tighten the bolts to the roof rack. Overall, it only took me about 15 minutes to complete the install.
In the box, you get everything you need to mount your spare tire on most bed racks and roof racks, including both platform and basket-style roof racks. This includes your mounting plate, the tire plate, and the J-bolt that connects the two securely in place. The tire handle screws on top of the tire plate, allowing you to tighten the top plate to accommodate a variety of tire sizes.
Hardware is included for securing the mounting plate to both styles of roof racks. It even comes with foam padding for the tire plate to prevent damage to the wheel and reduce vibrations. Finally, a travel lock is included to prevent theft. Although, I would recommend upgrading this lock as the shackle is a thin wire that could be easily cut through.
Step 1. Drop & Remove Spare
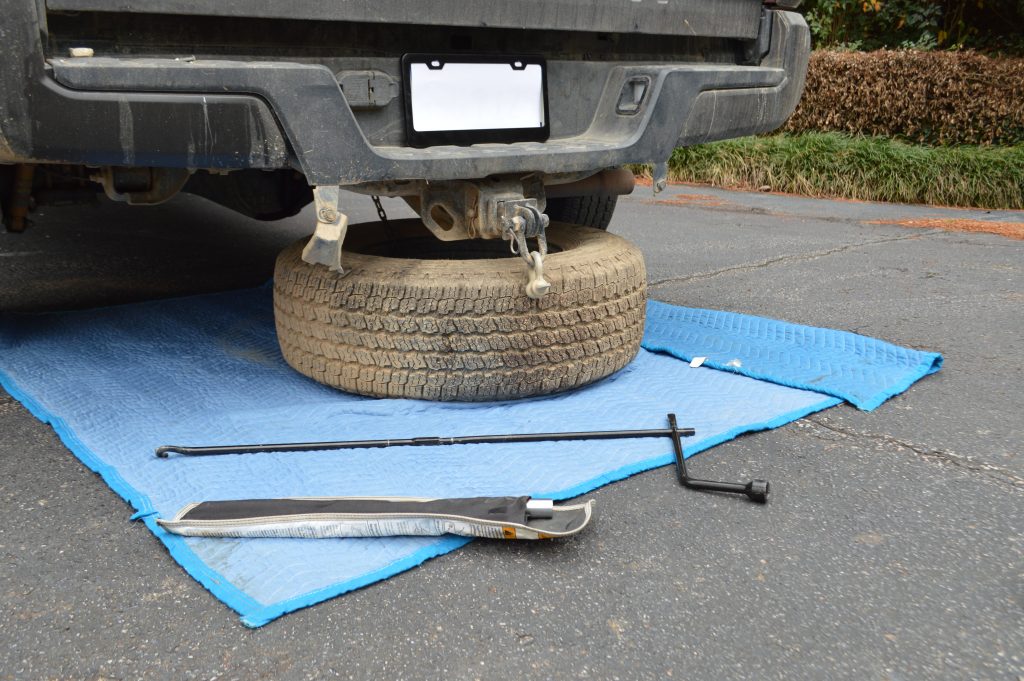
Remove your spare tire from underneath the truck bed. Use your tire iron to lower the spare and disconnect the central hub bracket.
Once disconnected, raise the bracket and chain all the way back up so that it is not dangling. Failure to do so can cause damage to the bracket or cause it to snag and break off.
Step 2. Align Bolts On Mounting Surface
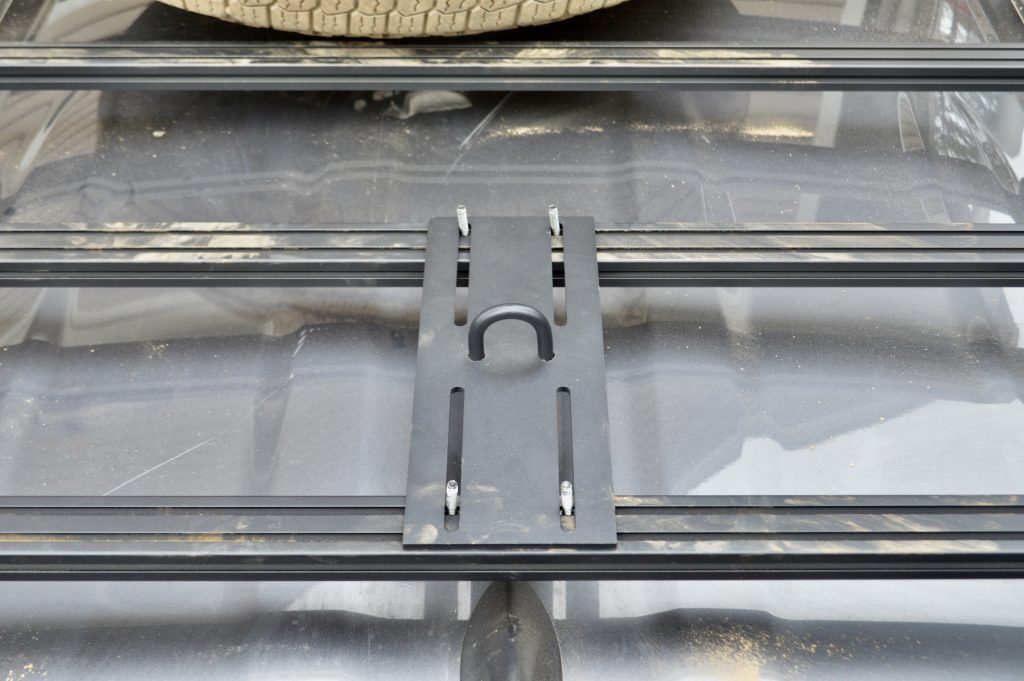
For a platform-style roof rack, take four bolts and slide the bolt heads into the track of the roof rack crossbar. Some adjustments to the crossbars may be necessary.
For a basket-style rack, four circular plate clips are included. Slide the plate clips over the round crossbars and insert the bolts into the holes.
For a bed rack or MOLLE panel, insert the bolts into the mounting locations.
Set the mounting plate over the four bolts with the metal loop facing up and tighten each nut.
Step 3. Position Spare Tire & Attach J-Bolt
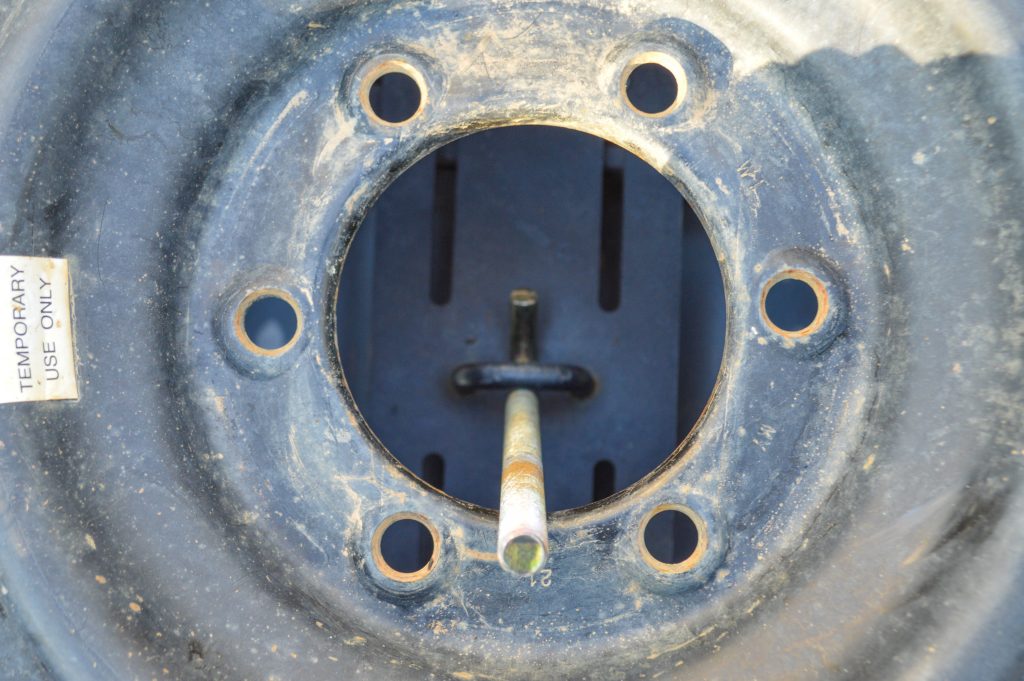
Position your wheel and tire in the center of this loop. Ensure the mounting plate and tire are centered on the roof rack since having the additional weight offset could cause you to lean hard into turns or even tip over.
With the wheel centered over the mounting plate hook, take your J-bolt and hook it to the metal loop on the mounting plate.
Step 4. Apply Foam Protective Pads
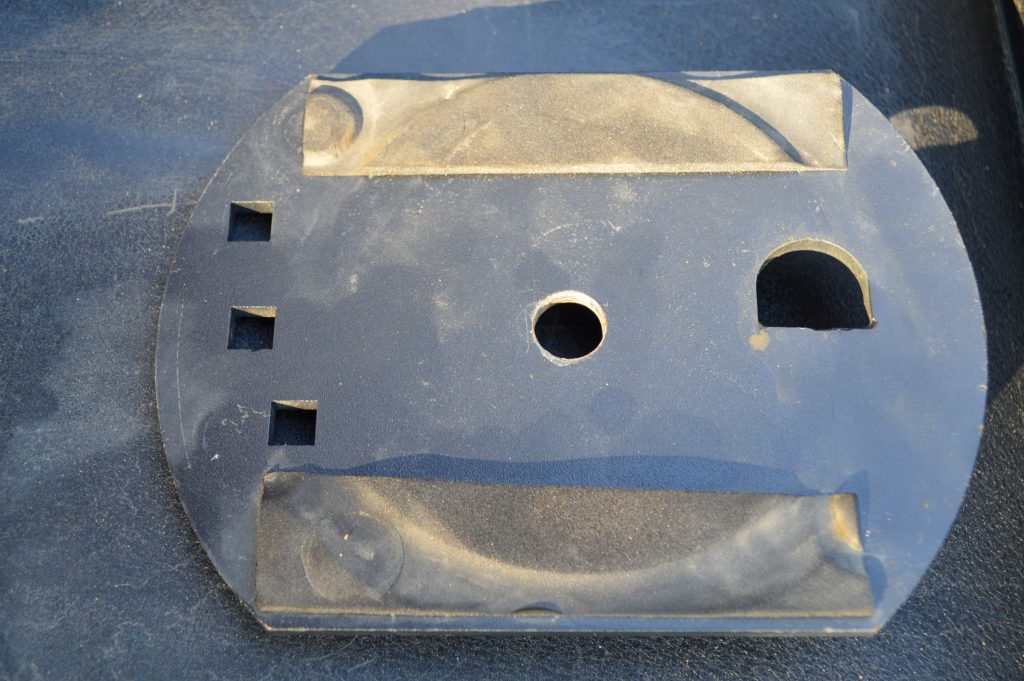
Grab your wheel plate and attach the foam wheel protector strips to both sides.
Step 5. Connect Top Plate & Secure Tire
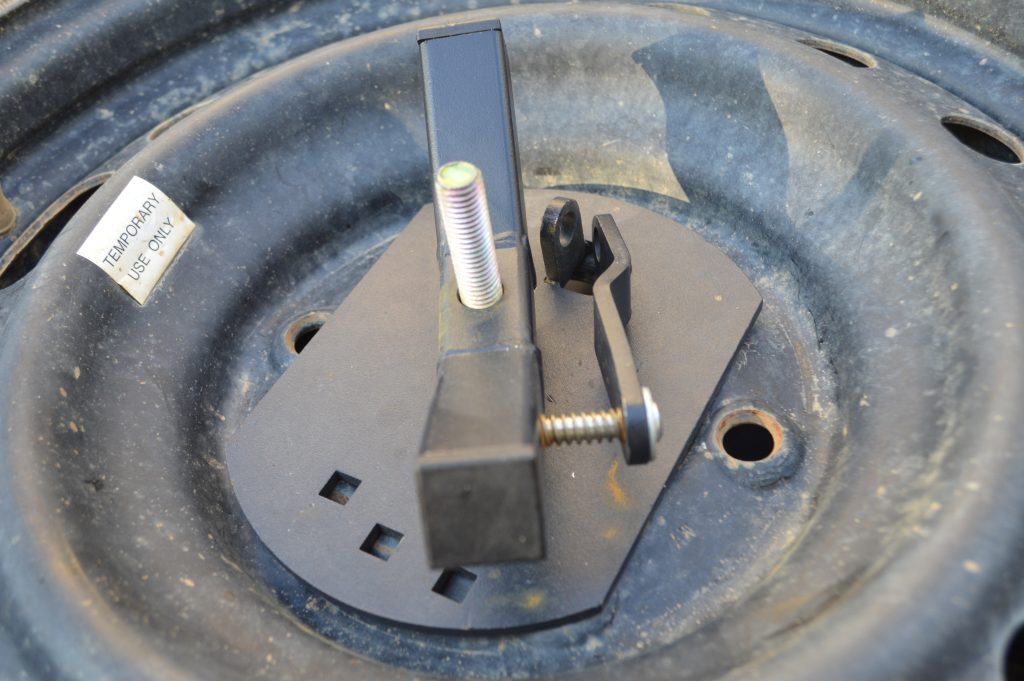
Place the wheel plate over the J-bolt, threading the j-bolt through the hole in the center of the wheel plate.
Thread the top handle onto the J-bolt until the wheel plate is tight against the wheel. Align the handle’s side hole to the wheel plate’s side hole and place your lock through both to secure your tire to the carrier.
Final Thoughts
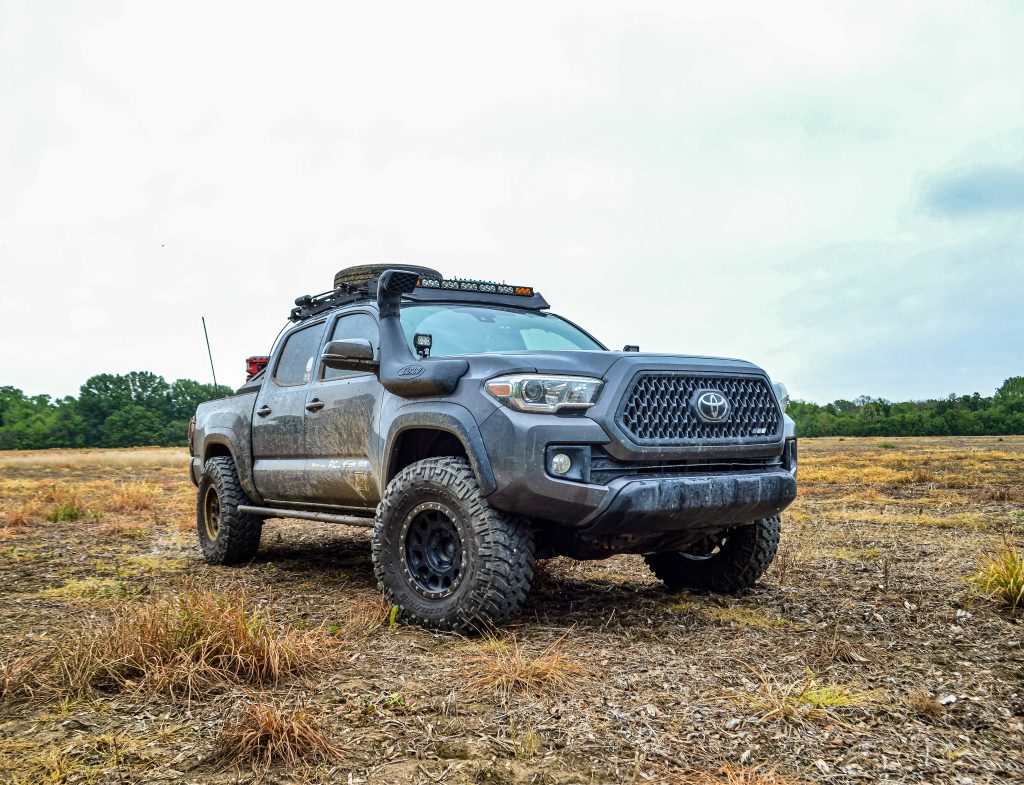
This spare tire carrier is an easy and cost-effective way to relocate your spare tire. It mounts to most types of roof racks, bed racks, and MOLLE panels, and secures the tire tightly to the surface.
Relocating my spare tire gives me a piece of mind that it will not get damaged while off-road or cause me to bottom out on difficult terrain. The installation only took a few minutes, and the whole setup can be easily removed if desired.
The only I didn’t like about the kit was the included lock. While I think it’s a thoughtful addition, the wire shackle could be easily cut with a pair of bolt cutters. However, the locking holes are large enough that I was able to replace them with a stronger padlock.
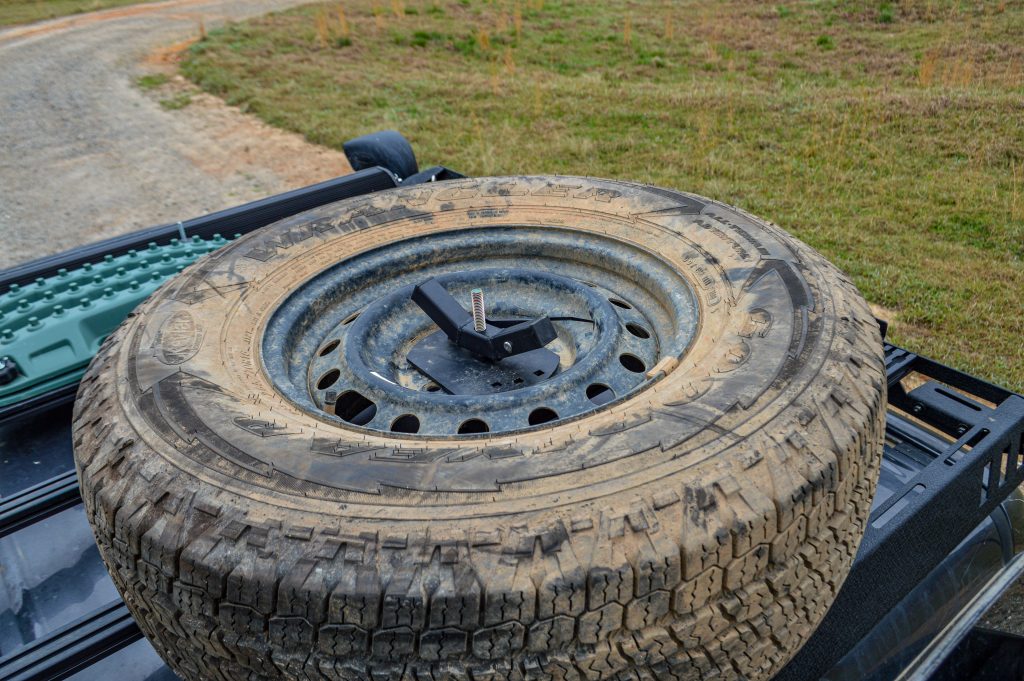
Another thing to consider is the added vehicle height. For example, I can’t pull into an average garage with my truck’s lift and the spare tire on top. As I said, though, the spare can be easily removed. I will be installing a full overland bed rack in the next few weeks. From there, I will mount the spare tire carrier on it, allowing me enough clearance to park in a garage.
Overall, I’m very happy with this tire carrier and would recommend it to anyone looking for a cost-effective spare tire relocation option.
