Create a Custom Look While Adding Strength and Durability
If you know me, I’m one for making my Tacoma look more unique than all the other builds out there. My roof is equipped with a Prinsu roof rack like many other trucks out on the road. If you’re looking to set your roof rack apart from all the others, then look no further than these shield plates.
The shield plates offer two benefits. They will add style to make it stand apart from all the other racks you see on the trail or in the parking lots at your local mall. You can choose to order them in Black, White, Grey, or Bare metal for a custom color option. I chose to go the bare metal route so I could have them matched to my Tacoma for that unique touch.
Style isn’t the only thing these shield plates will add, Prinsu had durability in mind when they created this add-on. Adding a set of plates will increase the thickness of your rack by more than double and helps to reinforce the overall structure.
Note: This only works with the original (V1) Prinsu racks – NOT the Prinsu Pro.
Find It Online
Features & Specs

- Aluminum construction
- 3 powder coat options or bare metal
- Make your Prinsu roof rack 54% thicker
- Customizes your roof rack
- Added strength
- Simple installation
- Limited lifetime warranty
Installation

You can use this article as your guide to help with the installation of your Prinsu shield plates.
Required Tools

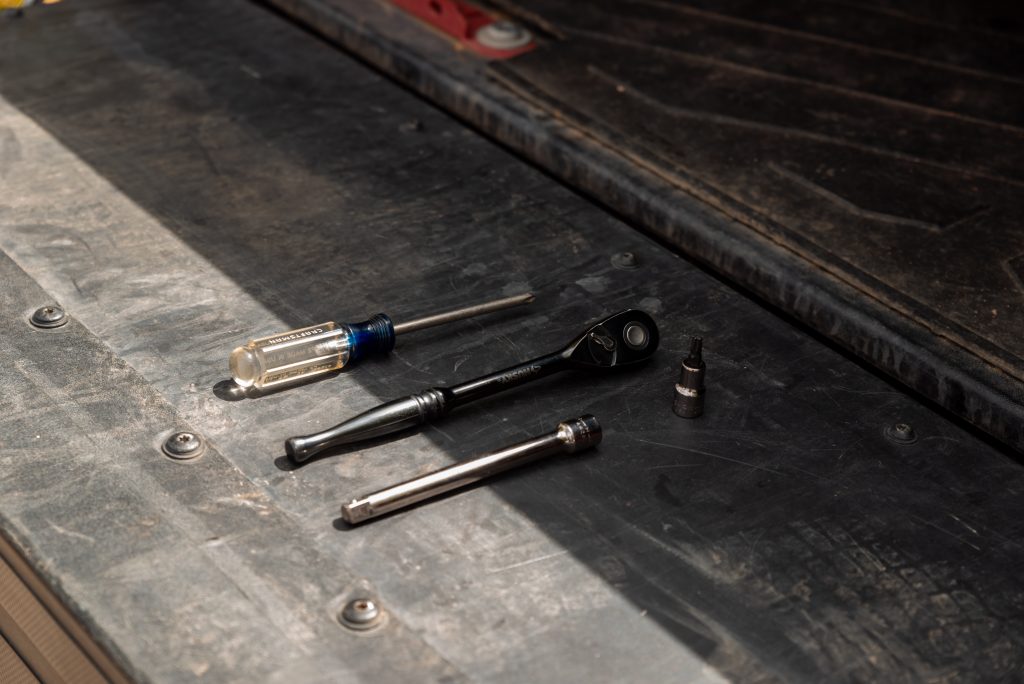
- Philips screwdriver
- 3/8″ ratchet
- 3/8″ socket extension (optional)
- T-30 Torx socket
- Towel or blanket
Step 1. Remove Wind Fairing

Using a Philips screwdriver you need to remove all 10 screws holding the front wind fairing onto your Prinsu roof rack. After you get your existing wind fairing off the roof rack it’s probably a good idea to clean everything up. The cleaning is optional but it’s always good to clean up the truck during installs.
As you can see from my photo, my wind fairing has the Prinsu wind-faring decal installed. If you have something like this you can either choose to remove it or leave it on. I ended up leaving my decal on since you can’t see it when the shield plate is installed.
Step 2. Install Fairing Plate

The shield plate and wind fairing are all pretty lightweight weight so holding them up isn’t too difficult. I started by inserting the top left screw and then doing the top right screw to hold the wind fairing and shield plate both in place. After that, I installed the last remaining 8 screws.
Step 3. Disconnect Crossbars & Accessories

Every screw from the side supports will be removed to get the plates installed. This means you will need to do only one side at a time because you will be separating all the cross bars. It’s a good idea to place a towel or blanket down on the roof of your truck to prevent the cross bars from scratching the roof.
If you have any accessories like I have the red hooks and the summit handles, those will all be removed temporarily as well to add the shield plate.
Step 4. Installing Side Plates

After you get all accessories and hardware removed from one side, align your side shield plate. Just like the front wind fairing, install a screw in the front and rear, just to line things up before you install the remaining hardware. If you plan on adding your accessories back onto the roof rack you can install those over the top.
Final Thoughts

I love how the Prinsu shield plates turned out, they give the rack a completely different look. I’m stoked on the custom powder coat as well.
If you opt to get the black shield plates, it won’t change how your roof rack looks but you will still gain the added strength upgrade. Increasing the width of your roof rack by more than 50% will help your roof rack withstand more load and also help it last longer.
The shield plate kit is lightweight but when paired with an existing roof rack it makes your roof rack much stronger. whether you’re trying to change the looks of your roof rack, increase the durability and longevity, or you want to do both, then adding a shield plate kit to your roof rack is something you should consider doing.
