Restless Offroad Fabrication Bolt-On DOM Rock Sliders For 3rd Gen (2016-2023) Tacoma – Installation, Detailed Review & Overview
Let’s talk rock sliders; one of the most important mods you can do to your truck in terms of protection and functionality. This is a mod that often gets overlooked by many when they begin their builds.
After getting the aesthetic mods out of my system, I knew it was time to up my protection game. This was also necessary if I wanted to do any sort of aggressive off-roading. The factory predator steps just didn’t cut it and hung way too low, impeding ground clearance. So, I began the process of researching the numerous rock slider options available for the 3rd Gen Tacoma.
I came across the Restless Offroad bolt-on rock sliders and the rest was history. Let’s go over the details and installation of these rock sliders, and what made me choose them.
Find It Online
Restless Offroad Rock Sliders
Who Is Restless Offroad Fabrication?

Restless Offroad is a Southern California-based fabrication company established in 2019. They specialize in all kinds of offroad armor for Toyota and Lexus trucks.
Boris and Rogelio, two locally raised and taught fabricators, are the guys behind the magical work.

They started out of a garage and built their shop from the ground up. Over the years, they have secured a solid reputation in the fabrication world. Restless Offroad mainly offers sliders but is currently planning to produce bumpers as well.
I was fortunate enough to swing by the shop for local pickup and meet the owners. Boy, it sure was a good time. I’m beyond anxious to see them grow and bring more products to the market in the near future!
Specifications
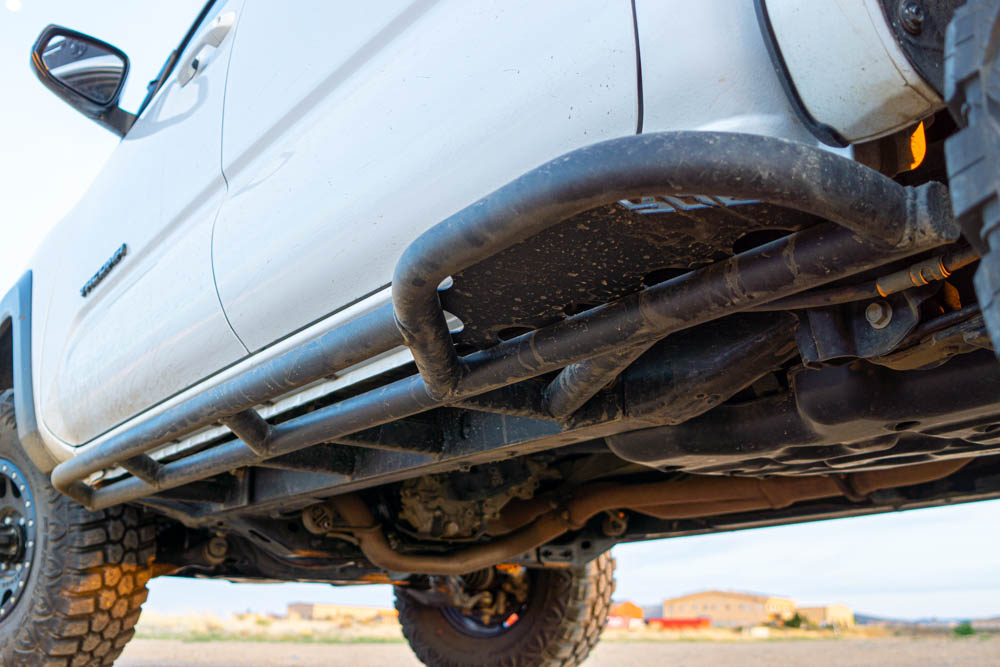
One of the best parts about the Restless Offroad bolt-on rock sliders is the endless amount of options available when purchasing. This really lets the consumer dial in their ideal specifications. Options include a variety of angles, top plating, and powder coat.
All sliders are built with 100% DOM tubing to help with strength and longevity. If you don’t know what DOM tubing is be sure to check out our article – DOM vs. HREW rock sliders.
They’re constructed with 1.75″ and .120 wall DOM tubing and use 1/4″ gussets and 3/16″ mounting plates. These are the ideal specifications on a Tacoma and offer a great balance of protection and weight savings. All sliders are optioned with a kick-out that is the perfect width to allow for proper protection, even with spacers. I’ve found the kick-out to be one of the most beneficial parts of the sliders.
Furthermore, the standard rock light mounts (x2) on each slider are a great feature to add some lights for extra style points.
Here are all of the slider options…
Angle (Degrees)
Top Plate
- Quarter-Plate
- Kickout-Only
- Full-Length
Powder Coat
My Setup
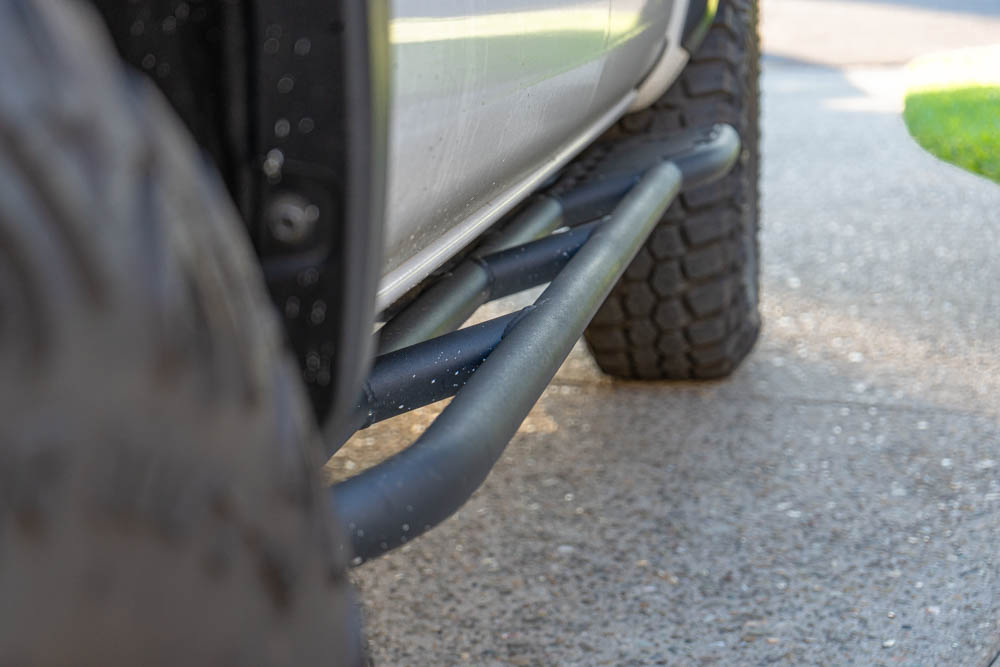
- 10 Degrees, Kick out-Only Top Plate, Textured Powder Coat
Restless Offroad suggests 10 degrees, which gives the right amount of surface area for a step but also enough tuck to keep it up and out of the way. I optioned a kickout-only top plate since I figured that was going to be a heavily used area as a step. I also decided to powder coat them for the best protection and longevity.
Installation

Luckily, the installation of the sliders is super straightforward since they are bolt-on! The crew at Restless Offroad offers the option to have them installed when you do local pick-up. I made the journey out there from Northern Arizona to get them installed and it was well worth it. They knocked out both sides in about an hour!
Tools & Hardware Needed
- All hardware included – Grade 8 (zinc coated)
- 24mm box end ratchet
- 10mm wrench/socket
- Impact driver/wrench (optional)
Step 1. Removing Modules & Plastics
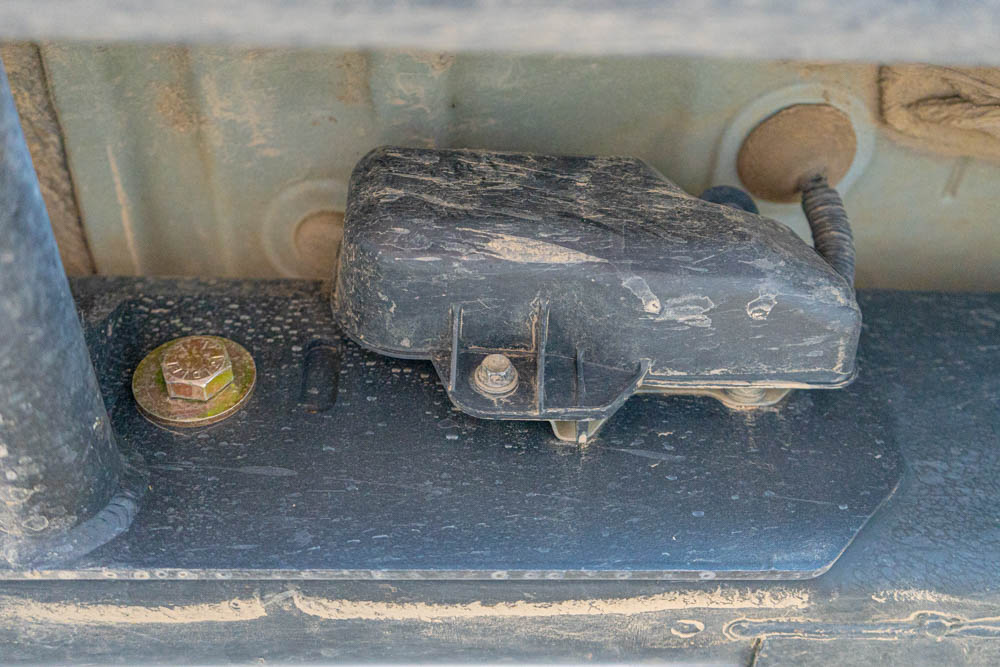
On the passenger’s side, there are some plastic covers that need to be removed with a set of pliers or a flathead screwdriver.
There’s also a plastic cover on the frame rail covering a bundle of wires that can get removed and set aside for later. You can see above where it was reinstalled.
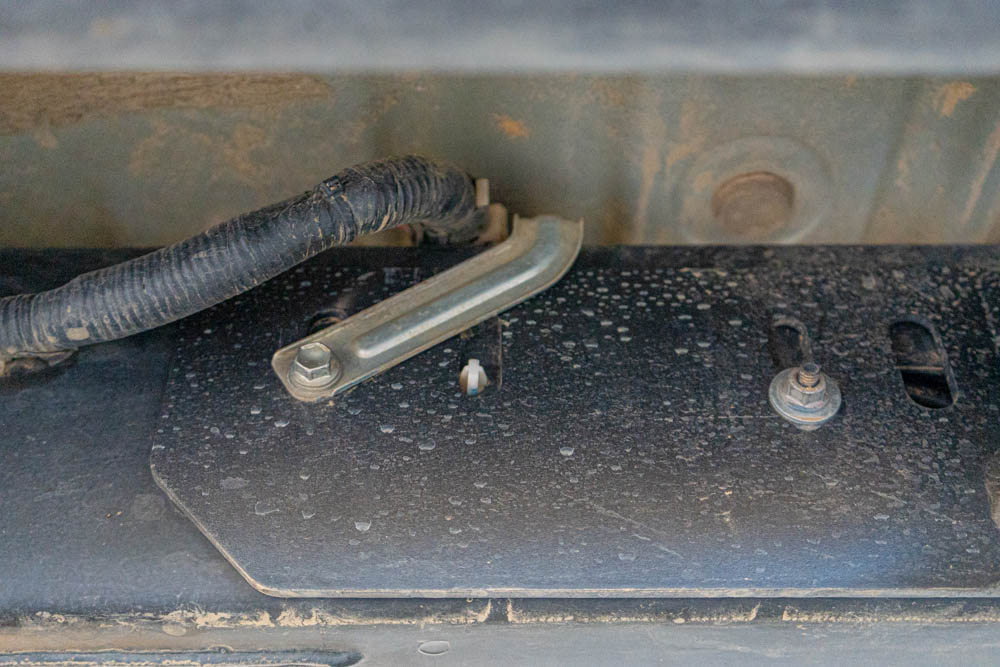
On the driver’s side there is a bracket and wiring harness that needs to loosened and reinstalled in the same location as before once the sliders are on. Seen above.
Step 2. Mounting Rock Slider
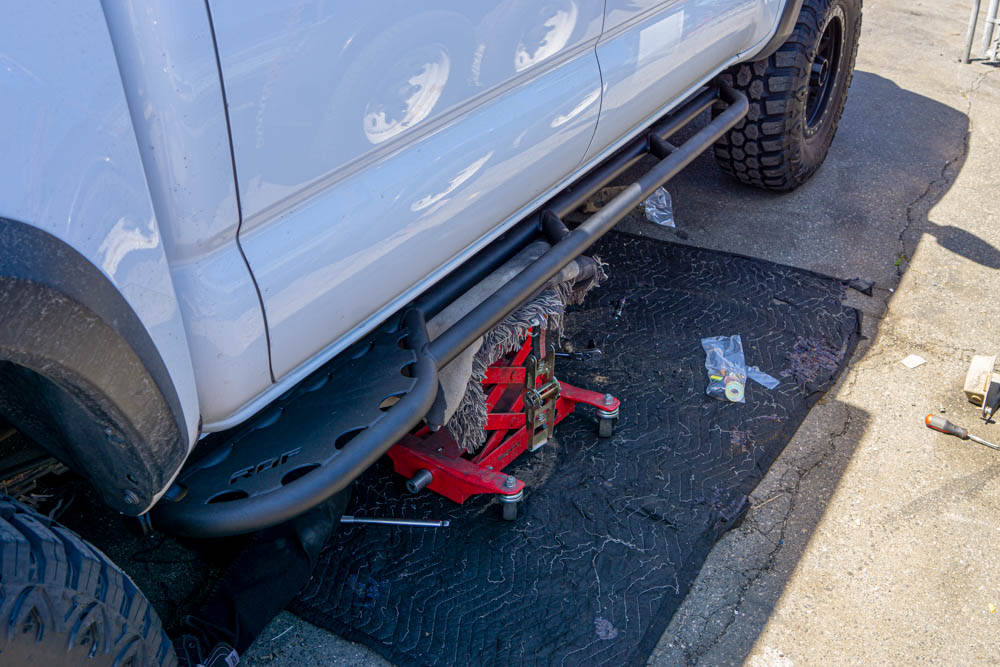
These sliders weigh a fair amount so it’s highly advised to have two people and/or a jack to assist with the lifting to get them properly placed.
Line up the corresponding holes and use the provided bolts to secure the sliders to the frame. All of the hardware is the same size.
Step 3. Installing Bolts
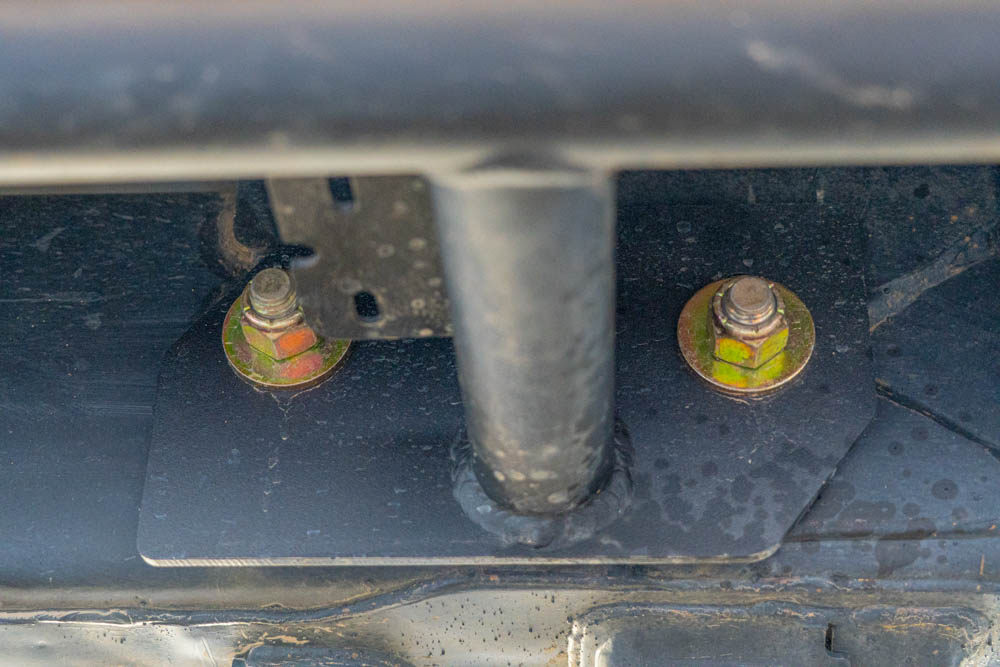
Since the bolts are all the same size, this step is easy. Once installed loosely, adjust the height of the sliders to be higher or lower in relation to the rocker panel. This is all preference as to how much tuck you want. Also, ensure they’re level before tightening down the bolts.
That’s it! Make sure to install any modules or cables you removed.
Close Up Details
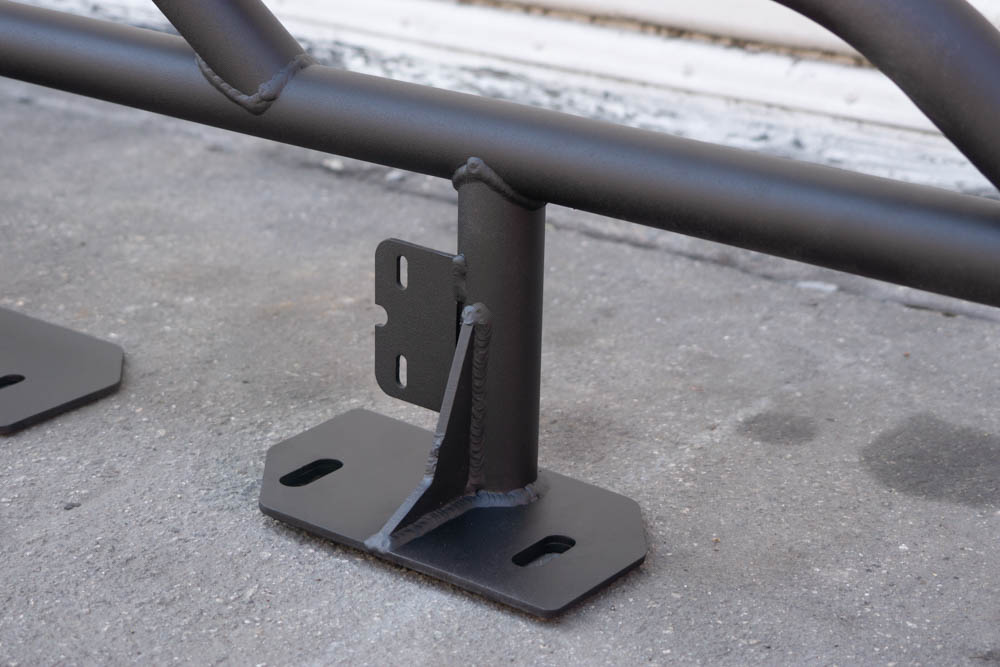
The welds are super clean and seem to be well done. Also pictured here, you can easily see the rad rock light mounts.
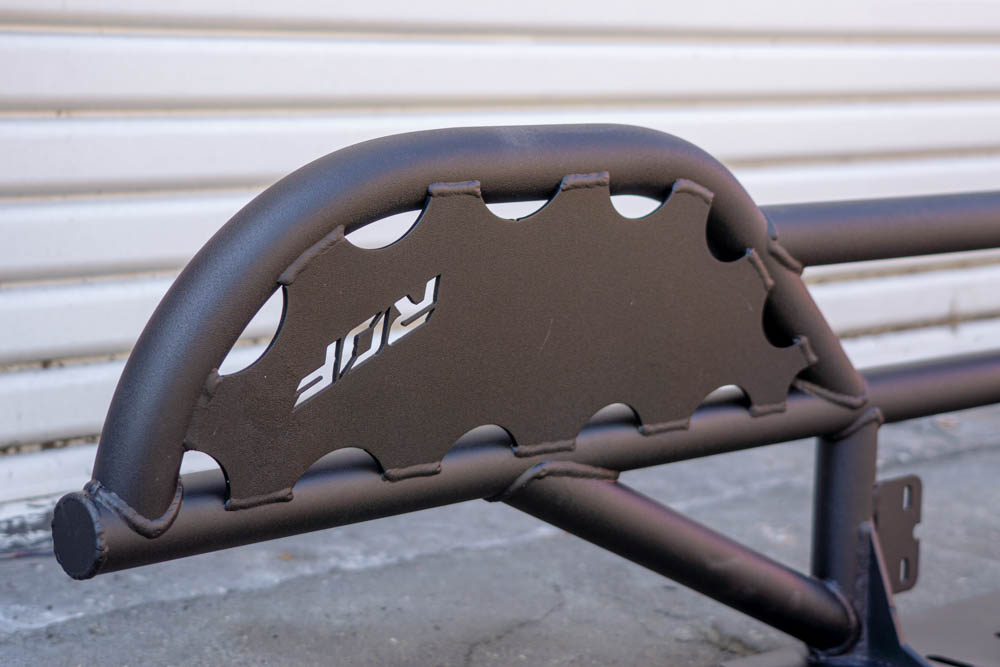
Here you can see the kickout up close, and the top plate. Makes it super easy to get to the roof or get into the truck.
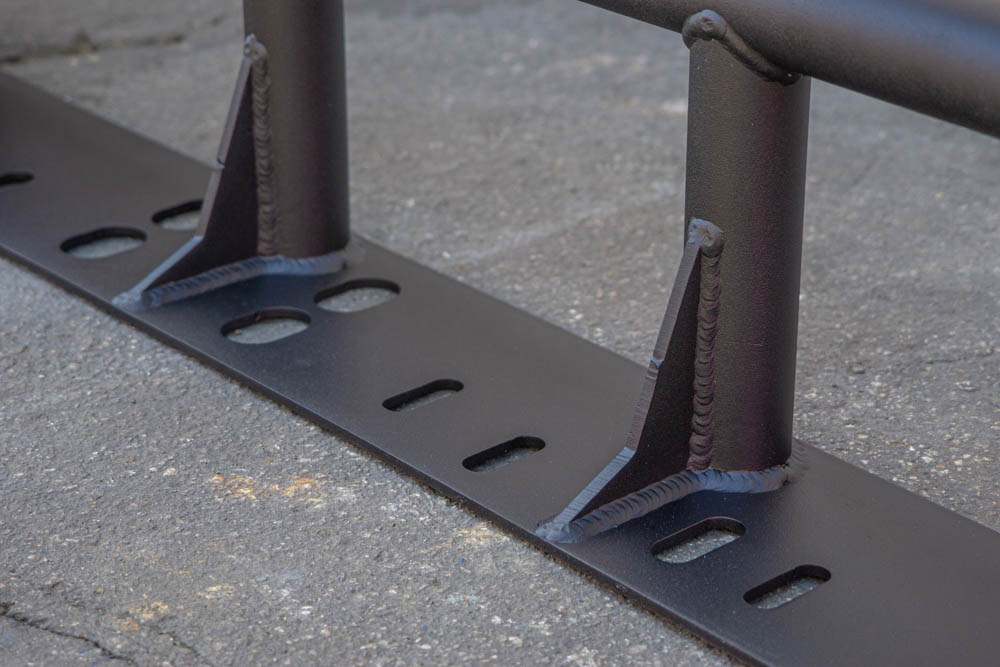
And a quick close up shot of the main mounting plate and gussets with the support tubes. Beefy!
Review
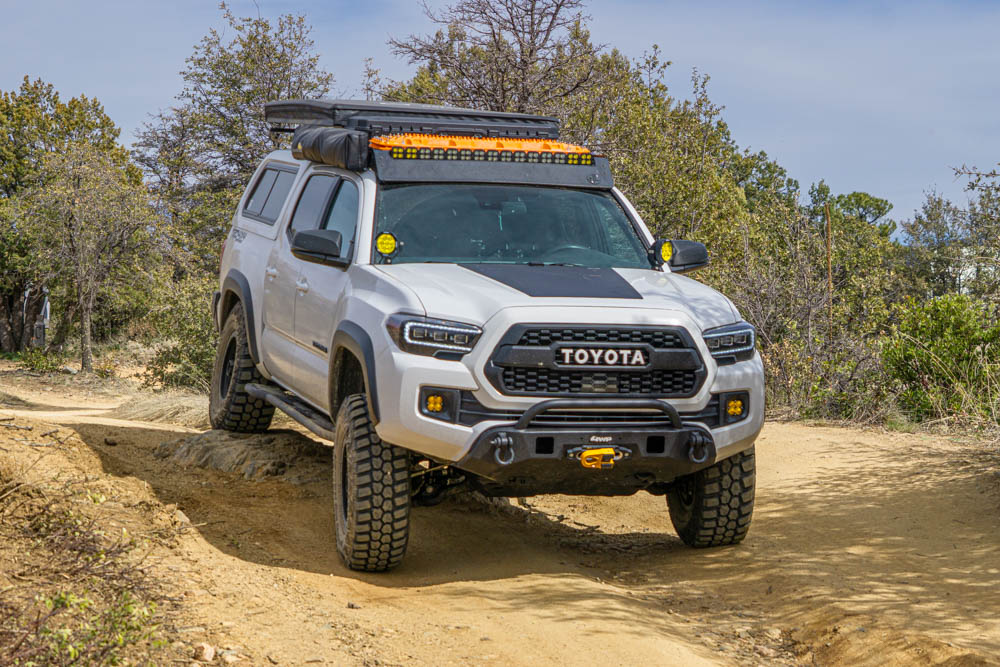
I’ll admit, rock sliders should’ve been one of my first mods. Since putting them on, they’ve given me a huge piece of mind every time I’m out on the trails. They add a new level of protection that certainly wasn’t there with the OEM steps. This is especially true compared to the steps I had, which could have potentially acted as damage multipliers.
Going over technical rock features, trees, ruts, etc. now feels like a breeze. In addition to the added protection, I’ve gained ground clearance to my rock panels since the sliders sit much higher than my old steps.
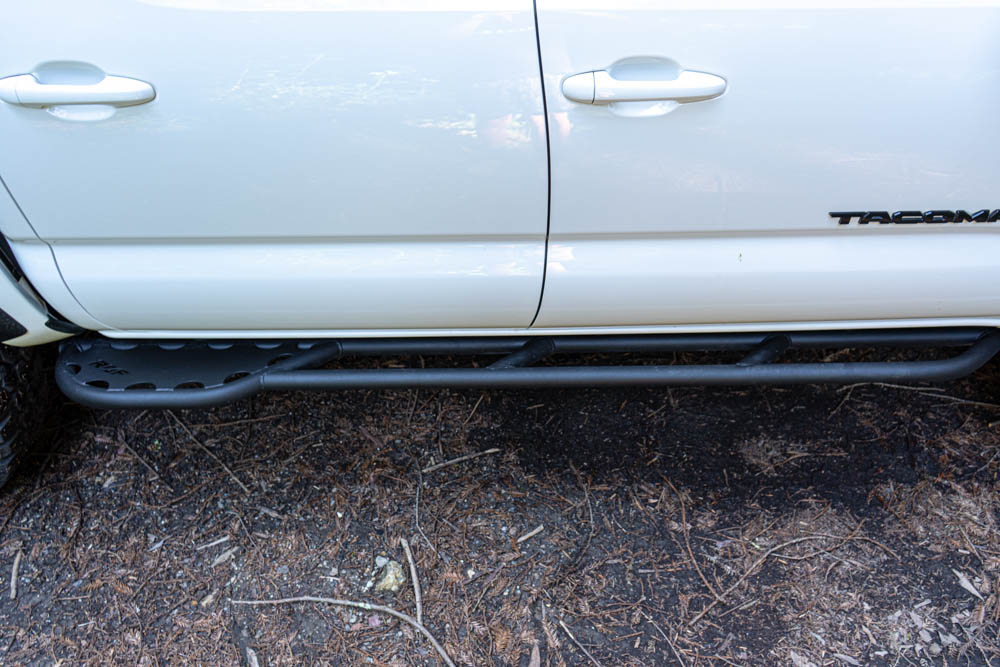
I personally enjoyed having a step to use to be able to access my roof rack and accessories. The kick-out in the rear also serves as a great step or even a little place to sit down and throw some shoes on. The versatility of these rock sliders is great and I’m super happy with how they’ve performed. I’ve been fortunate enough to avoid any massive boulders so far. But when I do inevitably run into a harder obstacle or trail, I’m no longer worried.
Living in the high Arizona desert, the ground consists of rocks, dirt, and some more rocks. Despite the challenges they’ve seen, I’ve had no issues with the powder coat chipping or the sliders bending or breaking in any way.
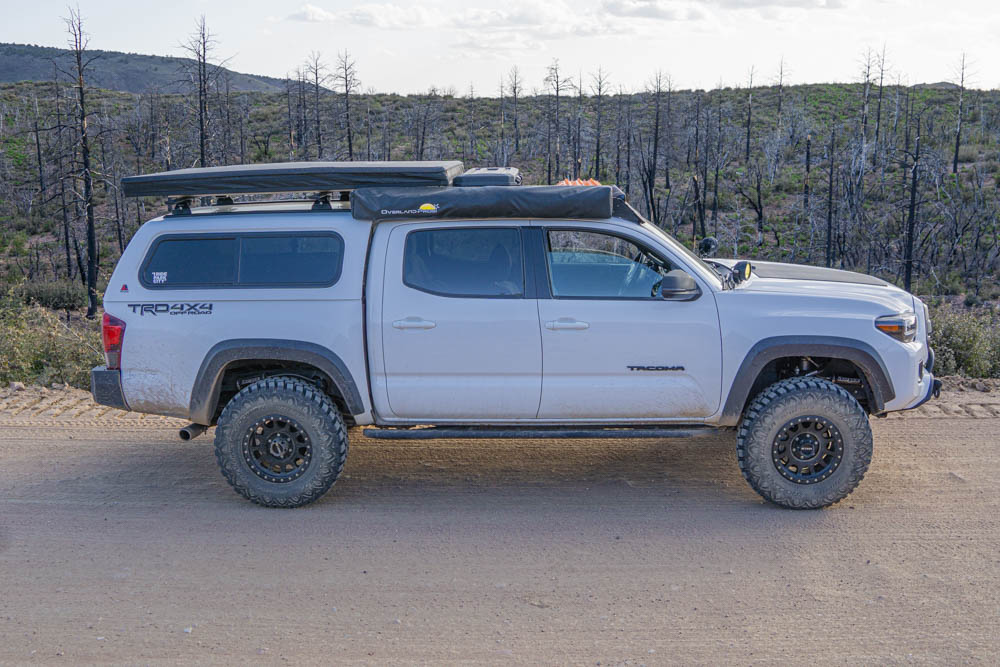
It’s pretty clear that I really like these rock sliders. I’ve run them for over two months now and have yet to find something that I don’t like about them.
To be honest, I’d say there are no cons thus far. They check every one of my boxes and I really stand by the fact that they’re the bee’s knees!
Final Thoughts

Without a doubt, Restless Offroad puts out a bangin’ product. They’re made in America, have a reasonable price, are easy to install, and have numerous customization options. These are all of the things that you could want in a set of rock sliders. If you’re in the market for a set of sliders, then you should highly consider Restless Offroad as an option!
I’m stoked about these and am looking forward to getting in some more miles to really put them through their paces!
