
DIY Kit That Can Potentially Save You Hundreds Of Dollars
Today, you don’t see too many DIY armor options. They used to be much more popular years ago with previous generations, but now, prefabricated options dominate.
The True North Fabrications DIY Kit provides an excellent opportunity to enhance your fabrication and welding skills – while saving money in the process.
This kit is priced right around $600, around half (or more) of what other hybrid bumpers cost. From there, you can purchase the required tools and protective gear to construct the bumper yourself or find a friend who is capable. The instructions guide you through the steps of prepping, welding, and finishing the bumper, allowing you to complete the entire project under budget. If you don’t already have tools, it’s easier to justify buying them, since the total cost for bumper and tools will still come in under a finished option.
Find it Online
- True North Fab DIY Hybrid Bumper 2016-2023 Tacoma: Check Price
Recommendations & Tips
If possible, use a 220v welder. The kit can still be assembled using a 110v welder, but it will require significant pre-heating of all components. Utilizing a 220v welder significantly reduces the time and effort required for the assembly.
Deploy a large, flat assembly surface. Many parts require the bumper to be placed upside down flat. A spacious, even surface simplifies alignment. Furthermore, adding jigs to the surface makes the process easier.
Build jigs and use clamps to keep everything flat in particular the BORA Centipede makes a great investment. Smaller DIY welding tables for this project will improve the quality of your build in detail these tables allow you to clamp directly onto them when welding holding the project flat.
Larger tools are more effective and generally faster and more accurate working with larger material. I had access to a belt sander, desktop grinder, and more. By comparison having these tools mounted and easy to use helped making fine adjustment to material.
Keep in mind that this is a DIY kit, being that things may not fit perfectly on the first try. Some grinding and sanding may be necessary to achieve a better fit.
Tools & Materials
- Welder 110v or 220v
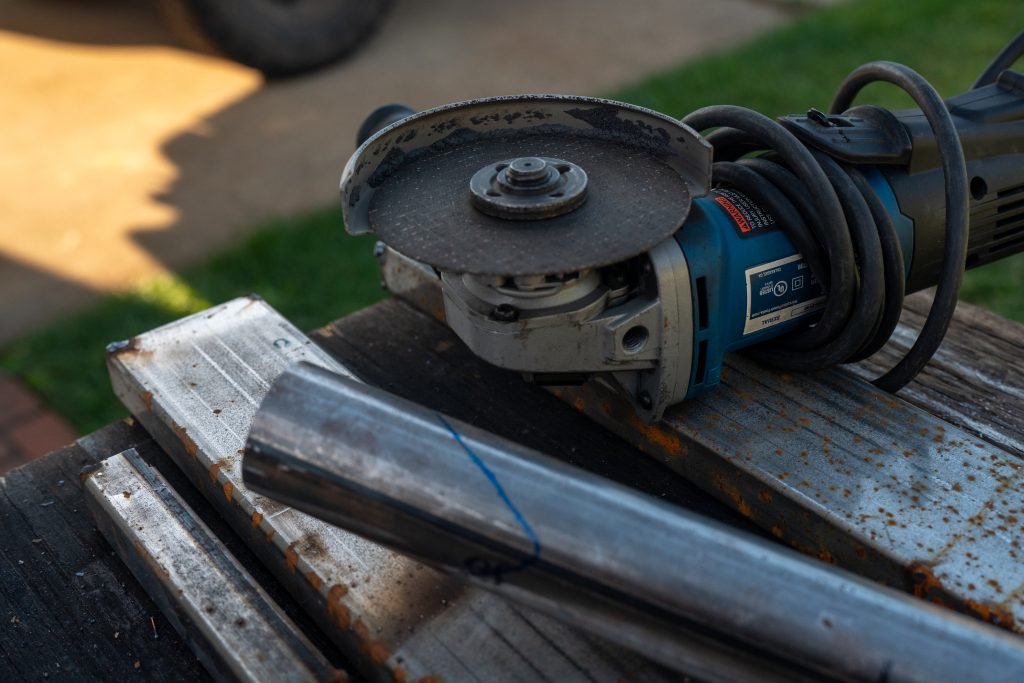
- 4-1/2″ Angle Grinder
- Flux Core Welding Wire 4 lb. Roll
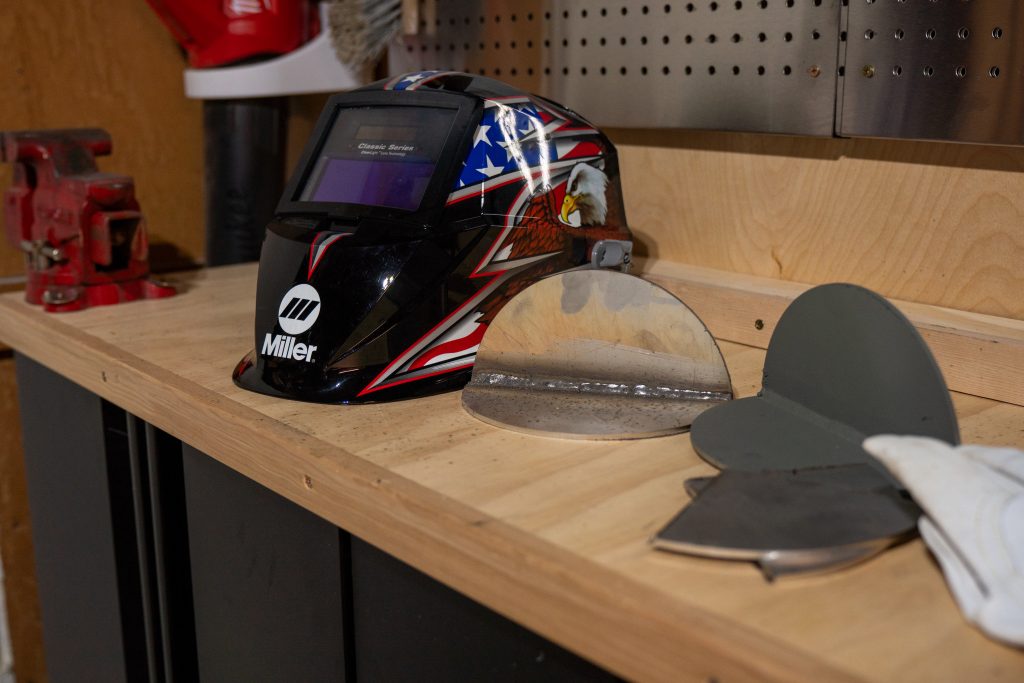
- Welding Gloves
- Auto-Darkening Hood
- Acetone
- Wire Wheel
- 4-1/2″ x 7/8″ 60-Grit Flap Disc
- Black Truck Bed Coating Spray
- 4-1/2″ Angle Grinder Wire Brush
- Self Etching Dark Green Primer Spray
- Calipers
- MIG Welding Pliers
- Magnetic Right Angle Welding Holders
- Clamps
- Spending the remaining funds on additional consumables, protective gear, and clamps.
Tip #1 – Practice Welding
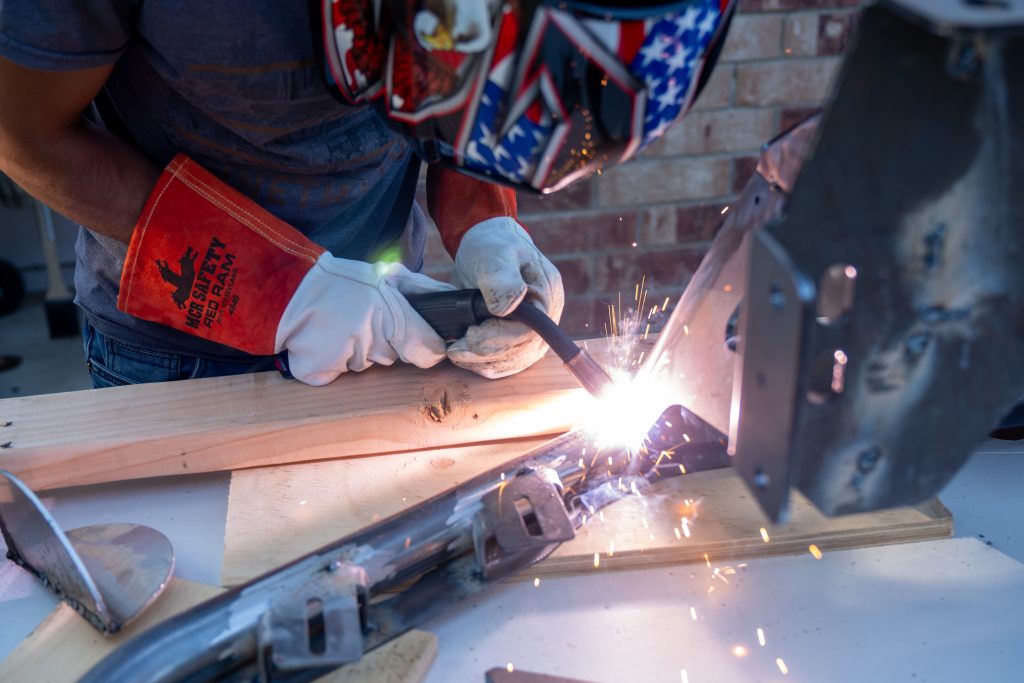
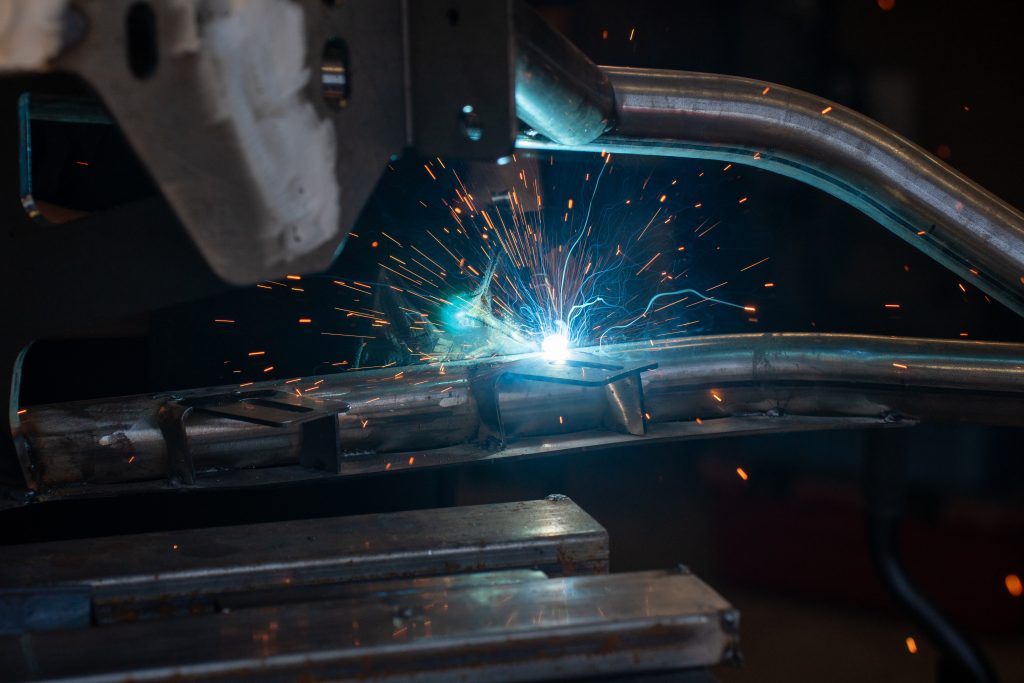
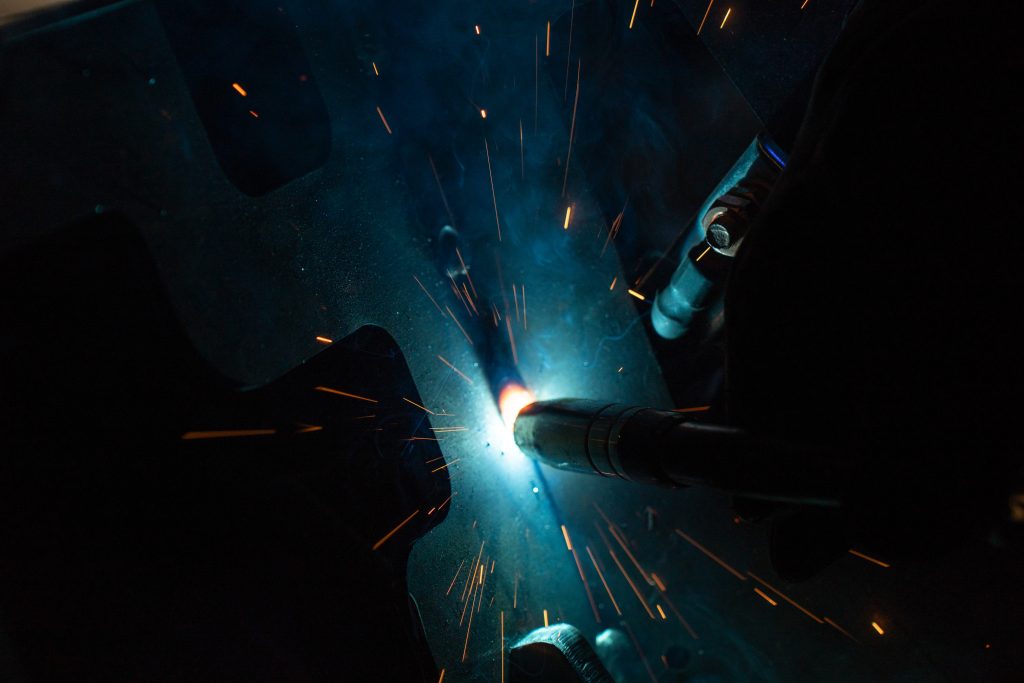
A crucial aspect of the entire bumper building process is practice welding and fabrication. While cost savings are certainly important, our primary goal is to ensure that the bumper looks good.
To achieve this, it’s imperative that we practice our welding skills. You can easily obtain scrap metal for practice from your local metal supplier.
Practice the following…
- Safety
- Wire Speed
- Heat Control
- Distance
- Movement Speed
- Movement Consistency
- Weld Pattern
I recommend watching welding tutorials on YouTube. Remember, you can always clean up your welds, grind them down, and redo them if necessary. Perfection isn’t essential for your first project; it’s all about the learning experience.
Tip #2 – Inventory Parts
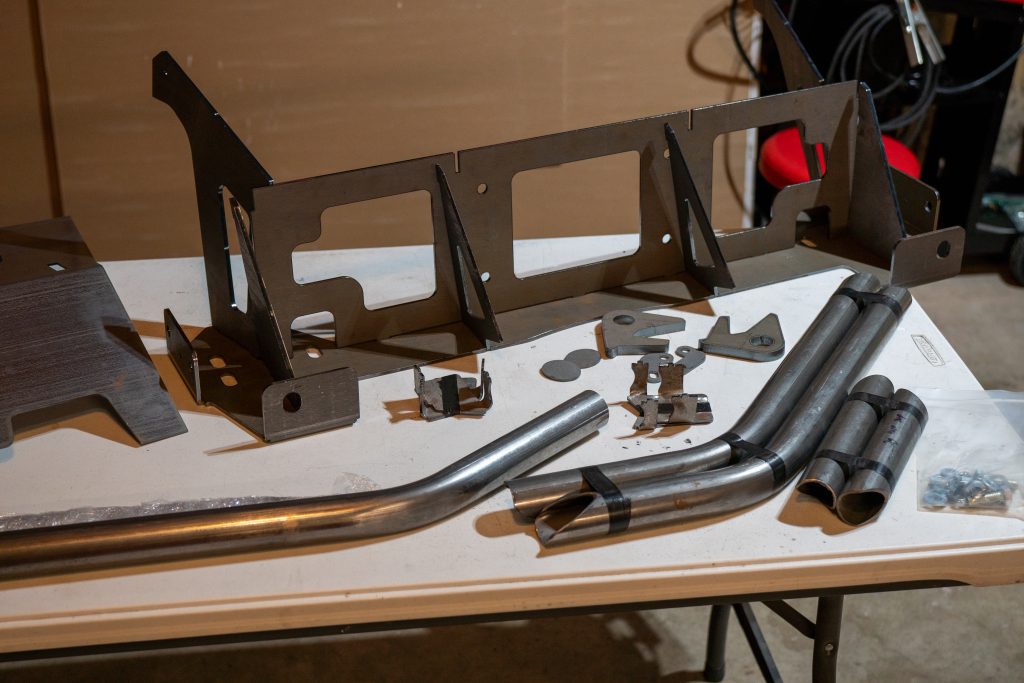
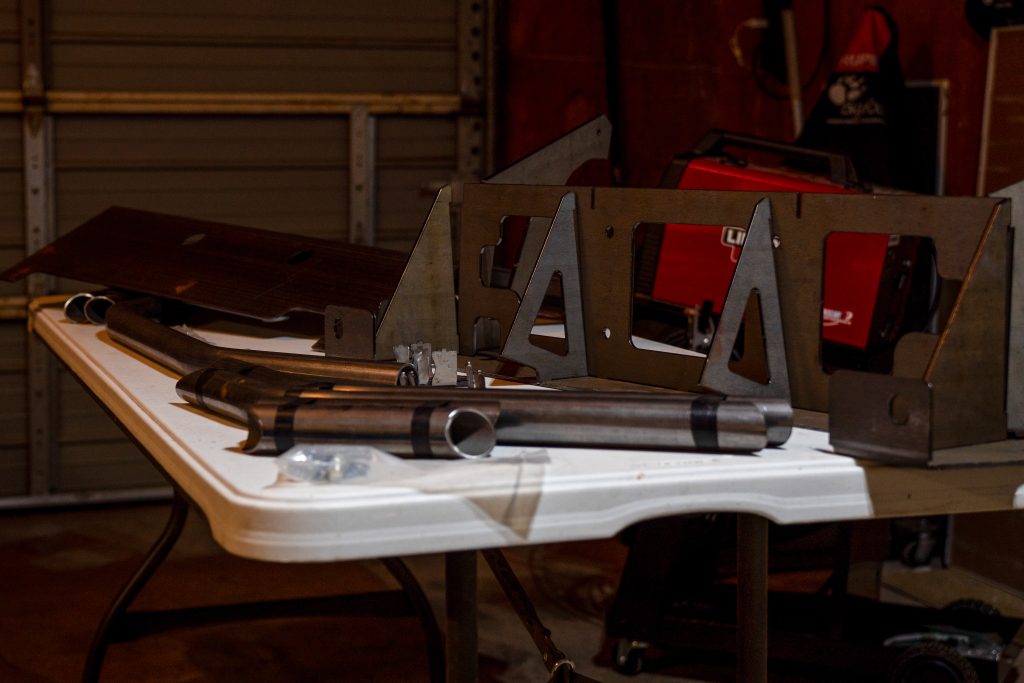
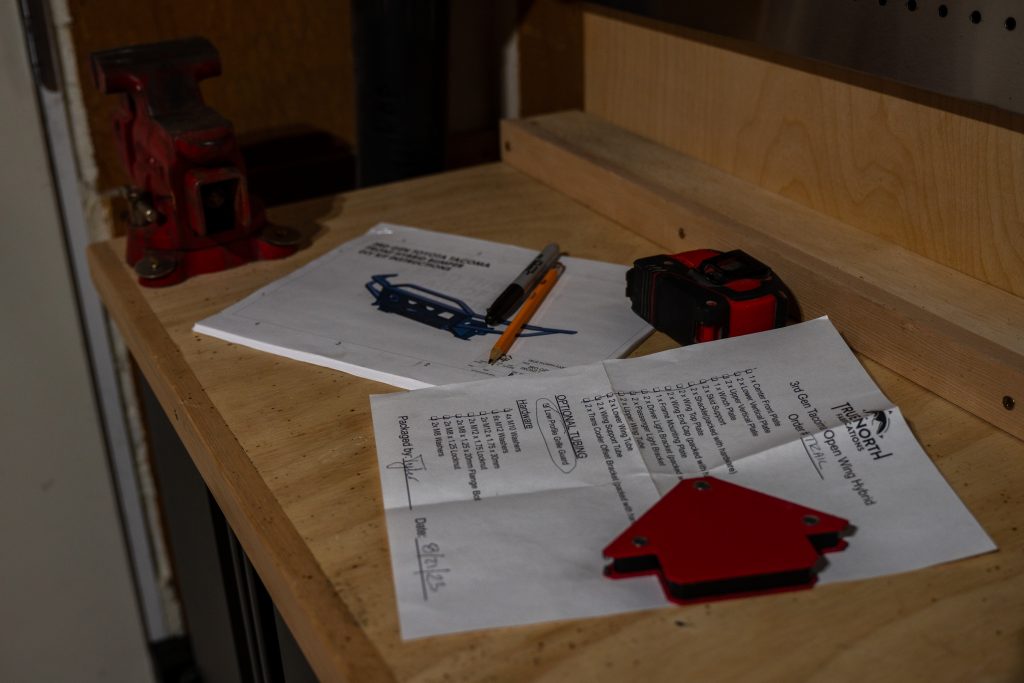
Nothing can disrupt a project more than getting into a productive rhythm and suddenly running out of a crucial component. To prevent this situation, begin by laying out all the bumper parts on the floor and taking inventory of everything available.
The objective is to confirm that we have every single part required for the assembly process. It’s wise to do this early on, as it provides a buffer in case we need to contact the vendor for a replacement part. Furthermore, consider your consumables. Things such as grinding discs, paint, primer, welding wire, and acetone can run out suddenly.
Tip #3 – Organize Tools
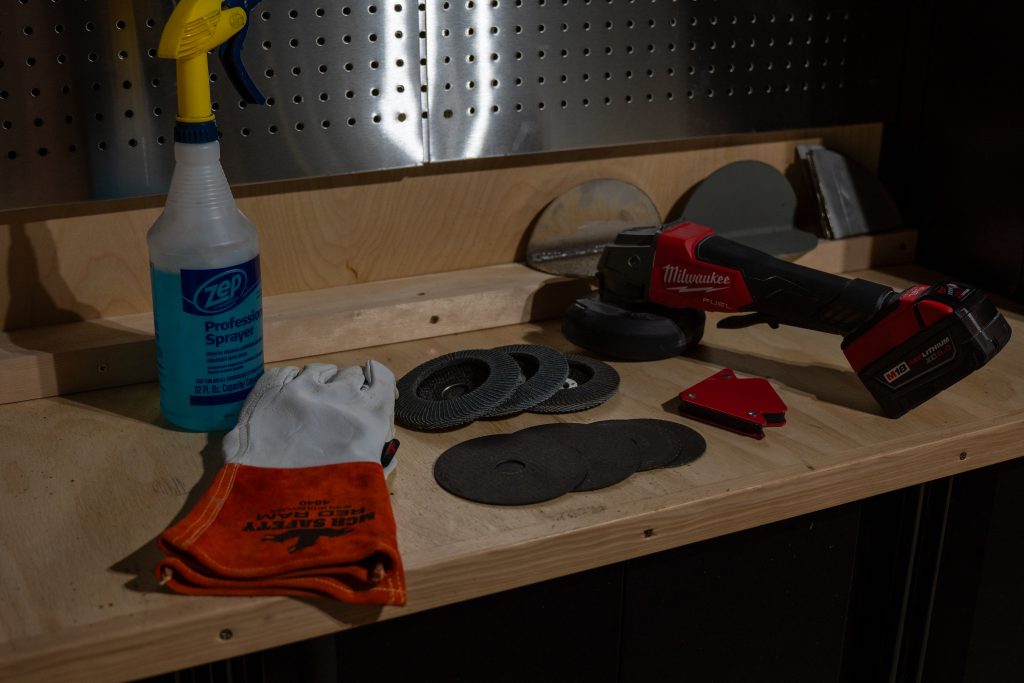
Create separate work areas to keep clean and organized. For example, having a staging area for tools and parts and then an assembly.
In doing so, you can avoid…
- Lost Tools
- Mixing Up Parts
- Errors During Assembly
- Skipping Steps
- Wasted Movements
Tip #4 – Plan The Build
True North provides us with highly detailed instructions on how to assemble the bumper. Here are some essential points to consider.
Prioritize Cleanliness: A clean workspace, clean parts, and a clean MIG gun are fundamental for achieving good welds. Thorough preparation work will help maintain a pristine appearance. Similar to painting a car, the majority of the effort lies in the preparation.
Maintain Precision: Use clamps and 90-degree angles to ensure everything remains perfectly square during assembly. This step is crucial for the overall alignment and appearance of the bumper.
Tacking Before Final Welds: When you begin assembling the flat plate, it’s advisable to tack components together as much as possible before proceeding with the final welds. Long, high-heat passes can cause the metal to warp out of square. It’s best to perform smaller passes on the bumper, switching to the other side for additional small passes to prevent overheating and metal warping.
Tip #5 – Clean & Prep Parts

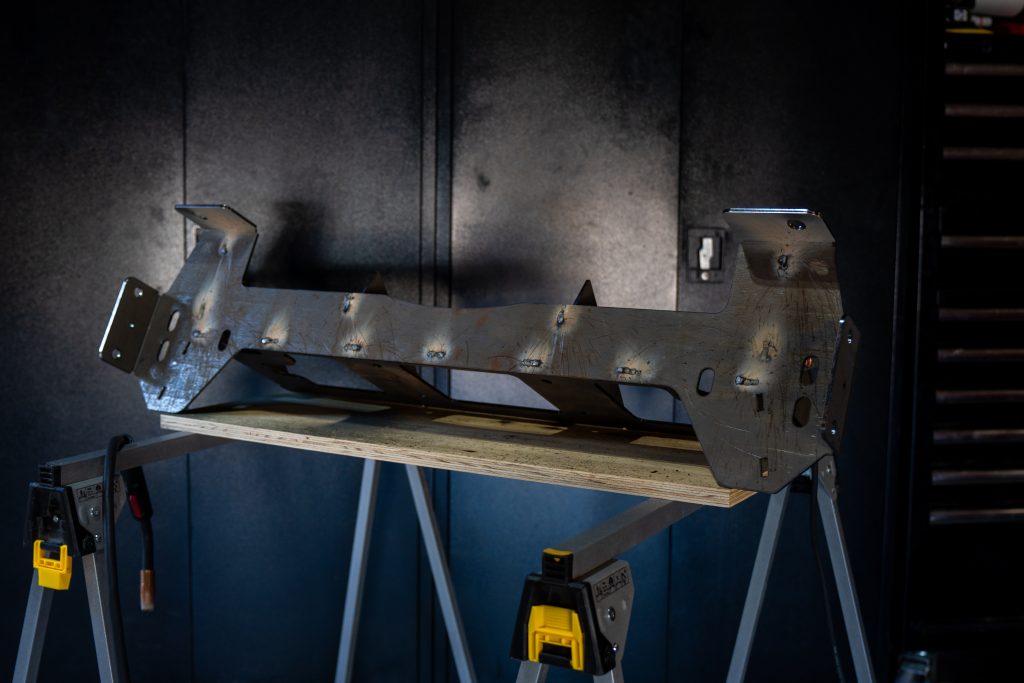
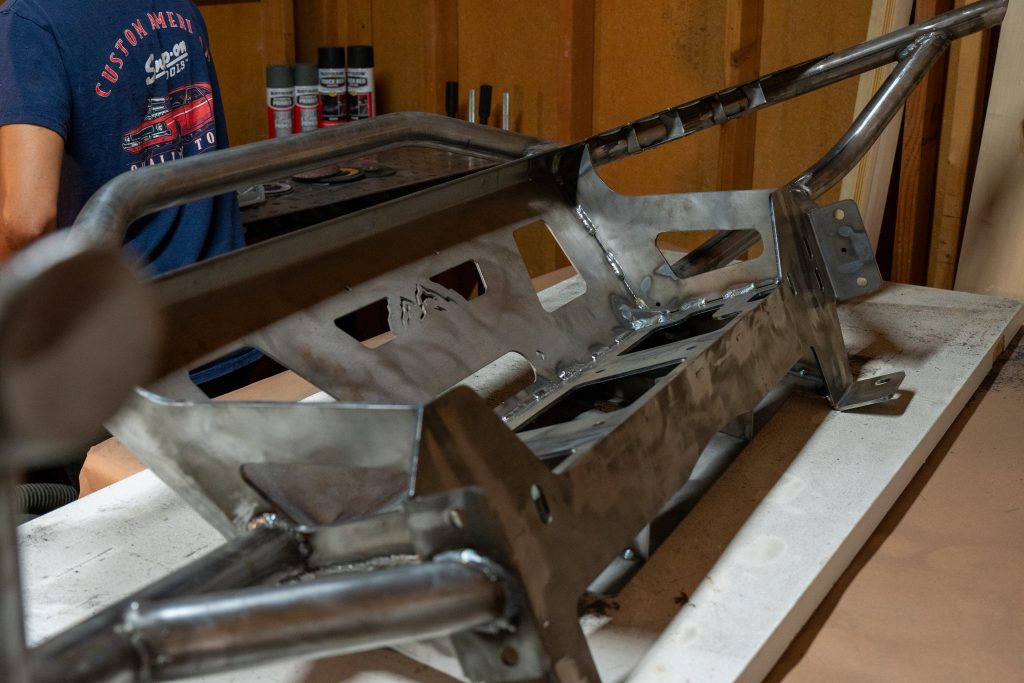
The bumper build commences with constructing the center section. Follow the provided instructions regarding where to place tacks. Double-check the measurements provided to ensure squareness and the correct width of the themes. Everything is laser-cut and designed to fit together. Before assembling the components complete this check list.
- Flap disk the two surface that will be touching.
- Wire wheel the corners if needed.
- Use acetone to clean off any oil or coating.
Installation
Follow along this guide to supplement the provided instructions.
Step 1. Frame Mounting Plate
Take Part 9 (Frame Mounting Plate) and place it on the assembly surface. Flap disk around the slots we will be welding. Then clean off the area with acetone and a lint free towel.
Step 2. Winch Plate

Take Part 4 (Winch Plate) and flap disk the slots that will attach to the frame plate. Clean off the tabs with acetone and then slot into place. Next, clean all the mating surfaces where the winch plate touches the frame plate. A clean weld surface will result in a clean weld.
Step 3. Skid Support Alignment
Prepare Part 5 (Skid Support) by using a flap disk to smooth out the slots that will attach to the Frame Mounting Plate and Winch Plate. Clean the areas you worked on with acetone. Position the skid support in place and clean the mating surface where it meets other parts that will be welded.
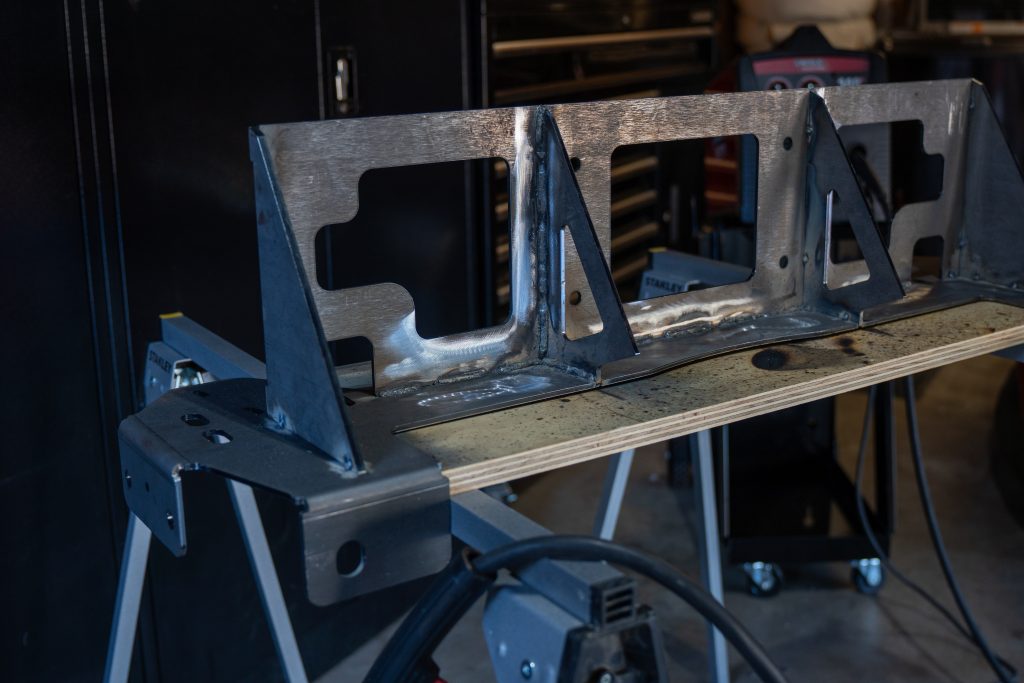
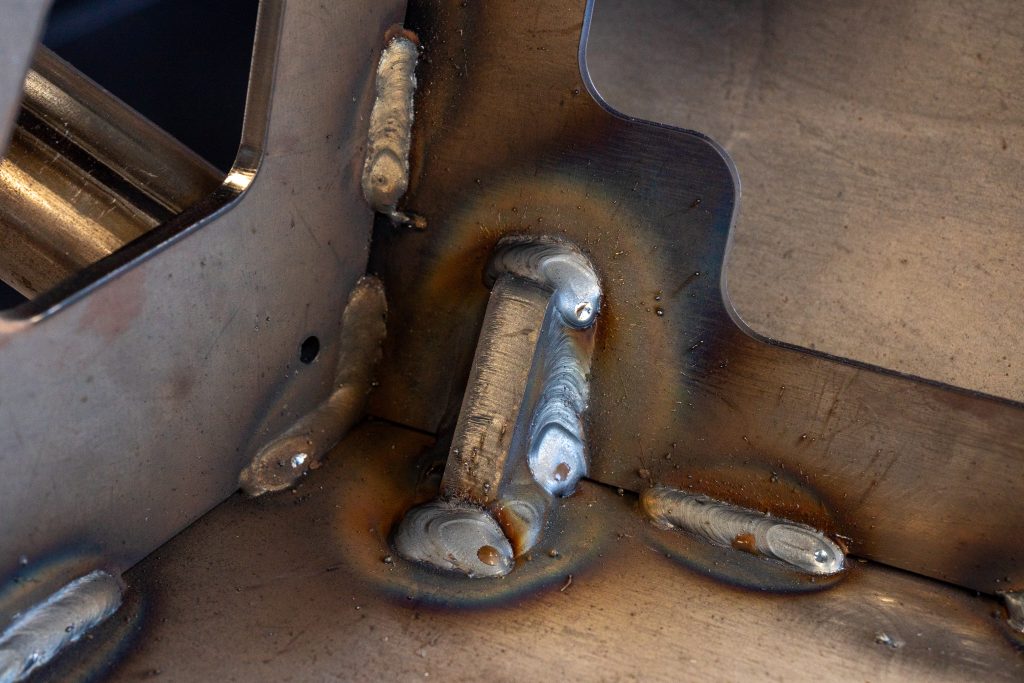
Step 4. Skid Support Tacks
Use a 90-degree angle to ensure that the Skid Supports are perfectly aligned with the Frame Plate and the Winch Plate. As shown above apply tack welds on each joining surface to secure them firmly in place. Ensure the tack welds are robust, preventing any movement and maintaining alignment.
Step 5. Tack Weld Frame Mounting Plate
Weld the plate from behind the Frame Mounting Plate. Tack the tabs firmly to avoid any movement, ensuring they stay in place during the welding process. Use strong tacks, as they can be smoothed down later.
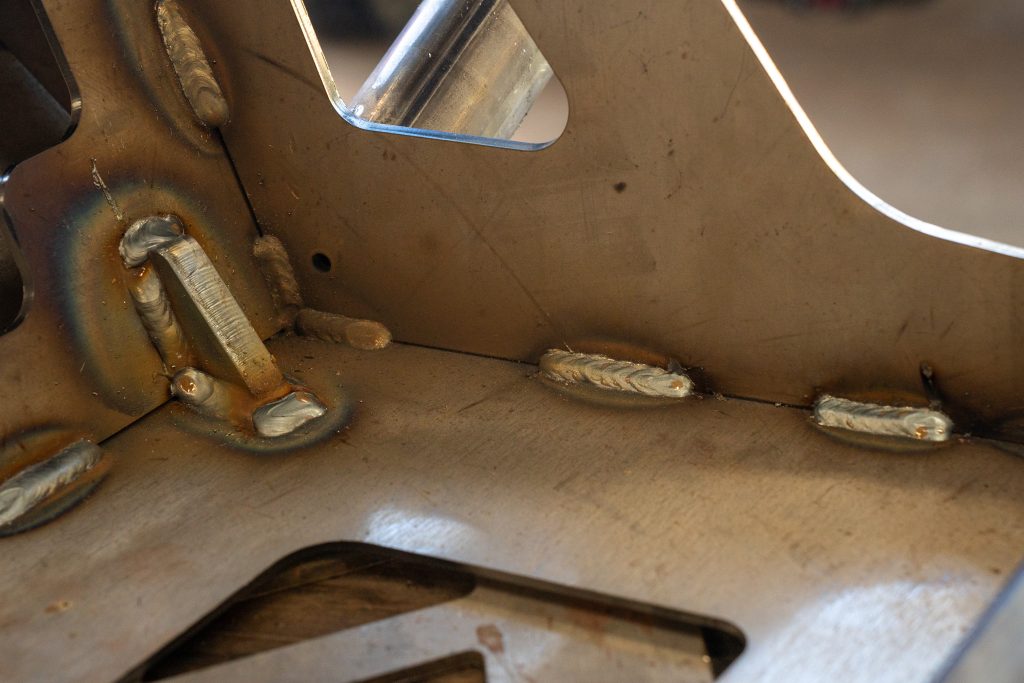
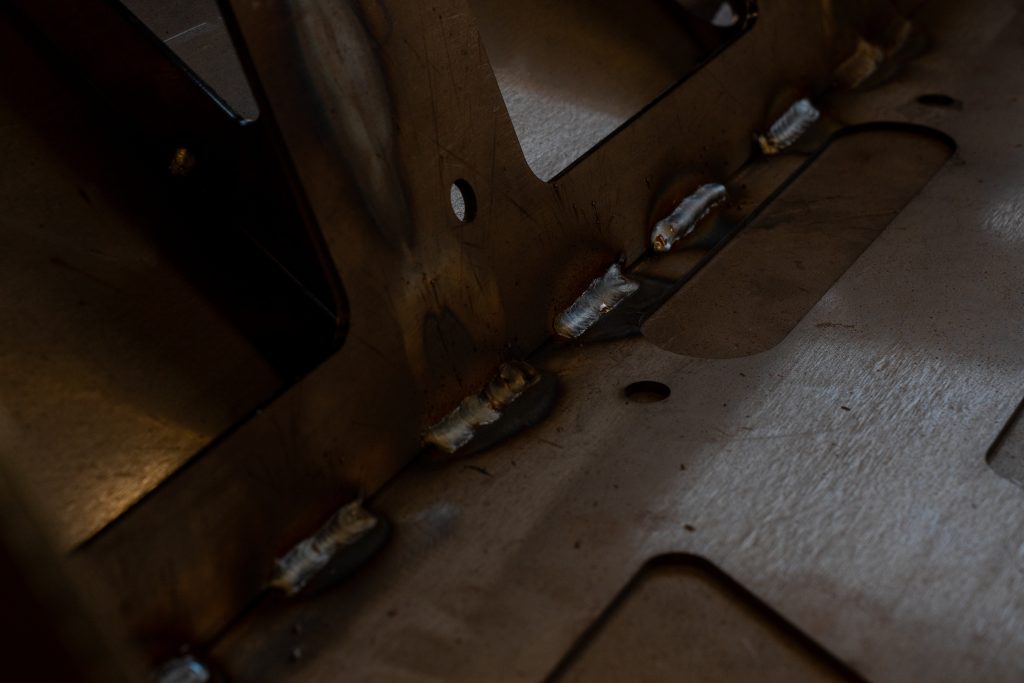
Step 6. Frame Plate Stitch Welding
Weld small beads around the Frame Mounting Plate, Winch Plate, and Skid Supports. These small welds are called stitch welds and are done in specific spots, not all over the part. Make sure to measure the distances and keep even spacing between each stitch weld for a neat appearance. Also, move around the bumper while welding to avoid overheating one area.
Avoid welding near the winch holes. I added a few more welds inside the winch plate to ensure it’s securely attached for winching. Not doing this may cause issues with winch compatibility.
Step 7. Lower Vertical Support
Take Part 2 (Lower Vertical Support) and clean any mounting tabs. Align the support with the Frame Mounting Plate and Winch Plate. Clean all mating edges for a proper weld. Securely tack the Lower Vertical Support into place. Repeat this process on both sides.
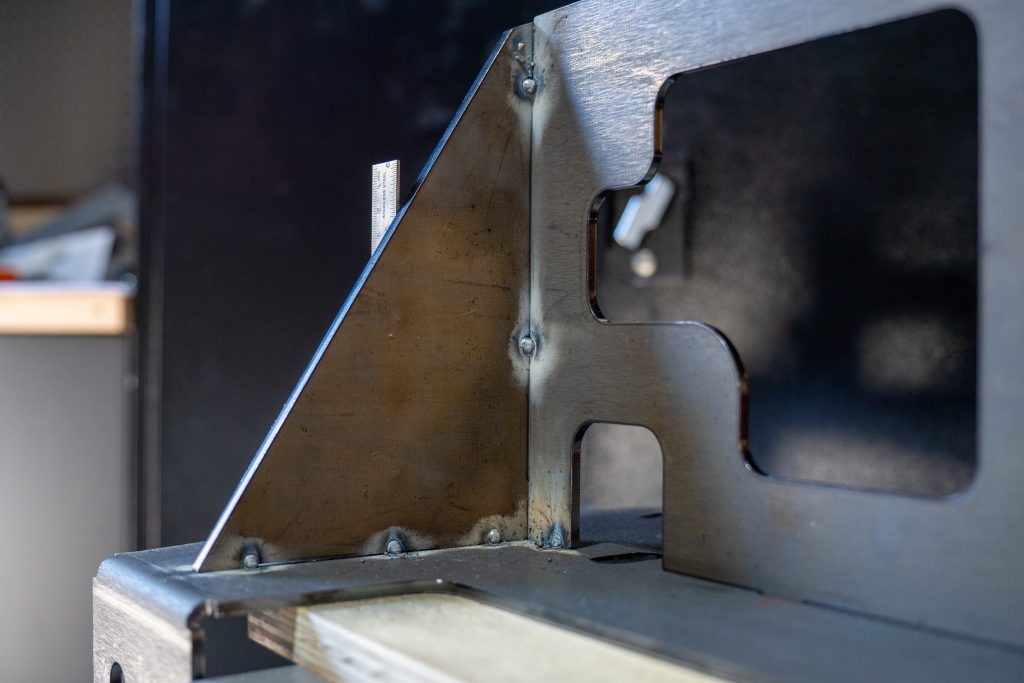
Step 8. Upper Vertical Support
Take Part 3 (Upper Vertical Support) and clean any tabs that will slot into the bumper. Clean all mating edges that will align with the Frame Mounting Plate, Lower Vertical Support, and Winch Plate. Securely tack the Upper Vertical Support by placing two tacks on the outside and tacking over the slots on the back of the frame mounting plate.
Apply tack welds along the outside edge where the upper and lower plates meet the winch plate. Additionally, add tack welds over the slots on the back of the frame mounting plate. Double-check that everything is square, but refrain from making the final weld at this stage. Repeat this process on both sides.
Step 9. Front Plate Mounting

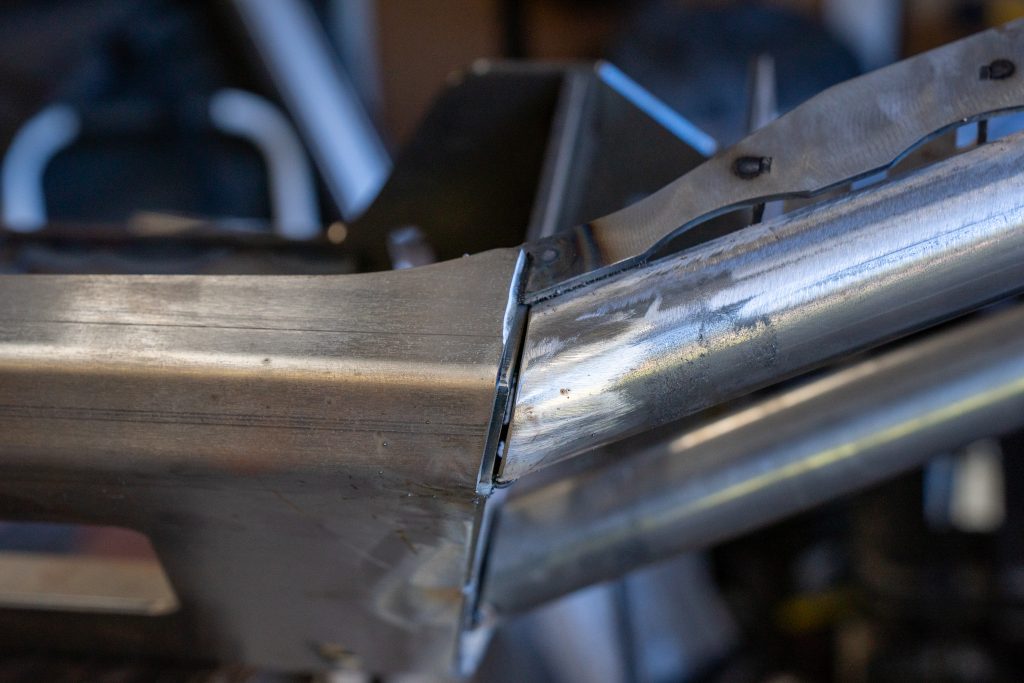
Collect Part #1 (Center Front Plate) and remove any debris from its outer edge. Position the Center Front Plate on top of the center bumper structure, ensuring even spacing from left to right. As can be seen confirm a clean and consistent reveal on both sides.
Apply a tack weld on the bottom corners where the plate meets the Frame Plate. Add tacks every 4 inches going up the side of the Center Front Plate. It’s helpful to have an extra pair of hands to prevent any movement.
Note: Do NOT tack on the top edge of the bumper where the Top Wing Plates will attach.
Step 10. Top Wing Plates
Collect Part #7 (Wing Top Plates). Grind a small Chamfer on the top edge of the Center Front Plate. This creates a valley to weld into.
Step 11. Attaching Top Wing Plates
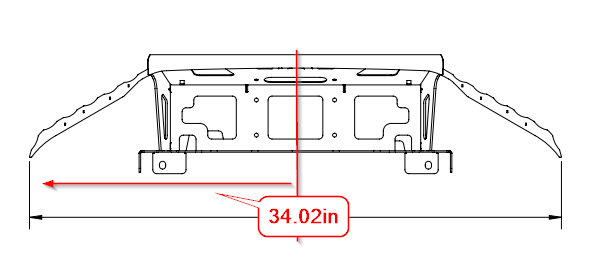
Place the bumper upside down on a flat surface. Find the center line of the bumper and measure outward from there. I marked the center line with tape. Ideally each wing top should be positioned at 34.02 inches from the center line. Tack the Top Wing Plates into place. It’s important to follow this rule to ensure that each wing ends up at the same angle.
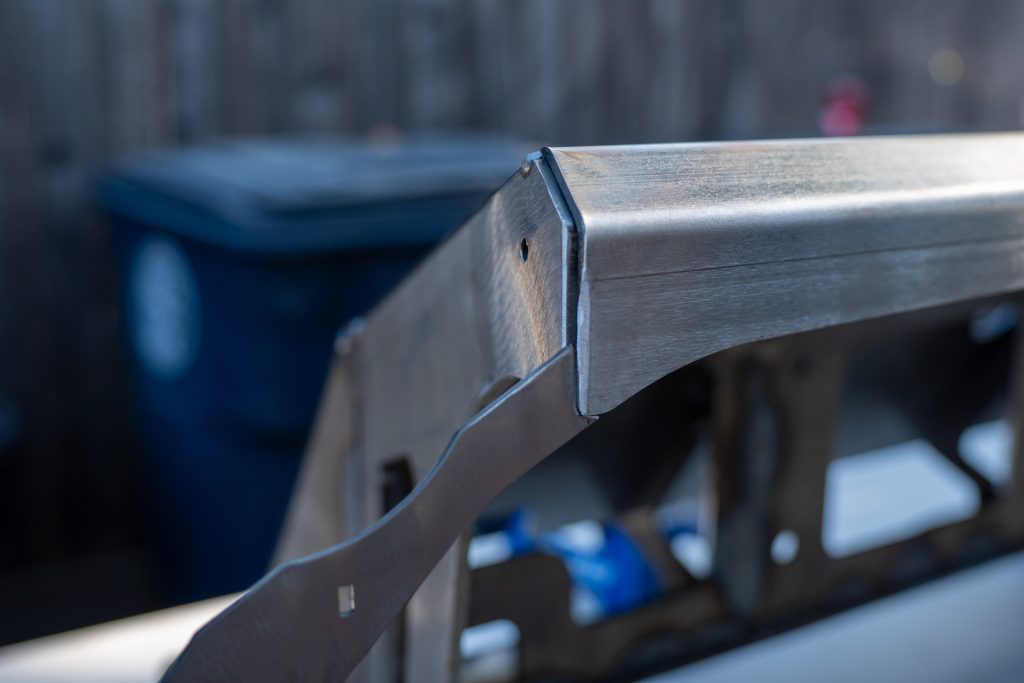
Step 12. Wing Tube
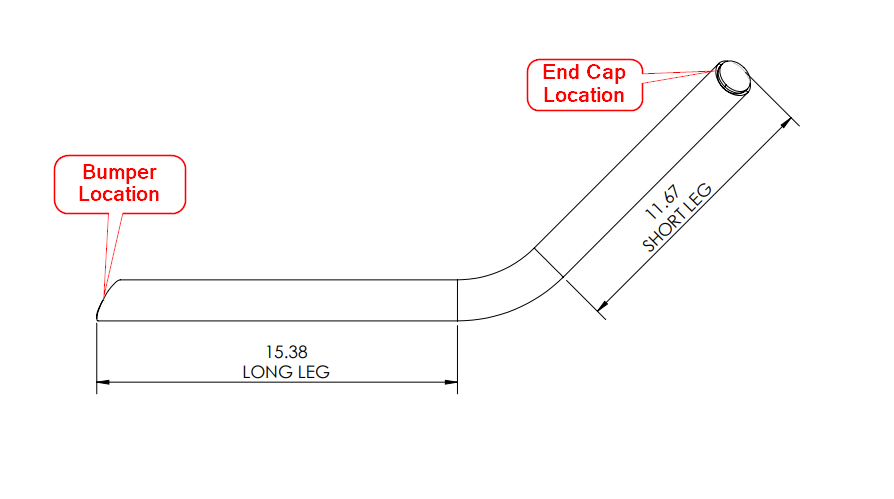
Gather Parts #12 (Passenger Upper Wing Tube), #13 (Driver Upper Wing Tube), and #8 (End Caps). Lay the tube flat on the assembly surface with the long end of the tube facing the bumper. Adjust the endcap to align it with the end of the tube.
Step 13. Attaching Wing Tube
Align the tube correctly to the driver and passenger sides. Ensure the tube makes contact with the inside of the bumper and rests on the edge of the Top Wing plate. You might need to grind down the tube for a flush fit.
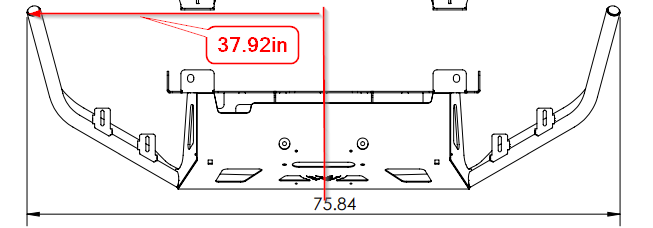
Find the center line of the bumper, and measure 37.92 inches from the center line to the wing tips. Tack the wing tubes into place.
Step 14. Wing Tube End Cap
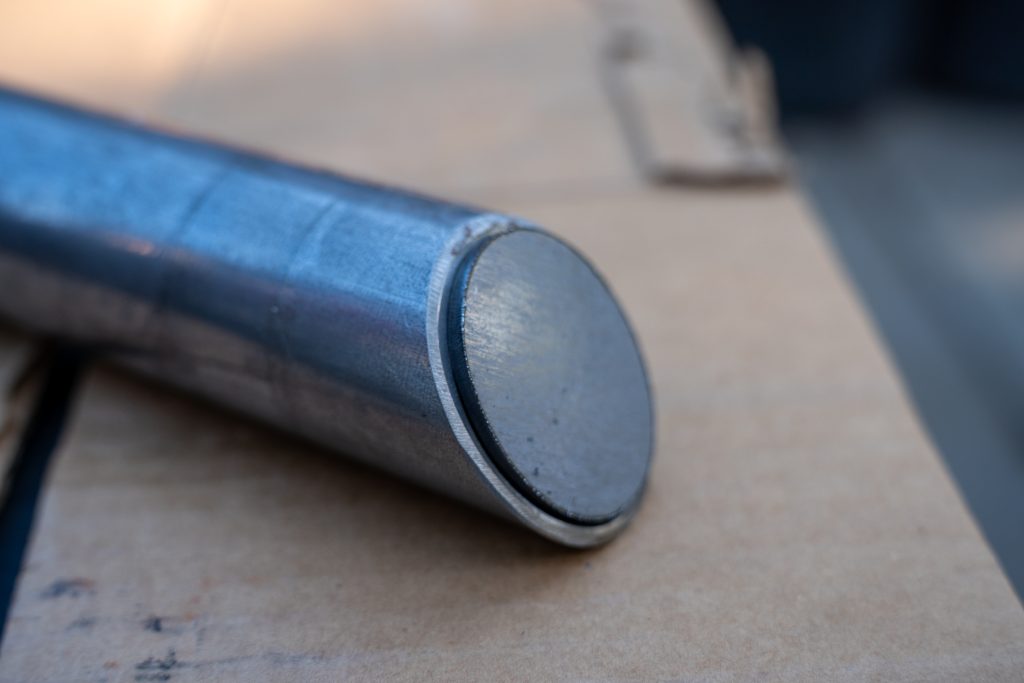
Clean the angled end of the wing tube. Put the cap on the end of the tube to ensure it has even spacing around it. Use a magnet to hold the cap in place and then tack the end cap into place. If possible, have a friend hold the cap with a magnet while you tack it in place.
Step 15. Weld Caps
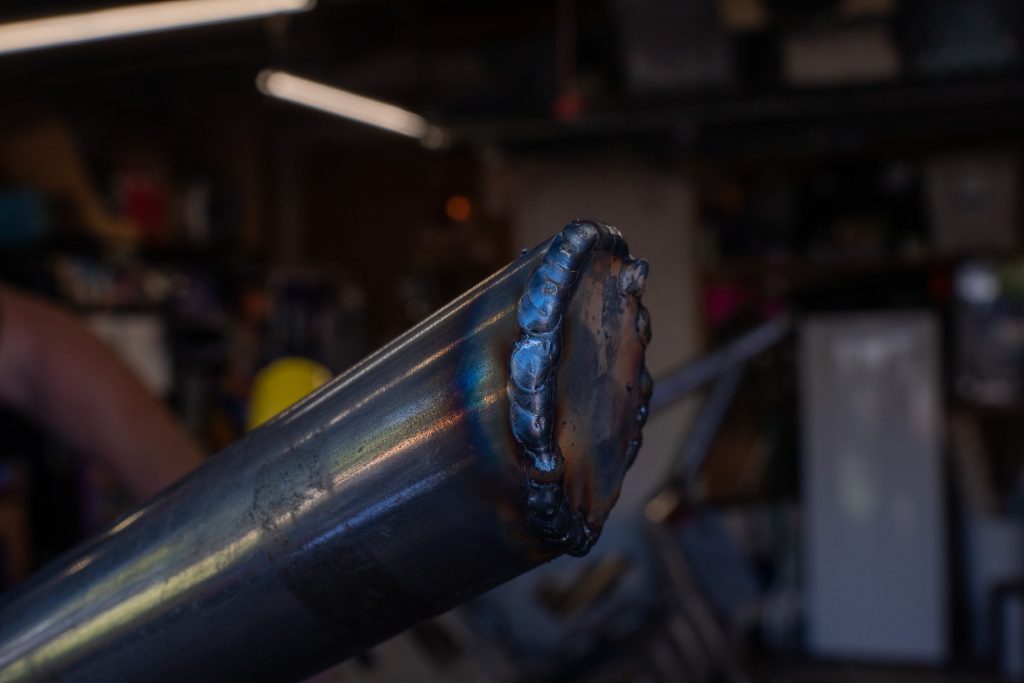
Fully weld in the end caps to the tube. We option to grind down the weld here for a cleaner look. The painting process will fill in a lot of the voids.
Step 16. Light Brackets
We had to adjust the light brackets because they didn’t line up with the top plate. After some bending, they fit. Once they aligned, we attached them to the tube.
Clean the area where we’ll be attaching the light brackets.
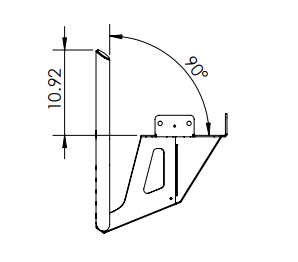
Take a moment to double-check the Wing Tube Measurements. The distance from the frame mounting plate to the end of the tube should be 10.92 inches. I used a long straight edge for this measurement. Having an extra pair of hands is helpful.
It’s important to ensure these measurements are correct because the tacks are still small and slightly adjustable at this time.
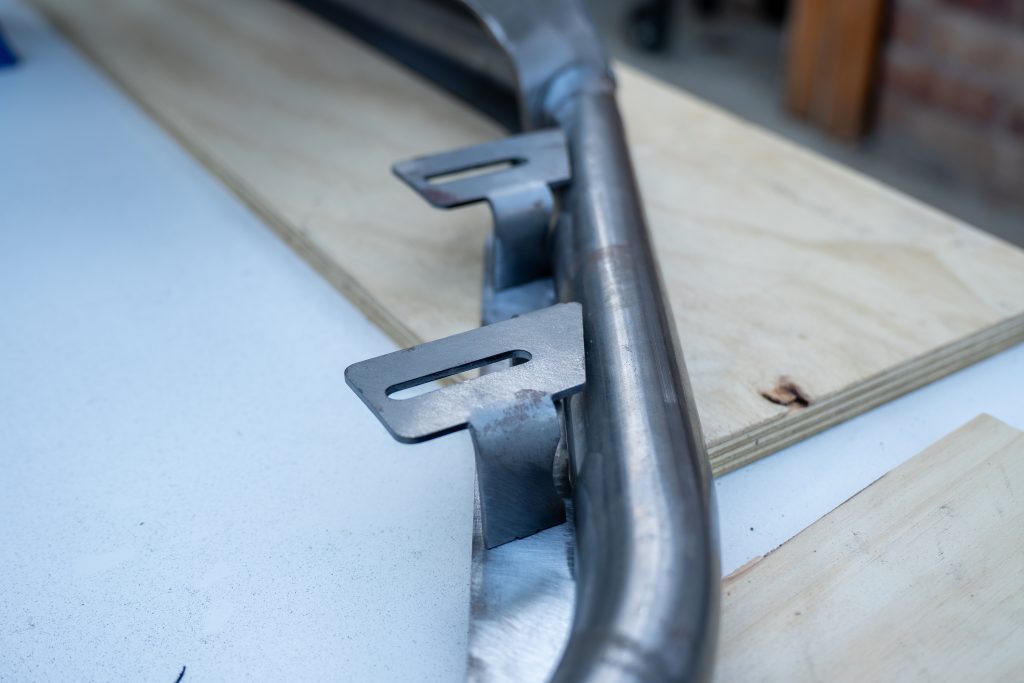
Step 17. Wing & Bracket Tacking
After confirming the measurements, clean the areas where tacks will be placed. Acetone is fine for tight spots.
Begin by tacking the Light Brackets to the Top Wing Plate. Then, tack the Wing Tube onto the Top Wing Plate along the sideline. Finally, tack the Light Brackets to the Wing Tube.
Step 18. Lower Wing Tubes
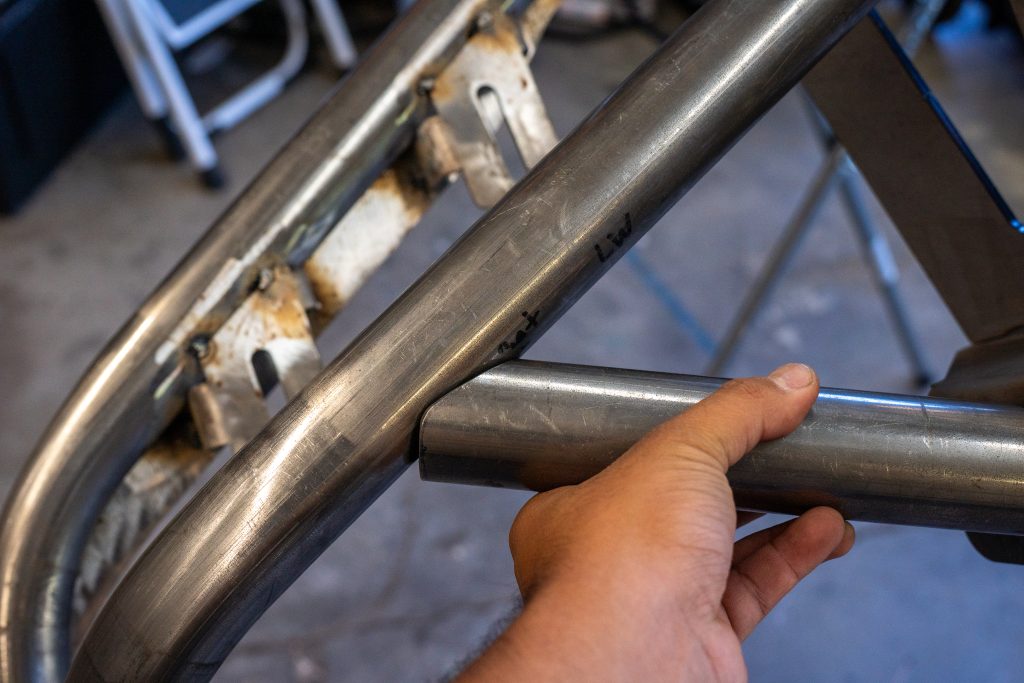
Gather Parts #14, 15, 17, and 18. These parts make up the lower wings of the bumper. Since each part is different, lay them out and test fit them on the bumper to ensure they are on the correct sides.
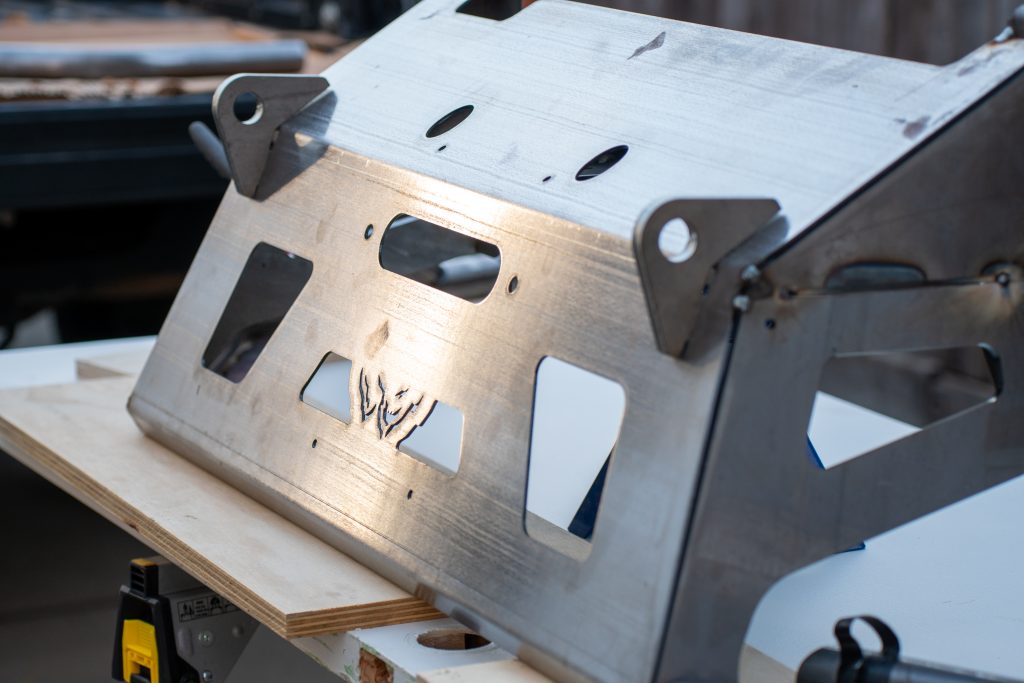
Step 19. Lower Tube Mounting
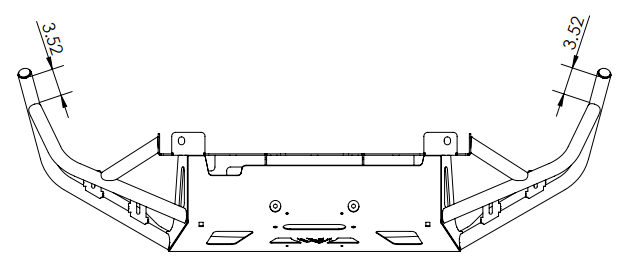
Measure 3.52in from the bottom of the upper wing tube in and make a line.
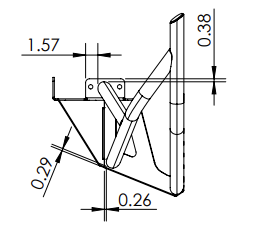
With the bumper positioned upside down measure .29in from the front plate in and .26in up from where the upper vertical support meets the lower vertical support. I found it is best to use a set of calipers for these measurements as it is most accurate. Repeat on both sides.
Step 20. Lower Wing Tube Tacking
With the markings on the bumper completed align the tube. The tube may not fit perfectly and some sanding will be needed to get a flush fit. We used a bench mounted belt sander to get a consistent angle. Then lastly tack the tube into place. Followed by repeating on both sides.
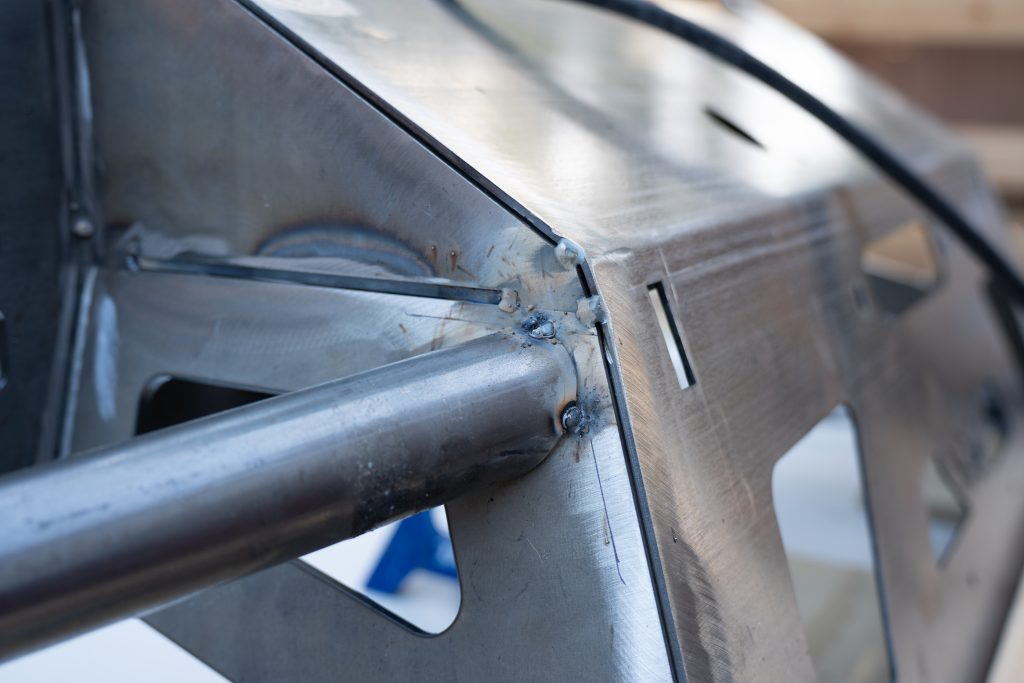
Step 21. Wing Tube Supports
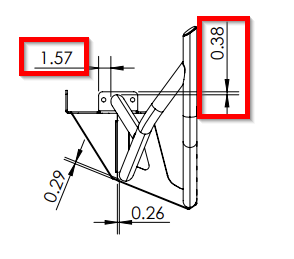
Locate the side support on the Frame Mounting Plate. Using a set of calipers measure 1.57in from the bottom and .38in from the rear of the plate. Mark off this area as the tube must line up within this square.
Align the tube and it should meet the lower wing tube and sit flush on the Frame Mounting Plate. This tube required heavy modification to fit properly. But after fine adjustment the fitment was perfect. Repeat on both sides.
Step 12. Wing Tube Support Tacking

Align the Wing Tube Supports with the markings we made before. Tack these items into place with good strong tacks. Follow through and repeat on both sides.
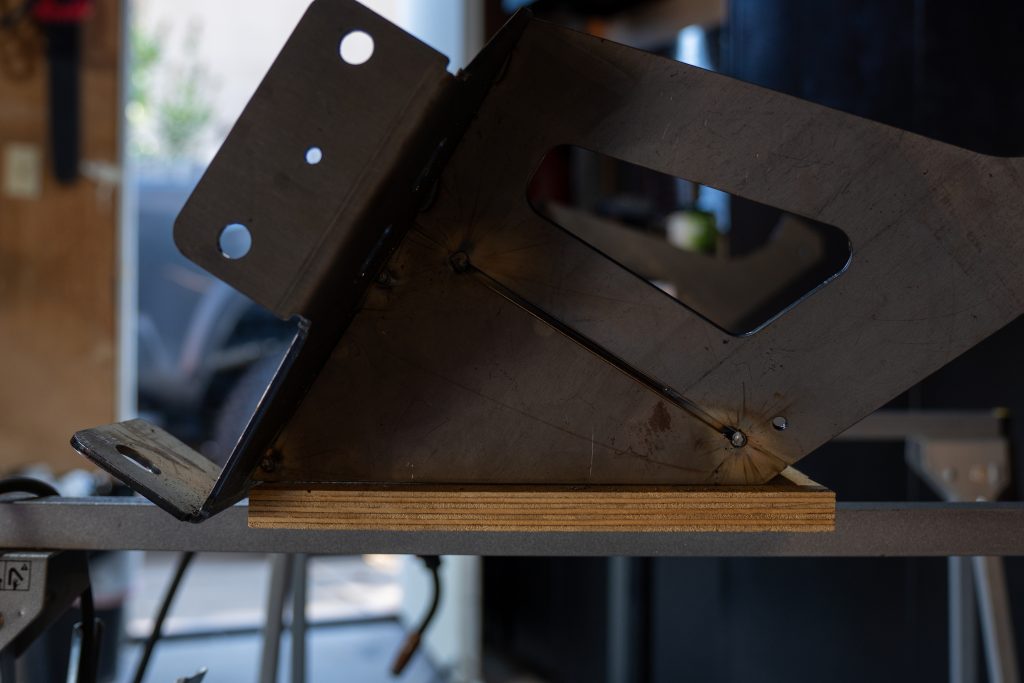
Step 23. Shackle Mounts

Collect Part #6 the Shackle Mounts. From here slot the mounts into the front of the bumper. Clean the area that the shackle mount will attach to. The slots are tight fit but confirm the measurements are correct with the image above.
Step 24. Shackle Mount Tacking
Once the Shackle Mounts are aligned in the bumper. Tack these items into place. It is best to place the tack in the corners of the shackle mount that way when we finish weld it will blend into the full weld.
Step 25. Finish Welding
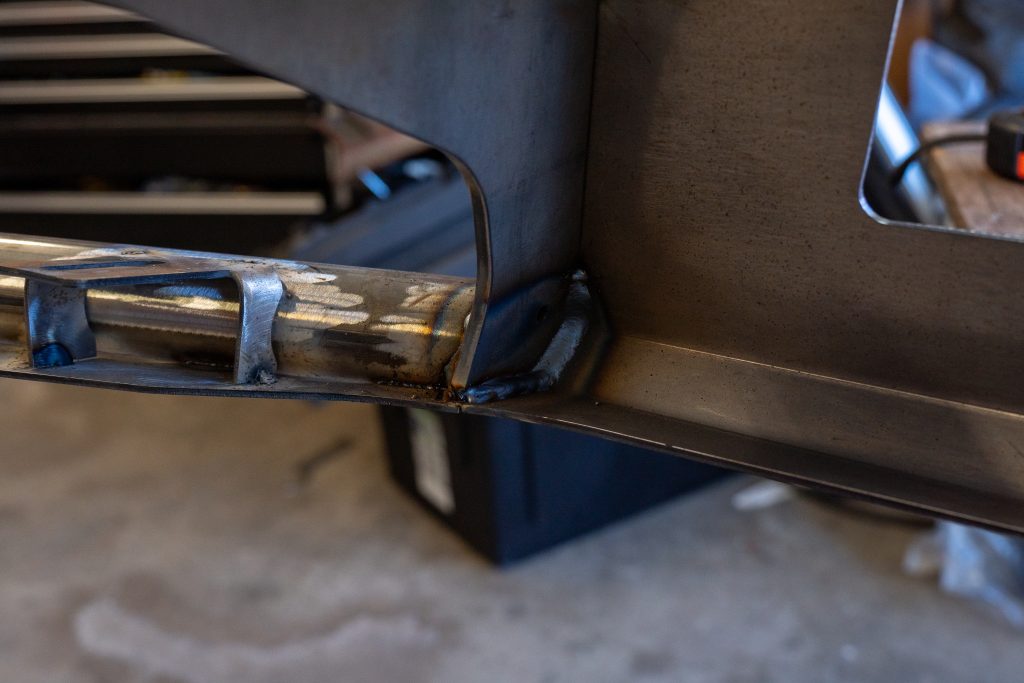
Looking that Upper Support of bumper where it meets the top edge of the Front Plate. Run a finish weld on the inside of the bumper. Meanwhile one side is cooling rotate to the other side to prevent warping. Identically run the same finish weld on the outside edge where the tube meets the Upper Support. Repeat on both sides.
Looking at the inside of the bumper. On the edges where the Front Plate and Winch Plate meet the Upper Support we will need to run a series of stitch welds. These welds are going to be around 2in long. Rotate between sides and also from the top to the bottom as a result it prevents the metal warping. As a result we want to evenly spread out the heat throughout the bumper.
Continuing to look at the inside of the bumper. Where the Front Plate meets the winch plate run a series of stitch welds here also. Correspondingly switch from side to side to keep front from plate from collecting too much heat.
Important: The shackle mounts metal is thick. Preheat the shackle mounts to 500F degrees before welding.
Locate where the shackle mounts meet the Winch Plate. Turn up the settings on the welder that can handle metal of this thickness. After preheating the metal finish weld around the Shackle Mount completely connecting it to the Winch Plate. As soon as the weld is finished post heat the weld so the weld joint does not cool too quickly.
Rotate the bumper into the most comfortable position after all this will result in a better weld. Locate where the Upper and Lower Vertical Supports meet the Frame Mounting Plate. Place a finish weld covering the full distance between the Upper and Lower Vertical support. It is best to do this in strips for consistency and not to heat soak the metal. Finish weld inside of the valley where the winch plate meets the vertical supports.
Since these welds are not 100% structural since the stitch weld is on the inside. We turned the welder down to a slower speed to get a slower more precise weld.
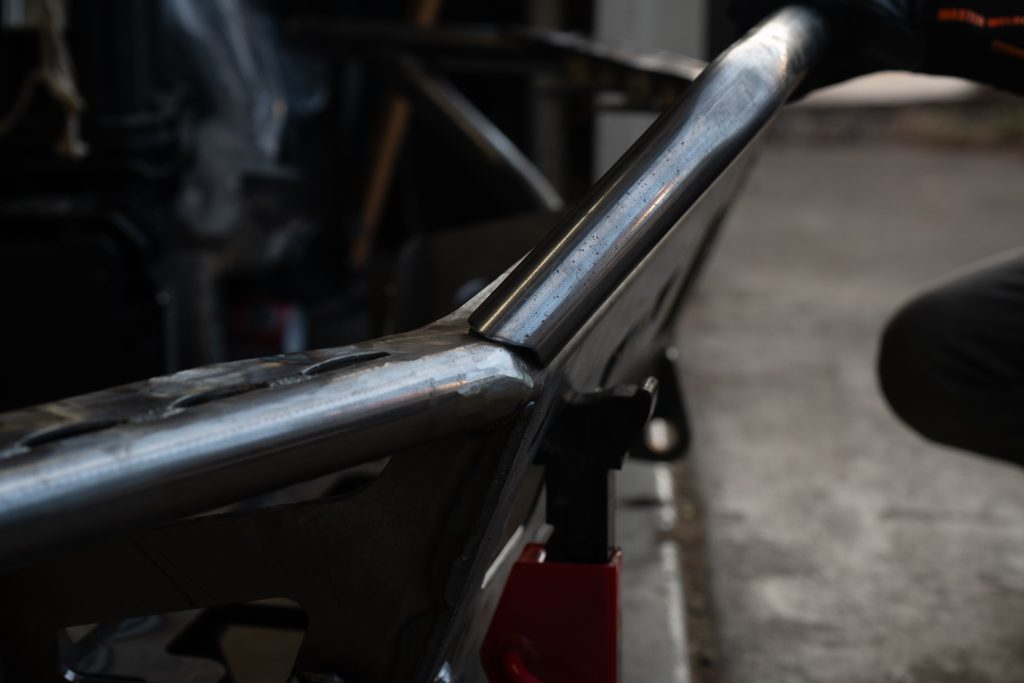
With the bumper in its up right position the valley that was created before. Perform a finish weld where the Top Plate Wing meets the Front Plate of the bumper. This weld will be visible but can be grinding down if it does not come out as excepted.
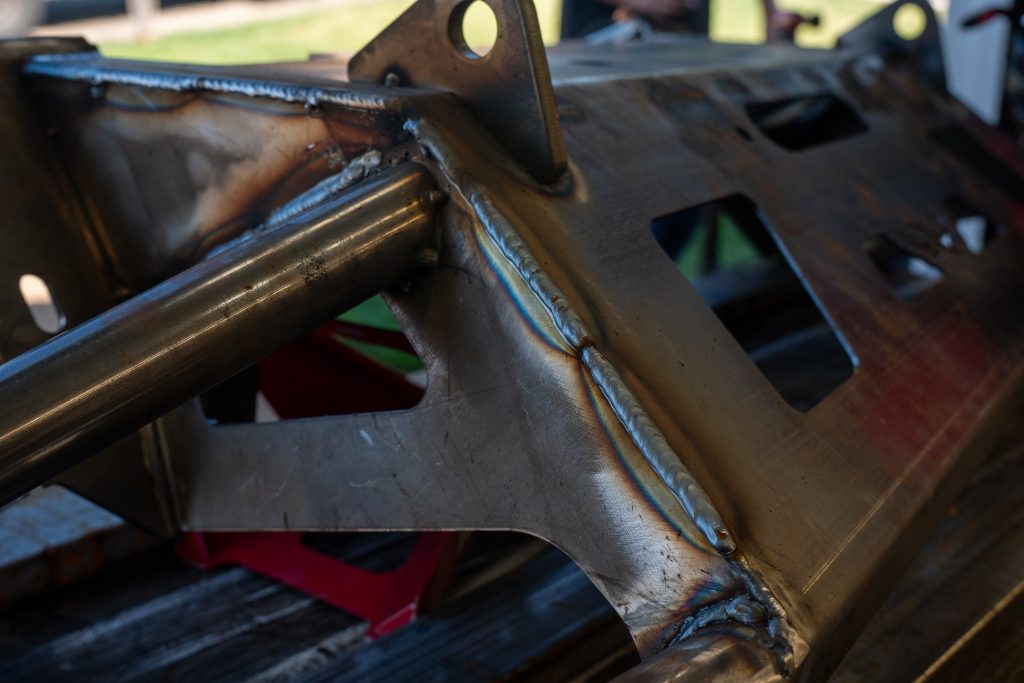
Plate the bumper laying on its back. From here we need to weld the full length of the Front Plate where it meets the Vertical Supports. There is a small valley here to weld into that needs to be cleaned before welding.
This weld will be one that is looked at and inspected. It would be best to either fill the gap substantially and grind it down. But if you have the confidence go for a clean continuous bead. We split this section up in three section to keep down heat. Be sure there is strong tacks around the other side of the front plate to prevent shifting or bending.
Welding around the front of the shackle mount does need to be strong. But this is one of the key points people will look at often. Some tips we followed for this location is leave the welder on the 3/16th setting so you have more time to lay a consistent bead. Preheated the shackle to 500F degrees before welding. Follow up by post heating the shackle so it does not cool down too quickly and cracks the weld.
Welding Tube is one of talents either you are naturally decent starting out or it is a huge learning curve. Unfortunately grinding down these area are fairly difficult too.
From here we want to finish weld all the tube where it meets the bumper. The painting process may help hide some of these areas being that it is best to take your time to get a finished look.
Next, we need to finish weld the Light Brackets into place. Overall these brackets are not structural or holding a ton of weight. A few strong tacks will hold them into place. We did need to use a clamp to adjust the bracket to be a tight fit.
These welds are highly visible and can be grinded down to be smooth. We found it was best to use a clamp to close the gap and use small tacks to hold everything in place. From there we turned the welder down to a slow setting and did a nice finish bead on the top of the Top Plate.
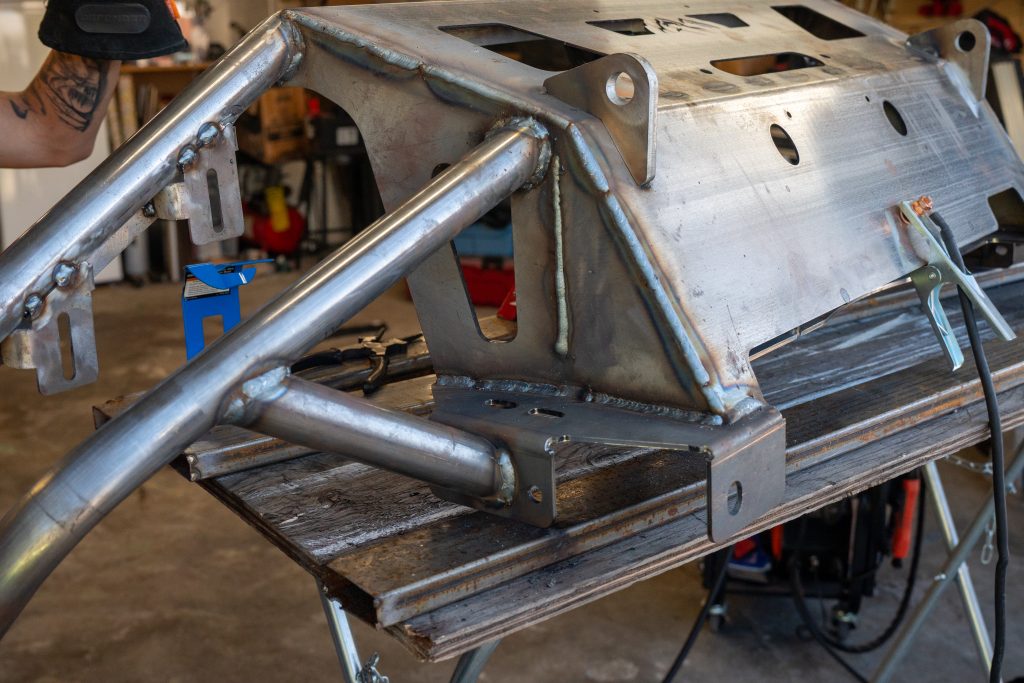
Looking at the rear of the bumper at the Frame Mounting Plate. We want to fill any remain holes and then grind them smooth for a flush fit.
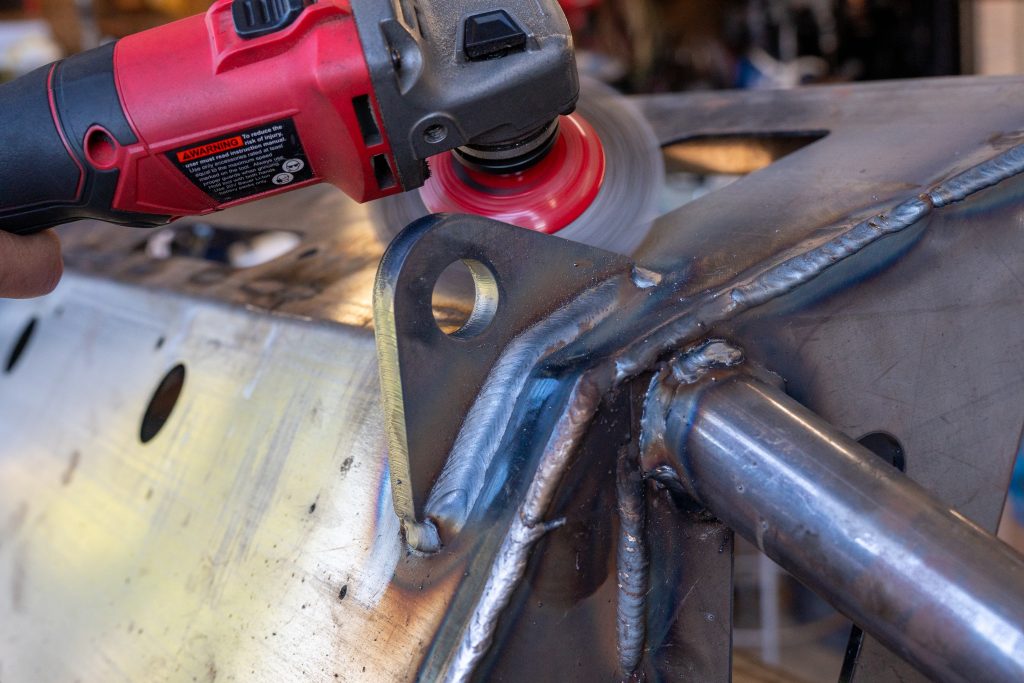
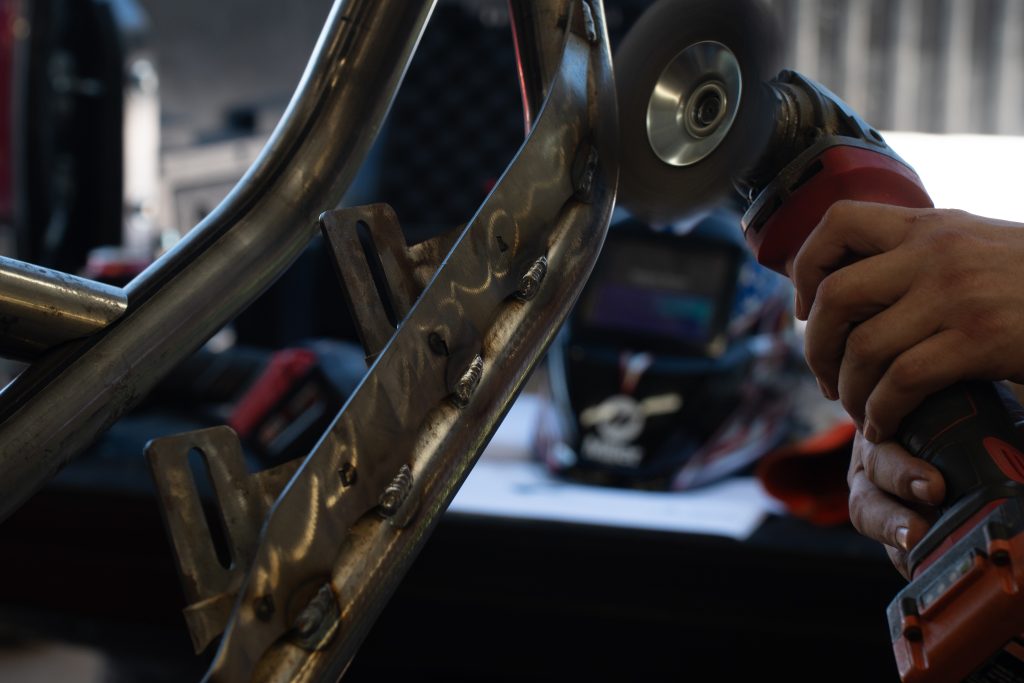
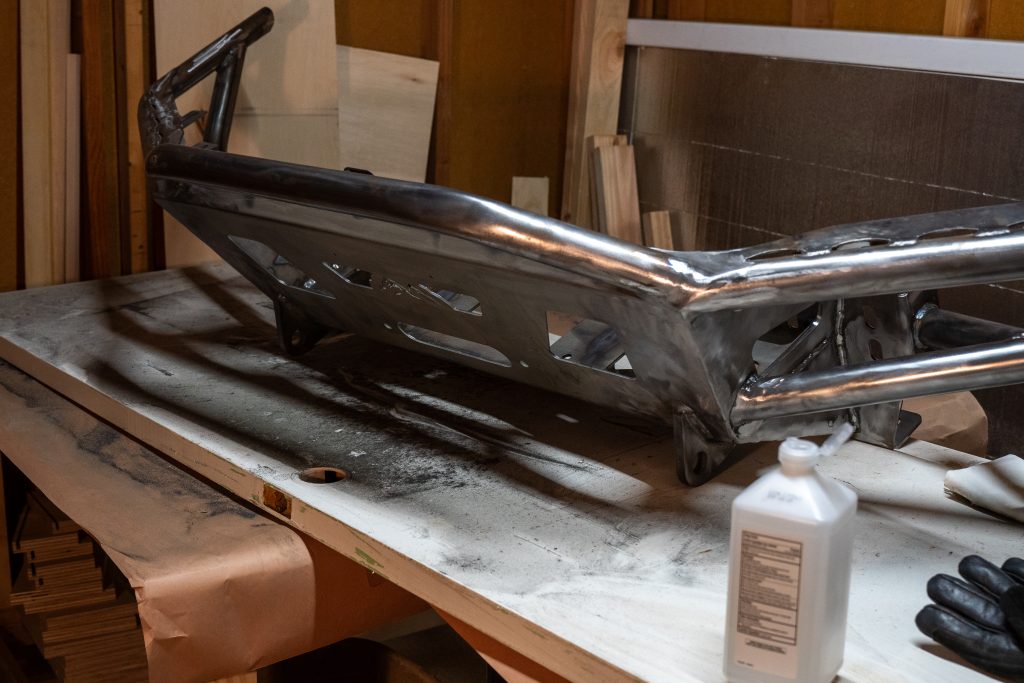
Step 26. Clean Up Welds
At this point the base bumper is complete and needs to be cleaned up. Use a combination of wire wheels, sanding disk, and grinding disk to work down high spots, welds, and slag on the bumper. Lastly the key here is to rough up to surface to get it ready for paint as well as create nice smooth surfaces.
Step 27. Print Tube Templates
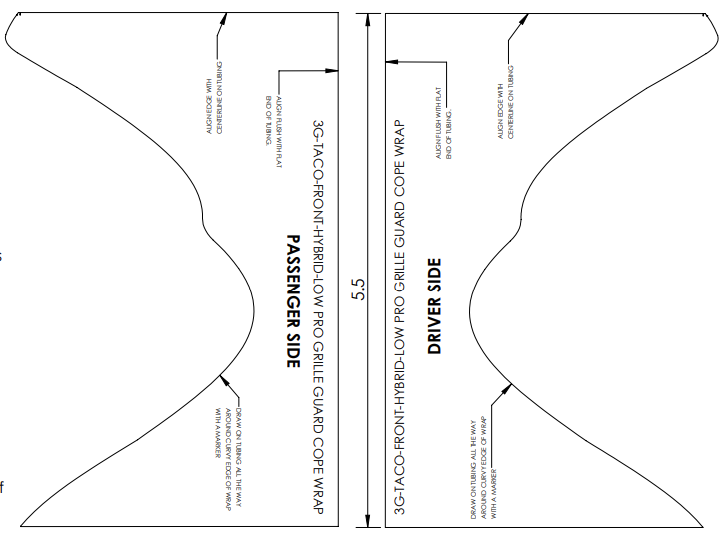
Print a copy of the page 27 from the instructions provided by the vendor. These instructions will contain a template that you need to cut out and align on the tube. Ensure that after printing and cutting out the template, the long side measures 5.5 inches.
Printing out the templates provided to be difficult. The PDF provided is written in a design format and no normal 8.5in x 11in paper. We found the easiest was was to screen shot the template and size it up and down until the print was correct.
Step 28. Clean Tube
Remove any oil residue from the tube using mineral spirts or acetone. The oil is applied to prevent the parts from rusting while in storage.
Step 29. Marking Center
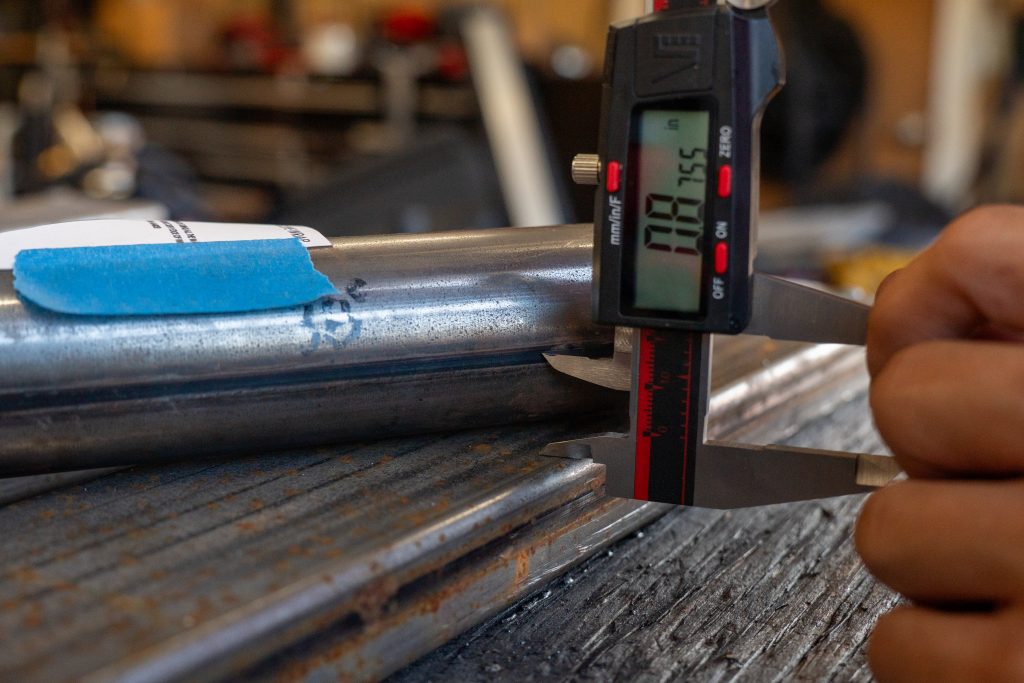
Place the tube on the flat surface where you are working. Measure 7/8ths or 0.875 inches from the flat surface to the tube as shown we used a caliper and a marking tool for this to get a precise measurement.
Step 30. Template & Cutting
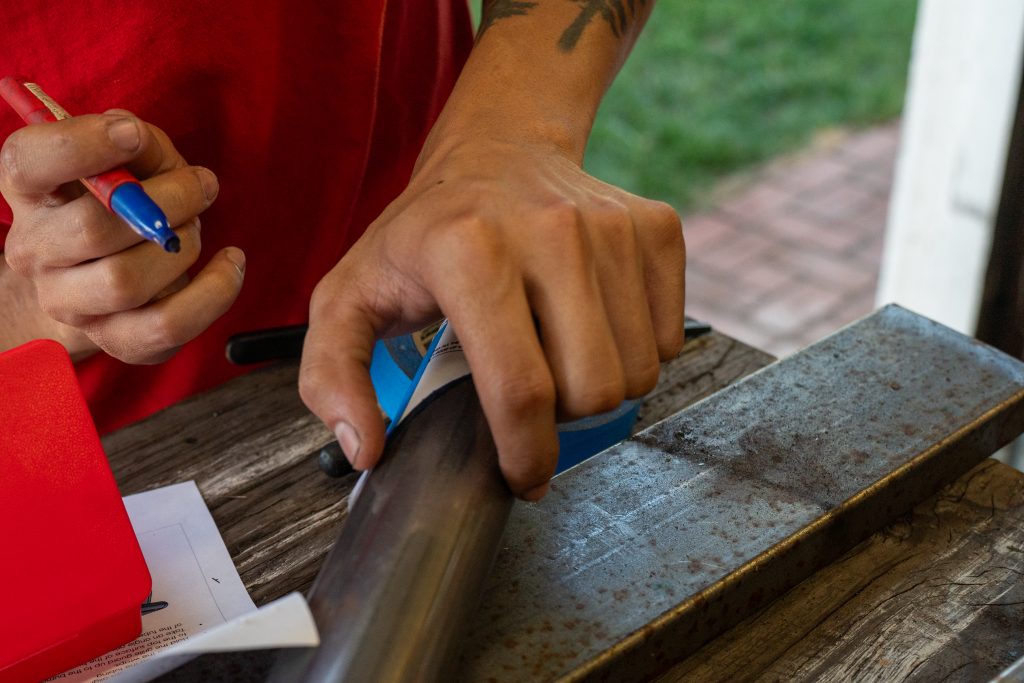
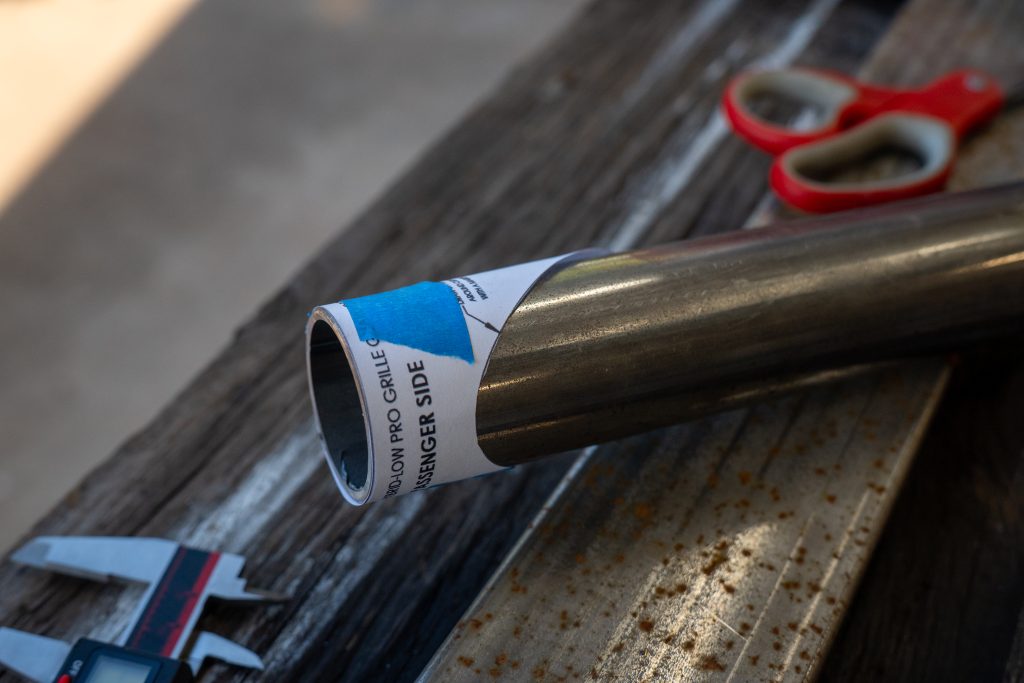
Wrap the cut-out template around the tube. Ensure that the two ends wrap all the way around and touch on the center line. If they do not touch, stop and double-check your 5.5-inch measurement of the template.
The two long edges of the template should align with the bottom of the tube, and the two ends of the template should meet at the centerline we just drew on the tube. Secure the template in place by wrapping tape around it to keep it perfectly aligned.
With the template wrapped around the tube as shown above use a sharpie to trace the line all the way around the tube. Precision is important at this stage, but keep in mind that you can always fill in gaps in the weld later if needed.
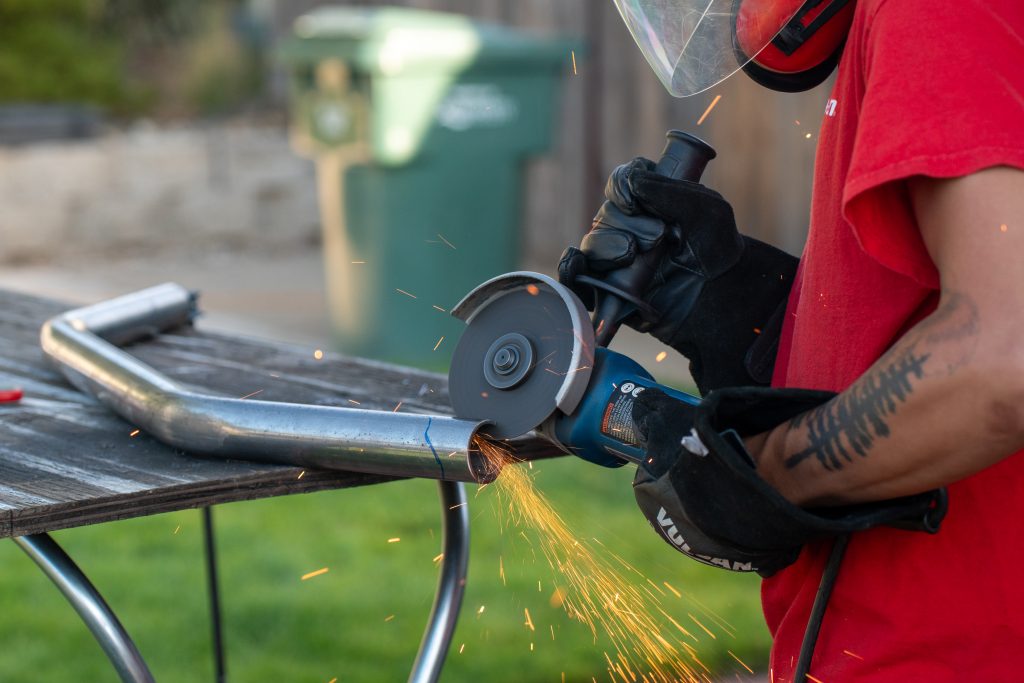
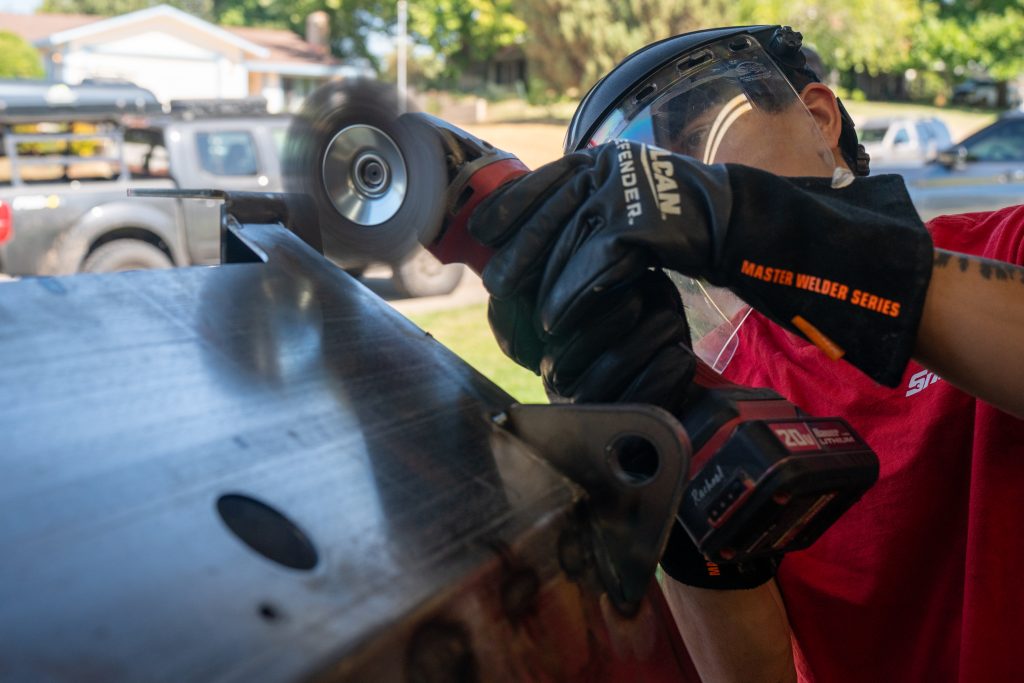
Remove the traced template and verify that the lines are clearly visible. Double-check that the lines appear similar on both sides. Then, using an angle grinder, saw, or plasma cutter, cut along the line. In this example, we used an angle grinder.
When using the cutting tool, make multiple small passes, taking off a small amount of material at a time. This process is time-consuming and requires patience to complete. We found it is best to make lines in the tube with the cutting wheel first then cut out the tabs.
From there use a Grinding Disk to grind down to the line in this manner use clamps to hold down the tube in a tight position while working.
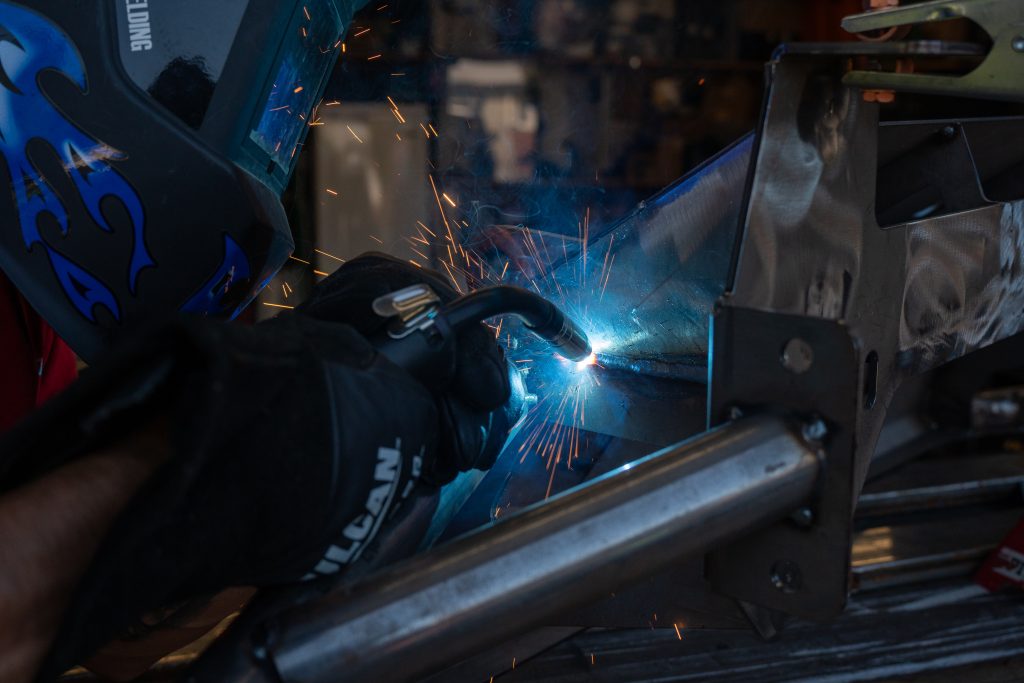
Step 31. Guard Welding
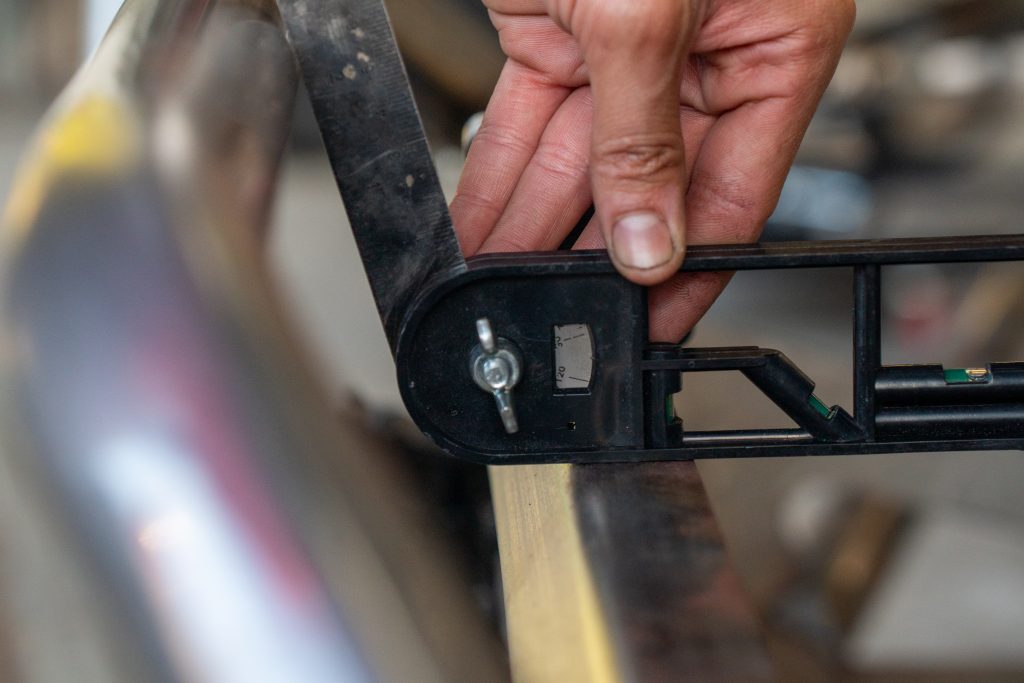
With the bumper in an upright position, place the grille guard on top. Mark the centerline on the bumper and the centerline on the grille to ensure proper right-to-left alignment.
The guard should have a 115-degree angle pushed outward. The most accurate way to measure this is by tilting the guard forward until its height reaches 4.95 inches, as indicated in the instruction manual. Additionally, ensure that the guard remains parallel with the front bumper.
Tack the tube into place and double-check all measurements. Once you’ve confirmed the alignment, proceed to finish weld the guard into place.
Step 32. Finishing & Painting
Utilize a grinder and sanding wheels to remove any weld splatter on the bumper. Additionally, employ a wire wheel disc to scuff the surface of the metal, which in return will help the paint adhere more effectively.
Step 33. Surface Prep
Utilize acetone or brake cleaner to clean the surface of the metal from any oils or solvents. It’s advisable to apply it with a spray bottle and then wipe it off using lint-free shop towels. Even more so cleaning the surface thoroughly to ensure that the part is free from dust and oil.
Step 34. Primer
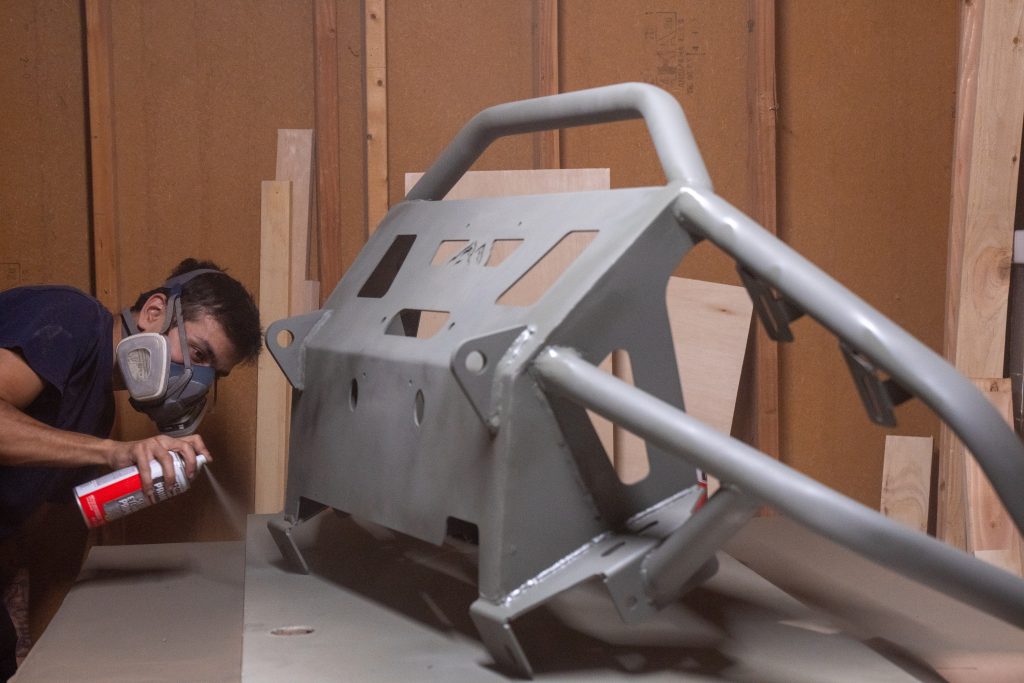
Apply a metal-specific self-etching primer. For instance self-etching primer contains an acid that enhances bonding to the material being sprayed.
Step 35. Paint
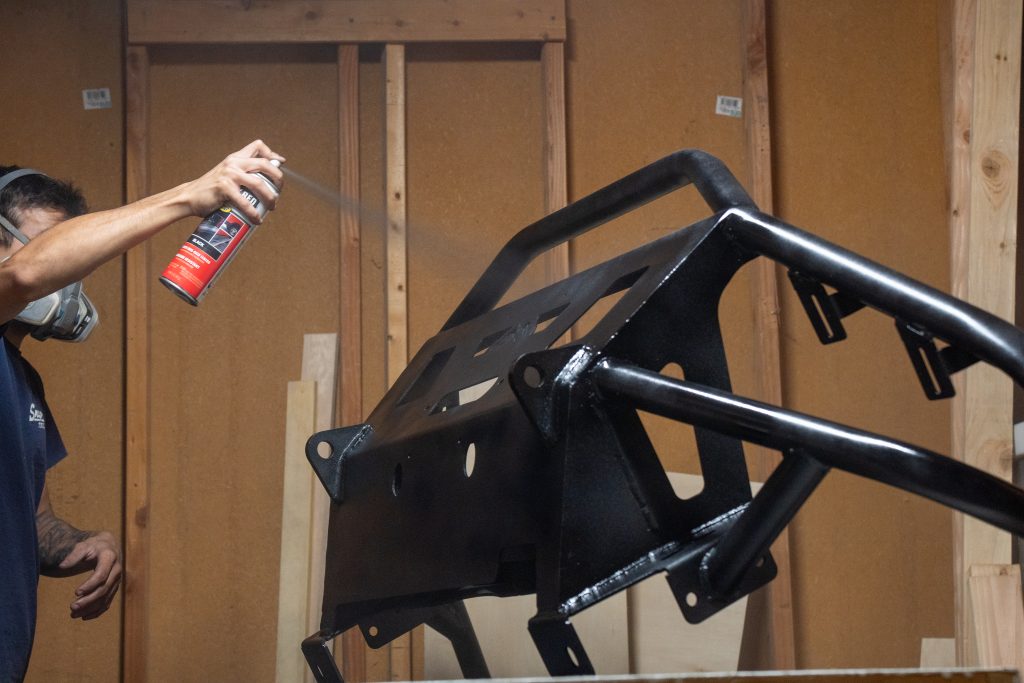
Next, apply several coats of the paint of your choice. In this case, we are finishing with Rustoleum bed liner. When applied from a reasonable distance, it provides a pleasing wrinkle coat texture. The process as was fast because per the instructions it was 10-15 min between coats.
Final Thoughts
By carefully following the instructions, double-checking measurements, and focusing on details, you can get great results. The kit’s price is competitive, especially if you already own the required tools. Even if you’re buying them for the first time, these tools can be used for future projects, making it a cost-effective choice. This kit’s affordability makes it perfect for beginner enthusiasts. It’s important to note that the most challenging part of the build is the grille guard, but it’s optional and doesn’t need to be added.
The results after the bumper installation exceeded our expectations. We didn’t do the best job assembling and welding; even so, the primer and bed liner hid a lot of mistakes. However, the sense of achievement afterward was well worth it. The bumper looks great, and stepping back, I must have repeated myself three or four times, “We built a whole bumper, look at what we built.” Seeing it on the truck really was the best way to top it off.